lockers

Disclaimer: Links on this page pointing to Amazon, eBay and other sites may include affiliate code. If you click them and make a purchase, we may earn a small commission.

u2slow

Full Access Member
Joined
Mar 6, 2012
Messages
979
Reaction score
286
Location
BC
Based on what you attached though it does appear to be the correct one for a c-clip Chrysler 8.25 even though they only list 1997 - 2000.
The 8.25" revisions I know of.... Would be the change from 27 to 29 spline (a reckon that's '97)... And the change from 3/8" bolts to 10mm (about 2005).

The bolt size shouldn't affect a lunch-box type locker.

For a full-case locker, the holes in the carrier would need to be drilled out for a 2005+ ring gear.
 

Shankster

Full Access Member
Joined
Nov 18, 2020
Messages
181
Reaction score
85
Location
Durango, Colorado
I went ahead and placed the order for the AA ET93 - didn't wait for him to send me anything (figured he was maybe trying to do it outside of Alibaba). $386 total. It was very straightforward - no different than ordering off Amazon or Ebay. I'll post back here if and when it shows up.

Let us know what you end up doing Chris Lepper and we can compare notes.

Anyone want a 8000ish mile Powertrax Grip Pro GT308229 Torsen rear diff?
I finally got this installed today. Seems to work like it should but there are some issues. The ABS speed sensor ring that is supposed to press fit onto the carrier under the ring gear just fell into place - it was really loose and you could just spin it around - it would not have worked like that. I ended up tack welding it to the carrier. A bigger issue is that the ring gear basically did the same - it is supposed to be a very tight fit on the carrier but it also just fell into place and I could spin it around too. The ring gear bolts hold it in place but if there is any slop in the bolts it can put the ring gear off center by a few thousandths. I didn't think to check for that slop in the bolts and when it came time to set the backlash I had +/- 0.004" from one side of the ring gear to the other - manual says it should be a max of 0.003". I had to get the job wrapped up so couldn't take it all apart again to check (and not sure if I could have done anything to fix it anyway). I don't know if that will create problems down the road.

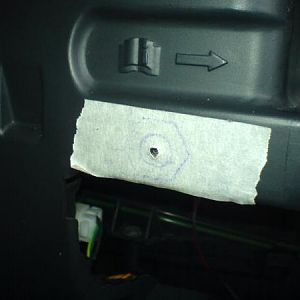
Probably the most time consuming part for me was the electrical - spent a lot of time trying to figure out what wires to tap into for power, dash lights etc. I ended up changing plans and tore everything out and started over - I had initially planned to do most of the wiring under the hood but decided that didn't make sense so did it all under the dash instead. The supplied wiring harness is probably 5 or 6 ft too long for a Liberty - they probably make this so it will work for a crew cab, 8 ft bed Dodge Ram PU. I ended up shortening mine accordingly which created a fair bit of extra work. Another horrendous time suck was drilling and tapping the differential casing to thread the little fitting (that came with the kit) to feed the wire through - I bought a tap and the proper size drill bit but it was a nightmare - might have been OK if I had the diff on the bench but trying to run the tap through in the confined space was next to impossible. After spending several hours trying to unsuccessfully tap the hole I ended up JBWelding the fitting on. Then I spent another hour trying to get the seal nut on the fitting which was mostly operator error - once I figured out how the 4 pieces went together it worked just fine. Looks like Eaton just supplies a rubber grommet with their kit which seems more sensible - if I were to do it again I'd go that route instead.

Another surprise was that my axle shafts were too long - there is a big pin that runs through the middle of the carrier but I couldn't slide it through once the axles were in - I had to take both axles back out and grind 2.5mm of the ends of each. Not a big deal but wasn't expecting to have to do that.

The instructions were pretty much garbage - appears they just took some ARB or Eaton instructions and did some bad editing so you basically have to figure everything out for yourself.

I verified everything worked before I put the cover back on the diff. It didn't seem to operate very well just off the battery but once I started the engine the extra volts/amps got it working well. I had bought some synthetic 75w-140 but after reading that it can cause a elocker not to work properly I filled it with good old 80w-90. Drove it around town - no bad noises. Took it up a steep gravel driveway and the locker definitely did what it was supposed to and the inside tire chirped when I turned the corner at the top.

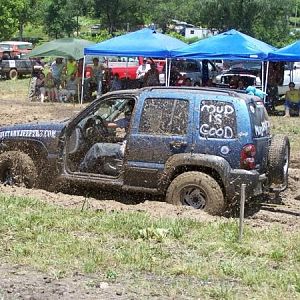
So can I recommend this? Definitely not yet - while it seems like a pretty well built piece of hardware, those tolerance issues with the ABS ring and ring gear are very concerning - and what other internal stuff did they screw up? I guess only time will tell if it's reliable - I'll try to remember to report back with good or bad news. I'll be testing it out on some of the trails in the San Juan mountains and will also go play in Moab when the weather cools off in the Fall.
 

KJowner

Full Access Member
Joined
Oct 20, 2022
Messages
2,243
Reaction score
1,377
Location
Uk
If you strip it again you could clamp the carrier to something so it spins & then clock the ring gear in, fiddly but should work.
Chinese precision engineering..... had similar issues with a gocart clutch, I finished up boring and sleeving it, it's always the 10 minute help a friend jobs that turn into a day's unpaid chew!
 

Shankster

Full Access Member
Joined
Nov 18, 2020
Messages
181
Reaction score
85
Location
Durango, Colorado
If you strip it again you could clamp the carrier to something so it spins & then clock the ring gear in, fiddly but should work.
I don't understand how that would help? More explanation please?

I was thinking if I get in there again I might try to wrap the shafts of several opposing bolts with aluminum tape so that they fit snug which would hopefully center the ring gear on the carrier before I torque them down? Any other ideas anyone has would be appreciated.
 

Shankster

Full Access Member
Joined
Nov 18, 2020
Messages
181
Reaction score
85
Location
Durango, Colorado
Another couple of things I forgot to mention:

The kit did not come with bearings like the Alibaba photos show. I probably wouldn't have used them anyway. I got some Timken (Set 36) bearings.

There is an inline fuse holder in the wiring harness for a standard 15a ATO blade fuse. I would have used it but there was a cover on it that clipped closed - the clip broke one of the times I opened it and later one of the connections pulled out of the bottom of the holder and would not go back in. I got a new fuse holder from Oreilly that was much better quality for $6. If you do the same make sure you get the one that uses mini fuses that match the other fuses on your Liberty, not ATO fuses. This is similar to the one I bought: https://www.oreillyauto.com/detail/...-XKy8vTpxl1FRESs5cCnwWBK277BJXT1XBtlO-sD4EtIq
 

KJowner

Full Access Member
Joined
Oct 20, 2022
Messages
2,243
Reaction score
1,377
Location
Uk
I was suggesting you set it up like something in a 4 jaw chuck - If you set the carrier up on a bench or something ridged, remove all the ring bolts, put 2 opposed bolts back in loosely and then set a dial test indicator to touch the outer edge of the ring gear you can rotate the ring and see the runout on the gauge, lightly tap the gear to center it and just nip the bolts, rotate and check, tap it to adjust, once it's running true pop another couple of bolts in and nip them up, check again then tighten them up.
It's the only way I can think of getting it to run true without the center locating it.
 

Shankster

Full Access Member
Joined
Nov 18, 2020
Messages
181
Reaction score
85
Location
Durango, Colorado
I was suggesting you set it up like something in a 4 jaw chuck - If you set the carrier up on a bench or something ridged, remove all the ring bolts, put 2 opposed bolts back in loosely and then set a dial test indicator to touch the outer edge of the ring gear you can rotate the ring and see the runout on the gauge, lightly tap the gear to center it and just nip the bolts, rotate and check, tap it to adjust, once it's running true pop another couple of bolts in and nip them up, check again then tighten them up.
It's the only way I can think of getting it to run true without the center locating it.
OK, gotcha. not sure I have the means to do that. I have a big bench vice but not sure where I'd grab the carrier and would it be perfectly round within a thou or 2?. You'd almost need a setup that grabbed the bearing cups, like a junkyard diff case, to get it super accurate. I guess you could put it in the axle and do it that way - get it centered with the dial indicator, snug up a few bolts then pull it out and torque them down - awkward but probably doable.
 

Rene_05

Member
Joined
Jan 25, 2025
Messages
34
Reaction score
16
The 8.25" revisions I know of.... Would be the change from 27 to 29 spline (a reckon that's '97)... And the change from 3/8" bolts to 10mm (about 2005).

The bolt size shouldn't affect a lunch-box type locker.

For a full-case locker, the holes in the carrier would need to be drilled out for a 2005+ ring gear.
Would this logic apply for the Detroit TrueTracs as well? My regear shop told me today that the DTT 912a553 bolt holes are too small for a Yukon 4.10 rear ring gear and need to be drilled out. Trying to figure out where I missed this, I have an 05 Renegade.
 
Last edited:

u2slow

Full Access Member
Joined
Mar 6, 2012
Messages
979
Reaction score
286
Location
BC
Would this logic apply for the Detroit TrueTracs as well? My regear shop told me today that the DTT 912a553 bolt holes are too small for a Yukon 4.10 rear ring gear and need to be drilled out. Trying to figure out where I missed this, I have an 05 Renegade.

I believe '05 is a mid-year change on the bolts for the 8-1/4".

If you get a r&p with 3/8" bolt holes, they it will work with a carrier that has 3/8" holes. Some r&P's have both sets of holes.
 

Rene_05

Member
Joined
Jan 25, 2025
Messages
34
Reaction score
16
I believe '05 is a mid-year change on the bolts for the 8-1/4".

If you get a r&p with 3/8" bolt holes, they it will work with a carrier that has 3/8" holes. Some r&P's have both sets of holes.
Thanks for the clarification! I have seen the DTT 912a553 posted and used on here, so I’m guessing it only has the 3/8 holes and my 2005 master service kit must have came with 10mm. My Yukon gears are supposed to be double drilled, so in my mind I just need 3/8 bolts.The below appears to be what was in models before the 05 change, so going to give them a shot. Wonder if that shank/shoulder would still require drilling though. YG33035

You must be registered for see images attach
 
Last edited:

Rene_05

Member
Joined
Jan 25, 2025
Messages
34
Reaction score
16
Thanks for the clarification! I have seen the DTT 912a553 posted and used on here, so I’m guessing it only has the 3/8 holes and my 2005 master service kit must have came with 10mm. My Yukon gears are supposed to be double drilled, so in my mind I just need 3/8 bolts.The below appears to be what was in models before the 05 change, so going to give them a shot. Wonder if that shank/shoulder would still require drilling though. YG33035

You must be registered for see images attach
For anyone in the future, can confirm these bolts are what were needed to go through the DTT carrier. Thanks for the input on the change to metric bolts in 05, you all saved me some rack time.
 
Top