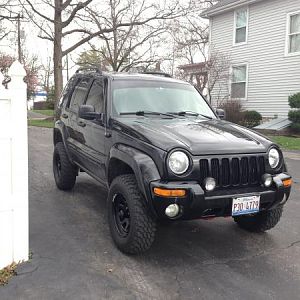
Project 2004 Liberty pickup

Disclaimer: Links on this page pointing to Amazon, eBay and other sites may include affiliate code. If you click them and make a purchase, we may earn a small commission.

CrazyDrei

Space Monkey
Joined
Dec 10, 2020
Messages
176
Reaction score
161
Location
Maine
ONE month progress!

You must be registered for see images attach


Original plan of what I had in store for my very first Jeep Liberty pickup project.

2" lift/level kit <--DONE
Find or make a real front bumper
Gut the interior from the B-pillar back <--DONE
Cut off the roof along the bottom of window line all the way to the tailgate <--DONE
Make a "pickup" bed from B-pillar back <--DONE
Weld rear doors to the rear quarter panel
31" or 33" tractor tires <--DONE
Lincoln locker in rear
Lunchbox locker up front
Possibly 5.13 gears
Reduce weight by 500-1,000 lbs <--DONE
John Deere green/yellow paint
Give profdlp credit for green done arrows <--DONE

6 out of 12 done in the first month, yippee! I did take two weeks off from tinkering the the Jeep around Christmas.

So the easy parts have been done. Next few items will be a little more challenging but just as exciting. Mostly because they require time consuming fit and finish cosmetic work.

NEW PLAN:
Widen rear wheel wells
Mount JK front bumper
Finish final fit of bed liner
Lincoln locker in rear
Find new front left fender and flare
Box in back of cab
Weld and build bed top/side rails
John Deere green/yellow paint
Make a functional sunroof

Other considerations:
Lunchbox locker up front
B-Pillar roll bar
4-pont roll cage
4.88 or 5.13 gears
Relocate rear hitch
Front hitch

Wish me luck, just kidding there is no luck involved here, chime in with any feedback and most important of all: enjoy the build and shenanigans!
 

CrazyDrei

Space Monkey
Joined
Dec 10, 2020
Messages
176
Reaction score
161
Location
Maine
Getting ready to install my Lincoln locker soon, what rear differential cover gaskets do you guys use? Grey or black RTV, cork, mopar or lube locker?

Also why do you use that particular gasket?
 

POPPASMURF

New Member
Joined
Jan 18, 2021
Messages
3
Reaction score
2
Maybe a little help with fabrication. There is a guy on You Tube that does crazy mods but his channel is great cause he shows how he bends sheet around and makes joints that work. Just good insite into what the average guy can do. His latest project was to put and old IH truck body on first gen Dodge diesel and then made a crew cab out of IH. He's called Halfassed Kustoms.
 

CrazyDrei

Space Monkey
Joined
Dec 10, 2020
Messages
176
Reaction score
161
Location
Maine
What are you replacing the front axle with?

JeepJeepster,

Not sure as of right now. My choices are as follows:
  • make my own 4.88 or 5.13 gears for the Dana 30 IFS
  • Cut down a front Dana 30 and make my own steel D30 IFS
  • Bolt up my GM 8.25" IFS (have a 4.10 laying around)
  • Bolt up a Ford 8.8" IFS
I am already looking for another parts Liberty so I can rip it apart and start actually figuring stuff out on a cadaver rather than this working daily driven pickup tractor.

Stay tuned for more shenanigans!
 

CrazyDrei

Space Monkey
Joined
Dec 10, 2020
Messages
176
Reaction score
161
Location
Maine
Maybe a little help with fabrication. There is a guy on You Tube that does crazy mods but his channel is great cause he shows how he bends sheet around and makes joints that work. Just good insite into what the average guy can do. His latest project was to put and old IH truck body on first gen Dodge diesel and then made a crew cab out of IH. He's called Halfassed Kustoms.

POPPASMURF,

I have seen his channel, he does do pretty cool stuff, think it's a little above and beyond what I can do but we can all dream right.

Stay tuned for more shenanigans!
 

CrazyDrei

Space Monkey
Joined
Dec 10, 2020
Messages
176
Reaction score
161
Location
Maine
2002 Jeep Liberty sport parts truck does not have a key and the steering wheel is locked, I need it unlocked so I can move it around the yard.

This is how you unlock a steering wheel in an emergency.

xc_hide_links_from_guests_guests_error_hide_media

Stay tuned for more shenanigans!
 

CrazyDrei

Space Monkey
Joined
Dec 10, 2020
Messages
176
Reaction score
161
Location
Maine
Got my JK bumper out and trying to see if I like it or if I even want to bolt it up to the KJ.

You must be registered for see images attach


Bolting it up to the KJ is pretty straight forward. Hollow out the two channel holes to fit a 2x2" steel tube, weld up couple brackets to JK bumper or use existing brackets, slide it in, drill out couple retaining holes on either side of frame channel, 2 bolts per side and done.

You must be registered for see images attach


I am not sold on the look. I think it sticks out way too far, and too wide. Both can easily be fixed with a grinder and sawzsall and made to look OEM but I am not sure that I like the look.

You must be registered for see images attach


I do like the "recovery" hooks which are built in and the fact that I will have a push bumper. I also like that I have enough room to hide an ATV winch inside the JK bumper protecting it from the elements. Which I will have to add if I plan on taking this monstrosity out on actual trails.

Stay tuned for more shenanigans!
 

CrazyDrei

Space Monkey
Joined
Dec 10, 2020
Messages
176
Reaction score
161
Location
Maine
This is how I fit a full size Silverado bed liner into the Liberty and made my own custom functional pickup bed.

xc_hide_links_from_guests_guests_error_hide_media

There is still a little bit of fit and finish work that needs to be done when it warms up above freezing but until then this is exactly what I wanted to create and use the Jeep pretty much daily for hauling junk and yard work.

Stay tuned for more shenanigans!
 

CrazyDrei

Space Monkey
Joined
Dec 10, 2020
Messages
176
Reaction score
161
Location
Maine
Body panel work time!

Took the front end apart to see how much damage was done by the previous owner that a wood bubba bumper was required.

You must be registered for see images attach


Very surprised by how easy Jeep Liberty is to take apart, torx 20 and a 10mm was all I needed to take off both fenders, grill and headlight assembly, or what was left of it in my case.

You must be registered for see images attach


This is what the front end is supposed to look like under the fender.

You must be registered for see images attach


This is what my front end looks like.

You must be registered for see images attach


Another angle of what it is supposed to look like.

You must be registered for see images attach


And once again what mine looks like.

You must be registered for see images attach


Fender, fender flare, grill and OEM 02 Liberty sport bumper are on and actually fit pretty good.

You must be registered for see images attach


Most of the body panels are heading to paint this week for a couple coats of that magical John Deere green.

You must be registered for see images attach


Here is a view of the tire clearance after folding in the front pinch weld.

Stay tuned for more shenanigans!
 

CrazyDrei

Space Monkey
Joined
Dec 10, 2020
Messages
176
Reaction score
161
Location
Maine
How many different types of fender flare molding clips are there?

You must be registered for see images attach


This is what I salvaged after removing my fenders and fender flares.

Top left: Grey front fender flare clip
PN: 55157055-AA

Top right: Rocker Panel & Bumper Fascia Clip
PN: 55156429-AA

Bottom left: Blind Rivets Flare Trim Clip 6mm
PN: 6506007-AA

Bottom right: Black rear fender flare clip
PN: 55156655-AA

This seems so ridiculous to me. Fortunately it looks like top left and bottom right clips are interchangeable. They are also for sale on eBay for $9 per 100 pack which is not too bad considering that I will need nearly 40 for all 4 fender flares.

On a lighter note: Jeep is getting closer to a new coat of paint.

You must be registered for see images attach


It was once again surprisingly easy and trouble free to remove the rear bumper, and fender flares attached to rear quarter panels.

Stay tuned for more shenanigans!
 

CrazyDrei

Space Monkey
Joined
Dec 10, 2020
Messages
176
Reaction score
161
Location
Maine
New paint is on it's way and most of the panels, doors, bumper, fenders, and trim was off the Jeep this morning.

My kids woke up to 1" of snow overnight and really wanted to drive around the yard in the Jeep, so I slaved away for a whopping 30 minutes and put it back together.

You must be registered for see images attach


I was half torn between an OEM Liberty or a stock Wrangler JK bumper, there was something that just did not look or feel right about the JK bumper so I bolted up a 2002 Liberty bumper, I like it, it keeps that Liberty bubbly cuteness.

You must be registered for see images attach


I did not snap on the fender flares, broke most of the clips taking them off and replacement eBay clips have not arrived yet.

You must be registered for see images attach


Rear wheelwells were trimmed and folded also to fix the minimal rub I had. Oh yeah I also fixed the front passenger window regulator, it now works as it should.

Stay tuned for more shenanigans!
 

CrazyDrei

Space Monkey
Joined
Dec 10, 2020
Messages
176
Reaction score
161
Location
Maine
Locker for rear axle too?

jeeptorino68,

Yes I have a couple extra Lincoln lockers laying around that should fit the Chrysler 8.25" perfectly.

You must be registered for see images attach


I am in the process of putting it in right now, should be in later today with pictures and a video to come soon.

Stay tuned for more shenanigans!
 

CrazyDrei

Space Monkey
Joined
Dec 10, 2020
Messages
176
Reaction score
161
Location
Maine
It ain't pretty but the rear diff is welded. Used a 110V stick welder and got some decent penetration.

You must be registered for see images attach


Now lets hear all bout my top notch welding skills!

Stay tuned for more shenanigans!
 

CrazyDrei

Space Monkey
Joined
Dec 10, 2020
Messages
176
Reaction score
161
Location
Maine
Installation of a rear Lincoln locker.

This is the least expensive initial cost locker. Lincoln locker comes from the Lincoln Electric welders used to weld the spider gears inside the carrier together in turn making the carrier a full spool or a permanent locker.

Step one: unbolt differential cover and drain the oil.

Step two: clean carrier with brake parts cleaner, and burn off excess oil with propane torch

Step three: weld side gears to spider gears, then side gears to case and spider gears to case

Step four: clean out slag, install differential cover, top off with gear oil

xc_hide_links_from_guests_guests_error_hide_media

Most people recommend a 220V welder, I only have 110V welders. Most people use a wire feed MIG welder, I don't like the splatter mine produces and the penetration is not that great. I used a 110V Klutch ST80i stick welder.

Stay tuned for more shenanigans!
 

RenKJ

Full Access Member
Joined
Feb 19, 2015
Messages
326
Reaction score
15
Location
Canada
How was the diamond plate on the doors to do? I'm starting to get bad rot on my Passenger side front and will have to do something about it this summer
 

CrazyDrei

Space Monkey
Joined
Dec 10, 2020
Messages
176
Reaction score
161
Location
Maine
How was the diamond plate on the doors to do? I'm starting to get bad rot on my Passenger side front and will have to do something about it this summer

RenKJ,

Previous owner put them on the Liberty because of the excessive rust and rot on the doors. Looks like they are held in with some silicone and couple sheet metal screws. I will be taking the front passenger one off the silver door and putting it onto the blue door that's on the pickup once I get it re-painted soon.

Will definitely take pictures of the diamond plate cutout and post them.

Stay tuned for more shenanigans!
 

CrazyDrei

Space Monkey
Joined
Dec 10, 2020
Messages
176
Reaction score
161
Location
Maine
New England is finally living up to it's snowy reputation and it's really slowing down my progress.

You must be registered for see images attach


Another 10" last night. Plowed the driveway and kids wanted to go joyriding in the Jeep, did a couple laps around the yard and blasted (at a whopping 2mph) through a 5ft high snowbank effortlessly.

Stay tuned for more shenanigans!
 

Latest posts

Members online

Top