Custom Roof Crossbars for a Low Profile Rack

Disclaimer: Links on this page pointing to Amazon, eBay and other sites may include affiliate code. If you click them and make a purchase, we may earn a small commission.

profdlp

Counting My Blessings
Staff member
Moderator
Joined
May 21, 2013
Messages
5,817
Reaction score
1,766
Location
Westlake, Ohio
Do the hex-head set screws make contact? Mine didn't and I had to replace them with bolts. That was fine, as it's one less tool to get out when I take the whole works off for cleaning and maintenance. (Which I need to do soon.)
 

Jim McClain

Full Access Member
Joined
Jul 31, 2015
Messages
429
Reaction score
2
Location
Teh REAL No. CA
Perfessor, the set screw on the crossbar makes contact and is a good fit. The set screw on the KJ roof rail hit too high and causes the crossbar to raise up. But that was before the rubber hose treatment. I didn't think to set that screw a little more after I installed the hose until I saw your post. By golly, the crossbars don't move at all now. It's possible a real heavy weight in the basket could cause some damage to the KJ rails because it is just the set screw holding the clamp up - the screw hits the rubber gasket material and presses it against the rails. I think it's good. The real test won't happen until I have a basket on there and load it up with stuff.
 

profdlp

Counting My Blessings
Staff member
Moderator
Joined
May 21, 2013
Messages
5,817
Reaction score
1,766
Location
Westlake, Ohio
The replacement bolts I used do make little marks on the roof rails, but mine have the rubberized coating. The only reason I need them as opposed to the original set screws) is that my bars are just a smidgen too long. I didn't want to get caught in a "I cut it twice and it's still too short" problem and wasn't 100% sure just where on the rails I wanted the crossbars to mount. Since the distance between the rails tapers I wanted a little wiggle room.
 

jettyspicer

New Member
Joined
Aug 15, 2016
Messages
25
Reaction score
0
Location
Carrollton, Va.
T Clamps

You could have resolved all these issues if you had used the T clamps for chain link fencing from Lowes for a $1.29 each. Used them on mine and no problems at all. You couldn't move my bars with a 20# mall.
 

Jim McClain

Full Access Member
Joined
Jul 31, 2015
Messages
429
Reaction score
2
Location
Teh REAL No. CA
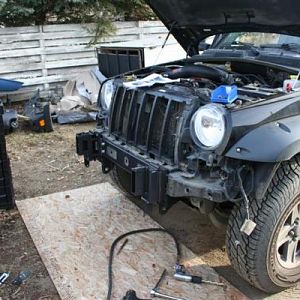
The Rola Roof Basket arrived today. My first job was to remove that damn Rola logo from the front and back of the basket. I paid a lot of money and I do not like advertising for companies unless they pay me. With some help from the good Jeepers of JeepKJ.com, I was able to get the logo off enough to suit me. The white part came off pretty easy after a little soaking in mineral spirits. I used my fingernail as a scraper. The hardest part was the static electricity and the dried up white paint. Wiping it just seemed to spread the tiny little flakes around. You could move them easy with your finger tips, but getting them to actually give up the Rola fairing was a chore.

That left the red "O". I don't know why it was so much harder, but the mineral spirits didn't even phase it. I bought some fingernail polish remover and that removed most of it, but left behind a faint background of the O. It's light enough not to bother me too much, so I called it good.

I listened to all the complaints of rust when I researched this basket and it didn't sway me from buying it. I knew that proper preventative measures would practically eliminate those issues. I also heard others say putting the rubber sleeves on was so hard, they decided not to. Not a good idea. Then the directions gave the stupidest advice: lubricate the inside of the sleeves so they could slide on easier. That only makes sealing that area from any water or vapor migration an impossibility.

The rubber sleeves are a very snug fit. They're supposed to be. But rubber has a memory, so you can stretch it a little and it will shrink back. I used my fingers to stretch the rubber. It's thick walled, which means it will be durable, but that also means it's harder to stretch. But it can be done. Then just twist the sleeves on until the ridge of the metal basket is in about the middle of the sleeve.

You must be registered for see images


The next difficult task is getting the sleeve rolled back on itself. You have to do that, according to the instructions, so you can screw the two half-baskets together. They don't say that you should pull the sleeve back on itself so that you expose about a quarter-inch of the basket frame past where it joins together. My lubricant of choice for this job is your every day dish detergent.

You must be registered for see images


Put a little bit on the rubber sleeve...

You must be registered for see images


And smear it around - don't get it on the inside of the sleeve or on the metal.

You must be registered for see images


Then just pull it back. You can use some needle nose pliers to assist you and nudge it along the roll with your finger tips. It's not difficult at all.

You must be registered for see images


Now it's time to screw the two halves of the basket together with the included tapping screws. They call them self-tapping, but they wouldn't be able to do that because the metal is too thick. Rola does drill the holes out though. I used a nail punch to align the holes - the rack doesn't slide all the way home. There's a good eighth-inch gap between them. That air gap, the cold metal and the warm rubber will sweat and cause rust.

You must be registered for see images


A good way to prevent moisture from getting inside the tubing is to use RTV silicone. I put it in and around every screw hole.

You must be registered for see images


I also put a thick bead all the way around that gap and let the silicone overlap the metal. The bead has to be continuous. If you leave a pin hole, mosture will find its way in.

You must be registered for see images


Slide the sleeve back onto the tube. It will squeeze some silicone out. Clean it up with your finger without smearing it all over. That dried silicone is actually a dirt magnet. Wipe it all down with a rag. It will get real clean because, remember, you put Dawn all over the sleeve.

You must be registered for see images


Now ask a friend to help mount that bad boy on the roof of your KJ. Make sure you center the basket and position the clamps the same distance from each side.

You must be registered for see images


The sun was setting quick, so I didn't get any shots of this after the job was complete. I did take it for a ride without the fairing. It needs the fairing, for sure. Unfortunately, one of the screws they sent me was machined wrong and it can't be used. Would it have eaten too far into their profit to give a guy an extra screw? :emotions34: So, OCD Jim will go to the store tomorrow and prob'ly have to buy 4 screws so they all look exactly the same.

Until I share more pictures, you will just have to take my word for it: this rack looks GREAT on a KJ. :gr_grin:
 

HoosierJeeper

Gold Supporter/Admin
Staff member
Administrator
Joined
Jan 20, 2009
Messages
20,855
Reaction score
266
Location
Western WI
That looks awesome! Good work on all the rust preventative stuff...I wonder how it would be up here in salt land.
 

profdlp

Counting My Blessings
Staff member
Moderator
Joined
May 21, 2013
Messages
5,817
Reaction score
1,766
Location
Westlake, Ohio
...Would it have eaten too far into their profit to give a guy an extra screw?...
That's what :favorites68:

That is one of my pet peeves as well. I bought a nice grill last weekend and agonized all the way through that I would drop a screw or nut somewhere and be heading to the hardware store. Not one extra of anything. :emotions34: (I managed to make it to the end without klutzing out or, like you, getting a dud.)
 

Jim McClain

Full Access Member
Joined
Jul 31, 2015
Messages
429
Reaction score
2
Location
Teh REAL No. CA
I ordered a scuba tank strap. It's designed to hold a much larger tank than what I use, but I thought it might work.

You must be registered for see images


It does work for a single tank, but it's kind of a struggle because of the way the strap and the velcro grips are laid out. It's long enough to hold 2 tanks in place, but the tanks are too big to fit flat between the basket cross-rails. One tank rides a bit higher.

I took it out today, after letting it sit in the rain for 2 days. I read that straps like this expand when they get wet, so I was concerned it might come loose.

You must be registered for see images


I tested it this way to see if I was going to need anything more to keep the tanks positioned and to keep them from rattling. I anticipated having to modify some PVC pipe caps, lined with rubber, for the base of the tanks to fit inside and then the strap to hold it down. So, I figured this test was just going to point out how much it rattled.

No rattles, no slippage, no tank band expansion. Not a bit. I am amazed. I figured at the very least, the far end of the tanks would slap the basket metal bars when I went over bumps. Not even that. The buckle on this strap is really well made. It's made so you don't smash your fingers in the clamp when you close it. And you can cinch the strap really tight before you close it, so it's even tighter.

My test drive wasn't the worst road I've been on, but I managed to find enough bad spots in the road to give it a good trial run. I was a little disappointed that I didn't get more mud on my Jeep, but it was a fun ride anyway. I'm sure my tanks will be very secure up there and easy to exchange when I need a fresh tank. I ordered a portable step stool that will help me reach the tanks and serve as something to sit on when I go out shooting photos at a low angle. It should arrive soon.

IN case you didn't see this in the what-I-did-with-my-KJ thread...

You must be registered for see images
 

tommudd

Moderator
Staff member
Moderator
Joined
Jul 14, 2005
Messages
22,456
Reaction score
3,642
Location
Southeastern Ohio
That's what :favorites68:

That is one of my pet peeves as well. I bought a nice grill last weekend and agonized all the way through that I would drop a screw or nut somewhere and be heading to the hardware store. Not one extra of anything. :emotions34: (I managed to make it to the end without klutzing out or, like you, getting a dud.)

The Chinese like to keep back one screw on everything they ship out, thats their way of just messing with us!:happy175:

But at least we get way better products in the USA than what I have bought in Tanzania that was Made in China .
 

EagleOne

Full Access Member
Joined
Dec 19, 2017
Messages
29
Reaction score
0
Location
IN
Very well documented how-to section! Your KJ looks great!

Thanks for sharing this!
 

sleepyjim

Full Access Member
Joined
May 18, 2012
Messages
157
Reaction score
1
Location
Bullhead City, Az.
I had one inch gas pipe into between the rails ( with all thread running through it and out the other side of the rail ) and still had room between the roof and the pipe.

Wait, what? Explain this more please my brain is not getting it...How dod you clamp it or did you?

jim
 

tommudd

Moderator
Staff member
Moderator
Joined
Jul 14, 2005
Messages
22,456
Reaction score
3,642
Location
Southeastern Ohio
Wait, what? Explain this more please my brain is not getting it...How dod you clamp it or did you?

jim

No clamps, 1/2 inch all thread ran all the way through the rails, with nuts holding it tight, one on the inside, one out side , used black acorn nut on outside to make it pretty ! LOL
 

Latest posts

Members online

Top