You are using an out of date browser. It may not display this or other websites correctly.
You should upgrade or use an alternative browser.
You should upgrade or use an alternative browser.
What did you do to your jeep today?
- Thread starter TheQ
- Start date
Disclaimer: Links on this page pointing to Amazon, eBay and other sites may include affiliate code. If you click them and make a purchase, we may earn a small commission.
Got the new exhaust installed today. More details here:
 www.jeepkj.com
KK cat-back exhaust options
What would you put on your KK if you needed a muffler, tail pipe, and resonator? The options in the poll seem to be the available ones. I would totally go with a Magnaflow kit, but they stopped making them unfortunately. MBRP makes a good performance model for the KJ but they don’t have a KK...
You must be registered for see images attach
You must be registered for see images attach
Ordered a bearing for the AC compressor clutch and some snap ring pliers. They should be here tomorrow so may have a nice short project for this weekend.
The AC compressor makes quite a racket when it’s on, although it works perfectly fine. I’ll see if the clutch bearing solves it.
(I also don’t want to be that guy on the side of the interstate with flames and black smoke erupting from under the hood due to a failed bearing that had been going bad for years but was never fixed.)
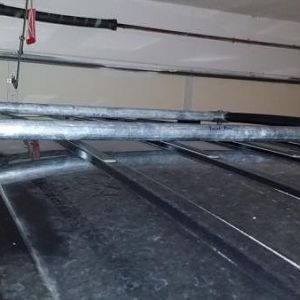
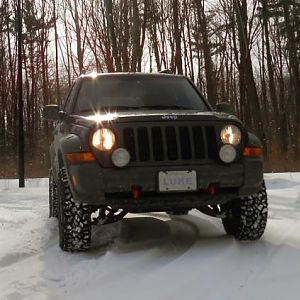
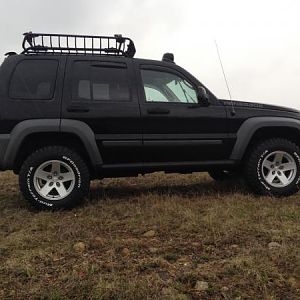
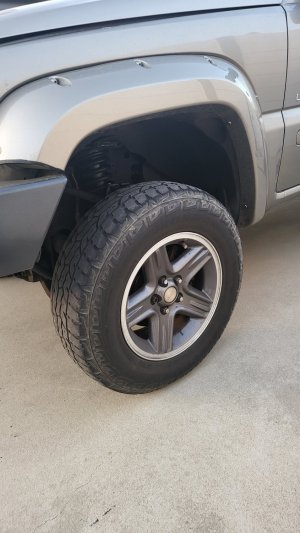
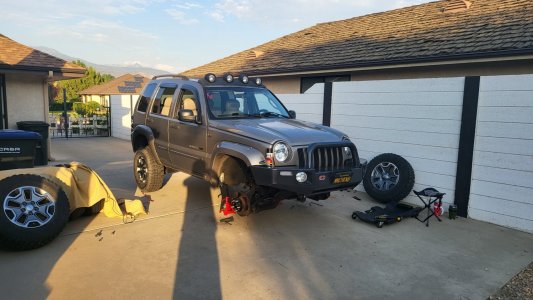
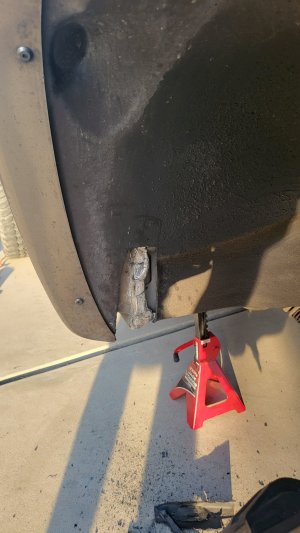
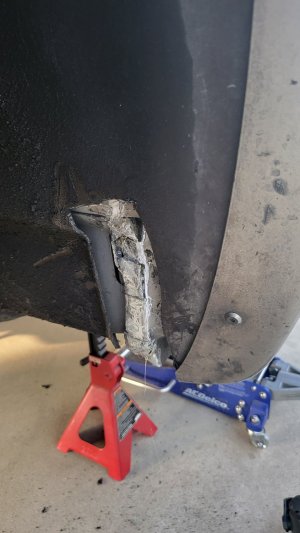
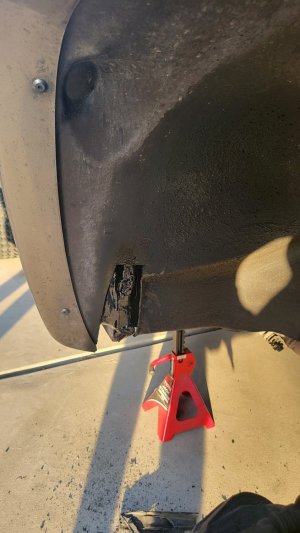
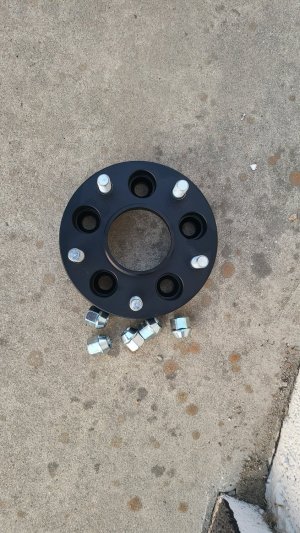
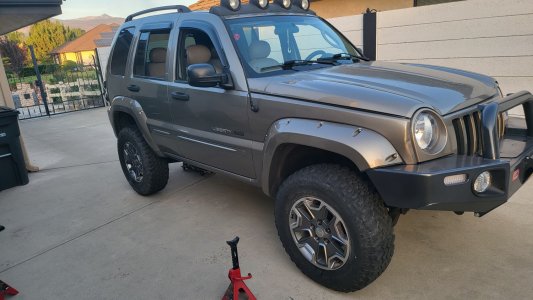
Installed JK Rubicon rims with 255/75/17 BF Goodrich MT's. Also installed 1.25 inch hubcentric wheel spacers / adapters to allow for the change in the liberty's bolt pattern to fit the JK's. Did the front inner fender pinch weld mod, applied automotive sealant and painted. Will put some raptor liner over the paint and then cover up the cut out in the inner fender liner this weekend. Next some 4.10 gears
Attachments
-
 20220815_191320.jpg248 KB · Views: 24
 -
 20220816_183821.jpg249 KB · Views: 21
 -
 20220816_183828.jpg221.2 KB · Views: 21
 -
 20220816_183838.jpg181.1 KB · Views: 22
 -
 20220816_184449.jpg225.6 KB · Views: 20
 -
 20220815_191309.jpg463 KB · Views: 22
 -
 20220815_191302.jpg240.3 KB · Views: 27
 -
 20220816_192231.jpg241 KB · Views: 26
tommudd
Moderator
You did not have to CUT OUT that part of the inner fender, the way I do them here , cut partially , bend over and melt in, can not even know or see you did itInstalled JK Rubicon rims with 255/75/17 BF Goodrich MT's. Also installed 1.25 inch hubcentric wheel spacers / adapters to allow for the change in the liberty's bolt pattern to fit the JK's. Did the front inner fender pinch weld mod, applied automotive sealant and painted. Will put some raptor liner over the paint and then cover up the cut out in the inner fender liner this weekend. Next some 4.10 gears
Not a fan of spacers but oh well its yours
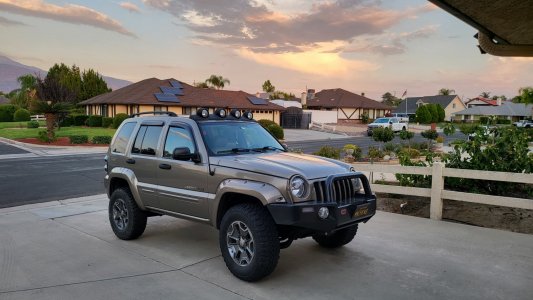
looks good otherwise
Now to regear for those taller tires, with a 32 inch tall tire you will need to to or end up over heating your transmission from it shifting all the time ( just a friendly word of advice )
tommudd
Moderator
ALWAYS good to change old earlEarl change.
The valve covers are difficult as I have done both sides do yourself a favor first of all get the good gaskets so you won’t have to do it again take your time and don’t be in a rush it’s absolutely not that difficult it looks harder than it is just take your time!Like I said before, what you may find simple, I don't; not because of the job (I've removed numerous drive shafts over the years) but because it's a KJ, unfamiliar &, in some respects, quite strange.
Certainly won't be selling it, not even for scrap, nor buying anything even newer (perhaps that's my problem: too far out of my comfort zone).
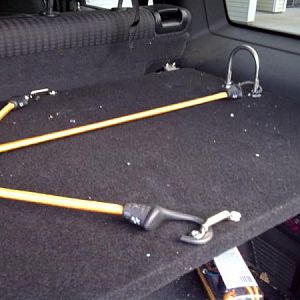
Now, to specifics: made some progress, in that the shaft's no longer seized in the flange on the diff but still can't separate them, mainly for want of room. Logic suggests removing the left down-pipe/cat. (as the FSM says for the 2.5 diesel) &/or the transfer case X-member, but I'm reluctant to do that if it can be avoided.
As for the valve covers, I remember when removing them was part of a routine service (to adjust valve clearances), they've got progressively less access able over the years, but 'til I got a WJ I'd never encountered a vehicle where you couldn't see them. It's the shear amount of dismantling, the time it must take & how long it's going to be stuck immobilised that deters me. What once would have been a challenge, now just seems more trouble than its worth but that's all for the future.
There are also a couple of pretty good YouTube videos that document the whole process but patience and not getting frustrated While doing the job is the key on those trust meThe valve covers are difficult as I have done both sides do yourself a favor first of all get the good gaskets so you won’t have to do it again take your time and don’t be in a rush it’s absolutely not that difficult it looks harder than it is just take your time!
tommudd
Moderator
Difficult ?The valve covers are difficult as I have done both sides do yourself a favor first of all get the good gaskets so you won’t have to do it again take your time and don’t be in a rush it’s absolutely not that difficult it looks harder than it is just take your time!
Another item that I think is pretty easy
My step son who arrived here in this country from Tanzania in 2015 and had never, ever done anything to any car in his life did a set two weeks after he got here . Only a few pointers from me
Its all how you go about doing anything , looking it over, thinking , planning in your head what has to come off or be moved slightly
Doing10to20
Full Access Member
- Joined
- Apr 23, 2020
- Messages
- 299
- Reaction score
- 490
Looks good manInstalled JK Rubicon rims with 255/75/17 BF Goodrich MT's. Also installed 1.25 inch hubcentric wheel spacers / adapters to allow for the change in the liberty's bolt pattern to fit the JK's. Did the front inner fender pinch weld mod, applied automotive sealant and painted. Will put some raptor liner over the paint and then cover up the cut out in the inner fender liner this weekend. Next some 4.10 gears
basist81
Member
- Joined
- Jan 30, 2020
- Messages
- 15
- Reaction score
- 35
how about the bump stops for the rears?Installed JK Rubicon rims with 255/75/17 BF Goodrich MT's. Also installed 1.25 inch hubcentric wheel spacers / adapters to allow for the change in the liberty's bolt pattern to fit the JK's. Did the front inner fender pinch weld mod, applied automotive sealant and painted. Will put some raptor liner over the paint and then cover up the cut out in the inner fender liner this weekend. Next some 4.10 gears
Deb'nKJ
Full Access Member
- Joined
- Jun 3, 2022
- Messages
- 634
- Reaction score
- 543
They're definitely difficult compared with anything else I've worked on as most would've taken 1/2-hour tops.The valve covers are difficult as I have done both sides do yourself a favor first of all get the good gaskets so you won’t have to do it again take your time and don’t be in a rush it’s absolutely not that difficult it looks harder than it is just take your time!
I like the advice about the gaskets but I'll have to make do with whatever I can find on-line.
It can't be as difficult as it looks, because it looks impossible: how can removing something you can't even see be otherwise? To think I used to hate vanity covers - if only it were that simple. Still, I'm going to reserve judgment 'til I've actually tackled the job - if that time ever comes.
Deb'nKJ
Full Access Member
- Joined
- Jun 3, 2022
- Messages
- 634
- Reaction score
- 543
What, like, there it is!Only a few pointers from me
That at least would give a clue as to what's in the way &, therefore, needs to be (re)moved.
As I've already said somewhere, having removed the battery tray, I now know where the left cover is. However, this is going to have to wait 'til Easter (assuming it passes inspection leaking as much as it does) as it really needs to be done in one hit. Meanwhile, I'm not going to fret, or even think, about it too much. After all, come then, it might be on its way back from China as bean cans

CherokeeLiberty
Full Access Member
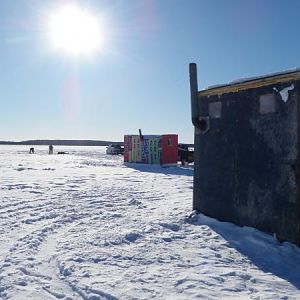
It’s that time again…
You must be registered for see images attach
@CherokeeLiberty how many miles on it now?
CherokeeLiberty
Full Access Member
195k, just the other day.@CherokeeLiberty how many miles on it now?
tommudd
Moderator
Few pointers as in, what size sockets etcWhat, like, there it is!
That at least would give a clue as to what's in the way &, therefore, needs to be (re)moved.
As I've already said somewhere, having removed the battery tray, I now know where the left cover is. However, this is going to have to wait 'til Easter (assuming it passes inspection leaking as much as it does) as it really needs to be done in one hit. Meanwhile, I'm not going to fret, or even think, about it too much. After all, come then, it might be on its way back from China as bean cans
NOT what needed to be removed he figured that out just by looking and thinking !
you know common sense type thinking
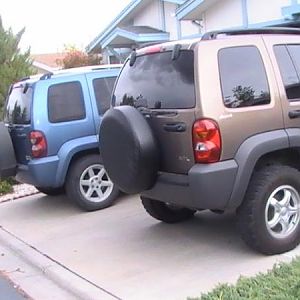
Put new rubbers on the 06 Renegade, Firestone Winterforce2 UV. Just the normal 225 size, they are so quiet I can hear all the voices in my head. The dynapros were louder than I thought after almost 4 years
Similar threads
- Replies
- 22
- Views
- 4K
- Replies
- 173
- Views
- 35K