I got two of those (the Husky version) in my garage - was a great addition to the space!Drove it to HF (yes, I sure did!) and picked up one of these bad boys:
46 in. 9 Drawer Mobile Storage Cabinet with Solid Wood Top, Black
I built a nice workbench a year or so ago and this will be a nice complement to it.
The people at HF did not think it would fit. I told them that I had gotten a 30" stove in there a few years back and not to worry. They marveled at how easy it was to slide it in (I got it back out by myself, and at nearly 200 pounds it is not exactly light) and they were surprised at how much room I had left. I joined their discount club and got $80 off the retail price.


You are using an out of date browser. It may not display this or other websites correctly.
You should upgrade or use an alternative browser.
You should upgrade or use an alternative browser.
What did you do to your jeep today?
- Thread starter TheQ
- Start date
Disclaimer: Links on this page pointing to Amazon, eBay and other sites may include affiliate code. If you click them and make a purchase, we may earn a small commission.
CherokeeLiberty
Full Access Member
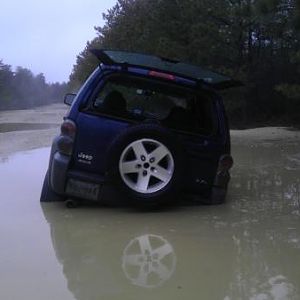
I filled up last night after our trip to my grandparents’ house…
You must be registered for see images attach
Johnny O
Just hangin' out.
Spent Sunday hauling the kayak around- hit two different lakes. Was supposed to go do some camping type field work this past weekend, but delayed that trip till July.
I filled up last night after our trip to my grandparents’ house…
You must be registered for see images attach
You must be registered for see images attach
Has any KK owner had any luck adjusting the parking brake tension with the star wheels when the brake calipers and tires were ON?
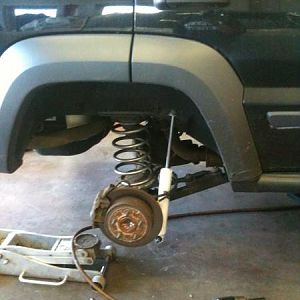
I finally got my drivers side UCA replaced, took about an hour with a small hacksaw and a sawzall with carbide blades to get the rear bolt cut off. After getting it cut out it looked like the bolt on the rear was a press fit and then rusted on the bolt head side. The passenger side was really easy to replace
CherokeeLiberty
Full Access Member
It should be the same as any other set up. The answer is yes. Adjust until you have some difficulty turning the wheels by hand. After that, roll backwards (on either an incline or idling in reverse) and set the brake. This will cause the brakes to adjust to their proper spot. When they start feeling light, repeat the process.Has any KK owner had any luck adjusting the parking brake tension with the star wheels when the brake calipers and tires were ON?
profdlp
Circling The Drain
This is on my list (and has been for years). Many attempts and no luck so far. After 30+ years driving a stick I feel weird with no parking brake.
Deb'nKJ
Full Access Member
- Joined
- Jun 3, 2022
- Messages
- 634
- Reaction score
- 543
Yup! How else you gonna do it?Has any KK owner had any luck adjusting the parking brake tension with the star wheels when the brake calipers and tires were ON?
On the KK the holes to access the star wheels are recessed under the brake caliper and are nearly inaccessible with the calipers on. The 08 Service Manual says, “Under normal circumstances, the only time adjustment is required is when the shoes are replaced, removed for access to other parts, or when one or both rotors are replaced.”Yup! How else you gonna do it?
CherokeeLiberty
Full Access Member
I did not realize that. What moron designed that?On the KK the holes to access the star wheels are recessed under the brake caliper and are nearly inaccessible with the calipers on. The 08 Service Manual says, “Under normal circumstances, the only time adjustment is required is when the shoes are replaced, removed for access to other parts, or when one or both rotors are replaced.”
profdlp
Circling The Drain
Never in my life did I think that changing the rear diff oil would turn into an all-afternoon experience.
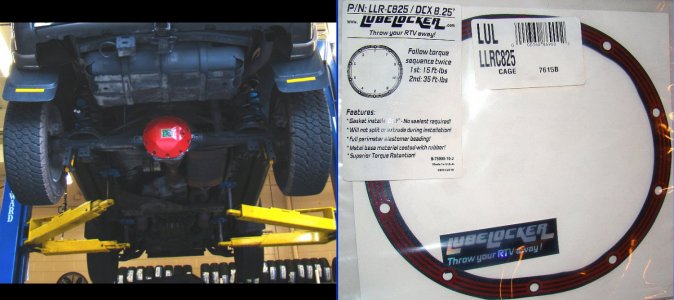
I had no trouble getting the old oil out. It actually looked beautiful, a fact that would come to haunt me as the day wore on. Got everything cleaned up and went to install my new ARB heavy duty cover. Almost forgot the new LubeLocker gasket but caught my mistake as I was starting to put the first bolt in. This is easy, I thought! You always make one little mistake and I had mine out of the way early and at no cost in any do-overs.
Then I had all sorts of trouble with the bolts that came with the ARB. They are hex head (which was no problem) and are designed to be recessed inside the cover so you can't rip them off if you hit something on the trail. Out of the ten bolts I was only able to get five of them in to any degree. I ended up taking them all out and actually running a test nut up and down the threads of all ten to make sure they were OK. This took a long time as many of them were tough going. Then I took one of the old bolts and ran it all the way into the housing in all ten holes. Got the cover and gasket back in place. Dang, that ARB cover was heavy when I started and it kept getting heavier as the day wore on.
This time around I had eight bolts that decided to play nice and two stinkers. They are the ones at approximately 11 o'clock and 1 o'clock. I just could not get them all the way in. So out they came and I did my test nut process all over again. I also used what seemed like a whole can of PB Blaster to make sure the threads in the housing were OK. I really don't know what to do next, though one idea is to put a few washers on the two stinker bolts and be done with it.
Then it came time to fill it. This is going to be great, I thought! Nice dipstick built into the ARB and even had some bagged oil that made filling the diff mess-free. Good grief - how I long for the day when you just squirted with wild abandon and when it started to run out the fill hole you popped the fill plug in and called it good. The ARB fill hole is way higher than the old cover, so if you did that you'd have way too much oil in there. So for the next half hour it was squirt oil, then check with the dipstick. Over and over again. To complicate matters the dipstick is barely long enough to reach the oil once you have it filled properly (keep your dirty jokes to yourself! ), so there was no way to see if you were getting close or not until you had too much in there.
I am going to get some rest and check things tomorrow. Maybe I will have a brilliant idea between now and then, or die in my sleep. (Either would be acceptable at this point. Flip a coin.)
I had no trouble getting the old oil out. It actually looked beautiful, a fact that would come to haunt me as the day wore on. Got everything cleaned up and went to install my new ARB heavy duty cover. Almost forgot the new LubeLocker gasket but caught my mistake as I was starting to put the first bolt in. This is easy, I thought! You always make one little mistake and I had mine out of the way early and at no cost in any do-overs.
Then I had all sorts of trouble with the bolts that came with the ARB. They are hex head (which was no problem) and are designed to be recessed inside the cover so you can't rip them off if you hit something on the trail. Out of the ten bolts I was only able to get five of them in to any degree. I ended up taking them all out and actually running a test nut up and down the threads of all ten to make sure they were OK. This took a long time as many of them were tough going. Then I took one of the old bolts and ran it all the way into the housing in all ten holes. Got the cover and gasket back in place. Dang, that ARB cover was heavy when I started and it kept getting heavier as the day wore on.
This time around I had eight bolts that decided to play nice and two stinkers. They are the ones at approximately 11 o'clock and 1 o'clock. I just could not get them all the way in. So out they came and I did my test nut process all over again. I also used what seemed like a whole can of PB Blaster to make sure the threads in the housing were OK. I really don't know what to do next, though one idea is to put a few washers on the two stinker bolts and be done with it.
Then it came time to fill it. This is going to be great, I thought! Nice dipstick built into the ARB and even had some bagged oil that made filling the diff mess-free. Good grief - how I long for the day when you just squirted with wild abandon and when it started to run out the fill hole you popped the fill plug in and called it good. The ARB fill hole is way higher than the old cover, so if you did that you'd have way too much oil in there. So for the next half hour it was squirt oil, then check with the dipstick. Over and over again. To complicate matters the dipstick is barely long enough to reach the oil once you have it filled properly (keep your dirty jokes to yourself!
), so there was no way to see if you were getting close or not until you had too much in there.I am going to get some rest and check things tomorrow. Maybe I will have a brilliant idea between now and then, or die in my sleep. (Either would be acceptable at this point. Flip a coin.)
Last edited:
What a nightmare!! I have always expected precision and quality from ARB, though I have never owned any of their stuff. Sorry to hear it was such a cluster to install their diff cover. On the bright side, the drain plug means you will only have to install the cover this one time.
profdlp
Circling The Drain
The cover itself is solid as a rock and all the parts (drain plug, fill plug, and bolts) seem to be extremely well machined. I suspect they put some kind of thread-lock finish on the bolts. (Which is perhaps why running a nut up and down them improved matters - I wore some of that stuff off.)
If I had it to do over (and I may have to, at some point...) I would have gotten a tap & die set and made sure the housing threads were clean on the diff. Last time I did this (20,000 miles and about four years ago) I did front and back in one day and don't seem to recall it being an ordeal. I do remember the first time I did it back around 2015 it took some fiddling with the factory bolts to get them all in a spot they liked.
As for never reinstalling, that was a big attraction when I bought the ARB cover, but then again - I will probably want to look things over from time to time.
profdlp
Circling The Drain
While I'm at it, what is the fluid capacity of this thing? I put just shy of 2 quarts in by the time I hit the dipstick. Does that sound reasonable?
EagleKJ
Lurking member
The rear takes 2.19 quarts.While I'm at it, what is the fluid capacity of this thing? I put just shy of 2 quarts in by the time I hit the dipstick. Does that sound reasonable?
profdlp
Circling The Drain
Given a choice, would it be better to marginally underfill it or marginally overfill it? I probably have about four ounces less than that in there now.
Glad you used the 8.25 LubeLocker gasket. I just filled my Riddler cover until it was just below the fill plug.
Chasing threads is not my idea of fun Prof. Something at ARB/ quality control is not right.
Send them an email about your experience.
Did you use my Lucas recommended synthetic & dino blend?
Chasing threads is not my idea of fun Prof. Something at ARB/ quality control is not right.
Send them an email about your experience.
Did you use my Lucas recommended synthetic & dino blend?
Attachments
Luke
Interloper
Ouch… glad you survived! Massaging those holes with a tap would be my only suggestion but you are there already. We’re pullin’ for ya!
Luke
Interloper
I would worry about blowing seals with too much before I worried about too much friction. But then again I’m not sure how much pressure actually builds in there if your breathers are clear.Given a choice, would it be better to marginally underfill it or marginally overfill it? I probably have about four ounces less than that in there now.
Last edited:
Similar threads
- Replies
- 22
- Views
- 4K
- Replies
- 173
- Views
- 35K