FRONT:
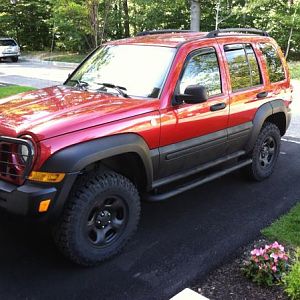
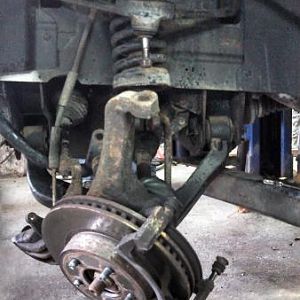
The OME Springs add a couple inches of lift, but you've still got room to grow before your CV angles and such are maxed out. The frankenlift goes beyond just the springs and has a thicker plastic piece between the bottom of the strut and the spring, basically making the spring longer without increasing its movement. They also use daystar top plates which extend the length of the assembly slightly. From what I understand a non-saggy frankenlift is about as tall as you'd want to go.
Now, one can gain all or most of that height by adding top plate spacers and doing a clevis lift. The top plate spacer basically is just a shim of metal between the top plate of the spring/strut assembly and the body of the jeep. By putting it in there you lower the mounting surface of the jeep instead of extending the spring assembly. You get about 2x as much lift as thickness of the spacer. So a 3/8 spacer should net you nearly 3/4" lift.
You can also do the clevis lift, which often uses conduit nuts to space the clevis down away from the strut end. From what I understand people generally stick to 3 conduit nut spacing to avoid having the clevis have too little strut end to grip, but I've heard of some putting in more.
You can do both, either, or neither, just depends how much height you want. If you want to max your height out it basically depends how much weight you have over stock. With stock weight, I think a 3/8" top plate and OME HD springs and 2 clevis rings will net you about 22-1/2" give or take. I'd personally start with 1 or 2 clevis rings and add more as needed. I went with just the top plate this fall and plan to add 2-3 conduit nuts once I get my bumper on this spring.
REAR:
The rear is also not at full height with just the OME coils. The stock rear suspension has about 1/2" thick hard rubber pads on each end of the coils. What people do is buy an additional pair (or two pairs) of top isolators and insert them between the stock isolator and the spring. In the rear, adding a half inch of extra isolator gives you about another 1/2" of lift. It is more 1 to 1. Basically you end up with 2 or 3 top isolators per side. I bought my top isolators this summer for $12 or $13 each, I forget. I ended up forgetting them on my workbench when I drove to Tom's for my lift, so we put in 2 pairs of lower isolators that he had laying around. People generally say not to use lowers because the spring can supposedly slip off the lower mount, but I do have 3" of hockey puck bumpstop down there to keep it from moving, so I think it will be ok. Another reason not to use lowers is that they are more expensive than uppers.
Hope this answers your questions. I'm sure some of that isn't perfectly right. Others will tell you that I'm not expert and shouldn't be talking about lifts

I'm definitely not an expert, but I think I have the basics down, and I'm willing to take the time to explain it.
I'll have a few pairs of top plates with me next week if you want to pick up a pair then. No rush though.


