Projector Headlights (pics inside)

Disclaimer: Links on this page pointing to Amazon, eBay and other sites may include affiliate code. If you click them and make a purchase, we may earn a small commission.

staindvans

Full Access Member
Joined
Jul 25, 2009
Messages
97
Reaction score
1
Location
Kaukauna, Wisconsin
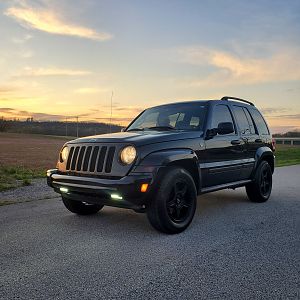
I've wanted to do lights like this for like 5 years now on 2 or 3 different vehicles and i finally got around to it. I've spent hours and hours reading information on another set of forums. The headlights are oem jeep headlights retrofited with bi-xenon projectors from a Nissan Murano. I couldn't keep the stock adjusters so i built in my own that work incredibly well, just a little more effort to align but the lights come out so easy. it took me alot of nights over the course of 2 or 3 months but now that they are finished and working properly i thought i'd share. HID lighting is incredible when done right. The high beams almost seem unfair to use compared to the old halogen high beams and the lows are nice and wide. during the aiming i had one projector in and one halogen in. the one hid went wider on each side of the jeep than the halogen did.

anyways on to pictures, you can flame if you want but they aren't just a hid kit thrown in. i have them actually aimed low right now.

You must be registered for see images attach


You must be registered for see images attach


You must be registered for see images attach


You must be registered for see images attach


You must be registered for see images attach


You must be registered for see images attach


if anybody wants anymore pics i tried to take pictures over the course of the whole project. there are much easier ways to do headlights like these but i like the performance of the Murano projectors and wasn't afraid of a challenge.

now i start saving for a lift
 
Last edited:

Neb1373

Full Access Member
Joined
Feb 7, 2011
Messages
281
Reaction score
1
Location
Louisville, KY
That is ugly as... Wait, sorry. You had my head set on bashing. They look real good on your jeep.
 

staindvans

Full Access Member
Joined
Jul 25, 2009
Messages
97
Reaction score
1
Location
Kaukauna, Wisconsin
i'll put more pics up showing the whole process i went through later, sorta busy this week but i'll see if i can get them up later.
 

staindvans

Full Access Member
Joined
Jul 25, 2009
Messages
97
Reaction score
1
Location
Kaukauna, Wisconsin
ok here we go big post. first i spent weeks and weeks reading stuff at HidPlanet researching what i would need to do, what i would need to do it, how things worked, everything like that. its a really good source of information for anything automotive HID lighting. after i knew all what had to be done i got a 2nd set of OEM lights on ebay for about $50 shipped, this was so i didn't have to take an entire weekend to do it and could do it slowly over the course of 2 months. i also found a set of Nissan Murano Bi-Xenon projectors(not the whole headlight) and bought them off ebay. those ran me about $80 shipped, there are others i could have used, these were just the ones i choose to use.

Nissan Murano Projector
You must be registered for see images attach


Then i used a heat gun aimed at where the lense attaches to the rest of the headlight housing. after heating it up a bit the sealant gets gummy and pliable. gently work a screwdriver/putty knife/butter knife, anything like that and pray the lense off. i went back with the heat gun a few times as i opened it up.

Lense removed and the little bulb shield removed
You must be registered for see images attach


after that there are to parts i missed taking pictures of. basically you buy what are called shrouds to cover the projector, mostly a decorative piece. i put one of those on and trimmed access off the projector. then using pieces of cardboard i made a template on what i had to cut out of the headlight housing to get the projector to fit. wish i would have taken more pictures, i just kept trimming with a drem until i got it to fit like this.

You must be registered for see images attach


then i went through the process of finding a way to attach it. at this point i was wishing i had chosen a different easier projector to use (banghead)

Anyways the attachment method i came up with.

You must be registered for see images attach

You must be registered for see images attach


My adjustment slide (was super proud of this idea works fairly well)
You must be registered for see images attach

You must be registered for see images attach


then i took one of the halogen headlights found a spot in my basement with a decent amount of space and hooked it up to a computer power supply and turned it on leveled the light out and marked on the wall with tape where the light cutoff was. then i set up the ballast, put the bulb in the HID headlight, put it in the same spot as the halogen, leveled the light and turned it on. adjusted it till it was in line with where the halogen light was and locked it in.

Then i started to seal the area i cut out, i used aluminum repair tape from home depot, its not pretty but it works.
You must be registered for see images attach


then i repeated the process for the 2nd headlight. bought some window ribbon sealer (butyl rubber) from napa, added some to where the old sealant was, add heat and push the lense back on.

looking back i wish i would have used a different projector. at the hidplanet store there are ones that have a threaded section on them. all you really have to do is open headlights, put threaded projector section through old bulb hole, secure with included washers and locking rings. test aim them, rotate them if you need to and re-seal the headlight. uses the factory aim adjusters still. super easy with great results. oh well live and learn i guess.
 
Top