JMM
New Member
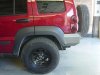
My Rock Lizard rear bumper came in late last week - sent it off to get it powder coated and picked it up Friday.
Spent Friday putting it on and all in all am pretty happy with it, not so happy with the way the color came out - is defiantly lighter than the sample I looked at before it got painted...oh well it will do for now - I am looking for a suitable color and figure I have time to hunt it out.
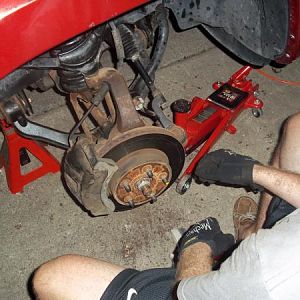
It went on fairly easily - the instructions were good and the work was not that hard. For the most part one person can do it but you really want that second set of hands around when you go to set that puppy, and to make sure it does not fall on you as you are getting those initial bolts started.
You cannot have enough jack stands!
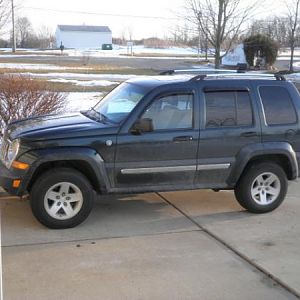
The bumper is well made and fit like a glove!
Figuring how I wanted to rig up the tag light was fun!
If one is going to do this there are definitely things you want to have before you start.
1. Did I mention that you cannot have enough jack stands?
2. Those darned plastic rivets and rivet tool. The plastic rivets have a larger diameter shaft than their metal counterparts and as such one cannot use their rivet tool they have for the aluminum or steel rivets. I ended up using some of the trim dowels (do not know what to call them) and they will do for now, they are holding and it is snug will replace them with the rivets once I have the paint thing figured out.
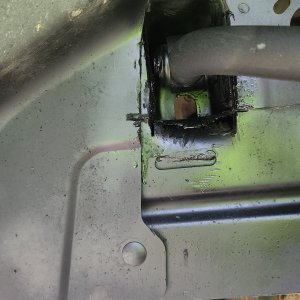
3. A can of undercoating. Once you open up the rear there I found some areas that appeared to have only primer on them so I shot those.
4. A length of wire – depending on what you are going to do with the tag. A couple of water tight connectors for the tag light lead. So you can easily disconnect the tag light should you actually need to use the spare.
5. Some silicon sealer – to close up the hole in the tailgate door to facilitate running the wire for the tag light.
6. That 18mm ratchet wrench for that one bolt that is just above the tail pipe!
I want to thank Marty and would recommend this add on to anyone looking for an aftermarket bumper for their Liberty.
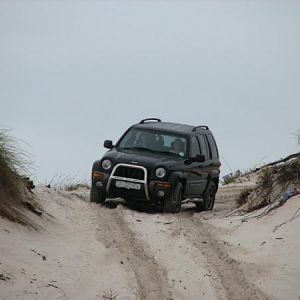
Next up – Frankinlift!
Spent Friday putting it on and all in all am pretty happy with it, not so happy with the way the color came out - is defiantly lighter than the sample I looked at before it got painted...oh well it will do for now - I am looking for a suitable color and figure I have time to hunt it out.
It went on fairly easily - the instructions were good and the work was not that hard. For the most part one person can do it but you really want that second set of hands around when you go to set that puppy, and to make sure it does not fall on you as you are getting those initial bolts started.
You cannot have enough jack stands!
The bumper is well made and fit like a glove!
Figuring how I wanted to rig up the tag light was fun!
If one is going to do this there are definitely things you want to have before you start.
1. Did I mention that you cannot have enough jack stands?
2. Those darned plastic rivets and rivet tool. The plastic rivets have a larger diameter shaft than their metal counterparts and as such one cannot use their rivet tool they have for the aluminum or steel rivets. I ended up using some of the trim dowels (do not know what to call them) and they will do for now, they are holding and it is snug will replace them with the rivets once I have the paint thing figured out.
3. A can of undercoating. Once you open up the rear there I found some areas that appeared to have only primer on them so I shot those.
4. A length of wire – depending on what you are going to do with the tag. A couple of water tight connectors for the tag light lead. So you can easily disconnect the tag light should you actually need to use the spare.
5. Some silicon sealer – to close up the hole in the tailgate door to facilitate running the wire for the tag light.
6. That 18mm ratchet wrench for that one bolt that is just above the tail pipe!
I want to thank Marty and would recommend this add on to anyone looking for an aftermarket bumper for their Liberty.
Next up – Frankinlift!