Liberty By Liberty

Disclaimer: Links on this page pointing to Amazon, eBay and other sites may include affiliate code. If you click them and make a purchase, we may earn a small commission.

RATX5

Full Access Member
Joined
Feb 11, 2015
Messages
52
Reaction score
0
Location
Central Nebraska
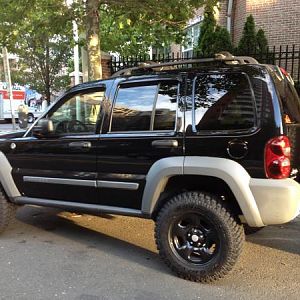
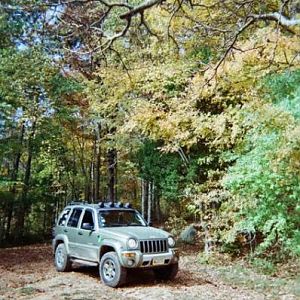
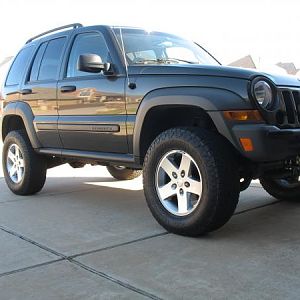
On the night of my 16th birthday (1-25-14 to be exact) I came home to a beautiful Stone White 03' Limited Edition Jeep Liberty in the garage with my name on it. My father works at a car lot, so he got a fairly decent deal for me (4.2k). Upon me receiving it my KJ had been a one owner vehicle, and had 159k miles on it. August that year my KJ endured a terrible hail storm, while I had it parked outside at my work. As a result of this I had to replace the windshield, and decided to use the rest of the insurance money to pay the Jeep off and have the title marked salvage. Front two door speakers were blown when I got it so, therefore I decided to do a full upgrade recently, and put in a brand new all Kenwood system (aside from the rear door speakers and dash tweeters) Anyways, Enough with the talk. Time for a parts list and pics! :gr_grin:

Things done since I've owned it
5" Billet antenna from AntennaX
Non-factory tire cover
New oem Transfer case
New Windshield
Two Kenwood KFC-1665S Speakers
One Kenwood KAC-7005PS AMP
New Kenwood KDC-BT558U Head Unit
[W.I.P.]Plasti-Dipped badges Blaze Blue (Fixing front logo and passenger side liberty badge left)
Replaced the stock tire cover with the tire cover my father ran on his old YJ
Coleman SUV/Packable Twin QuickBed (Along with Intex Quick-Fill Battery Air Pump for inflation.)
Maglite Mount
Angry Eyes using Plasti-Dip
Clear Turn Signals (Currently missing driver side.)
IPCW Bermuda Black Tail Lights
IPCW 3rd Brake Light
Mopar Graphite Taillight Guards


Plans
3" or 4" lift
New Rims
Offroad tires
Cargo rack
Roof (possibly front bumper as well) mounted led light bar
Tint passenger and driver windows
New Rocker Panels
Offroad Front Bumper
LED Fog Lights
Renegade Fender Flares
Sub-woofer along with it's own amp.

Now for pics!
You must be registered for see images attach


You must be registered for see images attach


You must be registered for see images attach


You must be registered for see images attach


You must be registered for see images attach


You must be registered for see images attach


You must be registered for see images attach


You must be registered for see images attach


You must be registered for see images attach


You must be registered for see images attach


You must be registered for see images attach


You must be registered for see images attach


You must be registered for see images attach


You must be registered for see images attach


You must be registered for see images attach


You must be registered for see images attach


You must be registered for see images attach


You must be registered for see images attach


You must be registered for see images attach


You must be registered for see images attach


You must be registered for see images attach


You must be registered for see images attach


You must be registered for see images attach


You must be registered for see images attach


You must be registered for see images attach


You must be registered for see images attach


You must be registered for see images attach


You must be registered for see images attach


You must be registered for see images attach


You must be registered for see images attach


You must be registered for see images attach


You must be registered for see images attach


You must be registered for see images attach


You must be registered for see images attach


You must be registered for see images attach


You must be registered for see images attach


You must be registered for see images attach


You must be registered for see images attach


You must be registered for see images attach


You must be registered for see images attach


You must be registered for see images attach


You must be registered for see images attach


You must be registered for see images attach


You must be registered for see images attach


You must be registered for see images attach


You must be registered for see images attach


You must be registered for see images attach


You must be registered for see images attach


You must be registered for see images attach


You must be registered for see images attach


You must be registered for see images attach


You must be registered for see images attach


You must be registered for see images attach


You must be registered for see images attach


You must be registered for see images attach


You must be registered for see images attach


You must be registered for see images attach


You must be registered for see images attach


You must be registered for see images attach
 
Last edited:

ftaa

Full Access Member
Joined
Feb 9, 2015
Messages
473
Reaction score
0
Location
canada
great looking jeep .... firstly to do a 6 inch lift you need 20k a cup (spacer?) lift is not recomended.... the best you can do for now would be a ome or ironman lift...
 

twowings

Full Access Member
Joined
Nov 23, 2014
Messages
802
Reaction score
3
Location
Tulsa, OK
X2...unless you're made of money, stick with a 2.5-4" lift...you'll be MUCH happier!
 

Dave

Administrator
KJ Supporting Member
KK Supporting Member
Joined
Feb 22, 2006
Messages
15,567
Reaction score
15
Location
on here
Nice Jeep and pics.


Dave
 

dude1116

Full Access Member
Joined
May 31, 2011
Messages
3,373
Reaction score
13
Location
Pompton Plains, NJ
Dang that's some serious hail damage. Still a nice Jeep though. Doesn't take away from the function. Just the form.
 

RATX5

Full Access Member
Joined
Feb 11, 2015
Messages
52
Reaction score
0
Location
Central Nebraska
Thanks for the warm welcome and the advice guys! Recently I've plastidipped both rear badges (thought of using a large roll of paper instead of news paper to mask off stuff and it cut my prep time down tremendously), and mounted my maglite to the seat rail on my driver's seat. Originally I had planned to mount it to the right of the seat, but once I received the brackets and went in for further inspection, I noticed that there was a substantially thick bit of insulation padding. Had the plastidip on the front badge come up while powerwashing it :Stupid Me:, so I now have the passenger side liberty badge and the hood badge to plastidip to finish until I'm done. I had to replace the tires I had due to them dry-rotting and leaking so bad that I had to fill them up daily (They were the same ones she had rolled out of the factory with.) Due to monetary constraints I opted to go for a set of new street tires and wait until a little further down the road to invest in mud tires. I also ran in to the unfortunately common issue of the ac drain being clogged a day before I had planned to go camping (figured it out and got it solved in time, fortunately). Pics below.

You must be registered for see images attach

You must be registered for see images attach

You must be registered for see images attach

You must be registered for see images attach

You must be registered for see images attach

You must be registered for see images attach

You must be registered for see images attach

You must be registered for see images attach

You must be registered for see images attach

You must be registered for see images attach

You must be registered for see images attach

You must be registered for see images attach

You must be registered for see images attach

You must be registered for see images attach

You must be registered for see images attach
 
Last edited:

RATX5

Full Access Member
Joined
Feb 11, 2015
Messages
52
Reaction score
0
Location
Central Nebraska
Pictures of the head unit and Mag-lite mount install.

You must be registered for see images attach

You must be registered for see images attach

You must be registered for see images attach

You must be registered for see images attach
 

TwoBobsKJ

Full Access Member
Joined
Jan 28, 2011
Messages
2,637
Reaction score
17
Location
Northern Ohio
Looks great. What transmission do you have? Also what transfer case?

****** is the oem auto one, and the transfer case is an oem replacement that I put in about 2k miles ago.

I think what renegade 04 is asking is which model transmission and transfer case do you have. In other words, do you have the 45RFE transmission or the 42RLE? And do you have the Part Time Command Trac transfer case (no Full Time option) or the Full Time SelecTrac case (has 5 positions including a Full Time mode)?

Count the number of bolts on the ****** pan. 13 bolts you have the 42RLE, 15 bolts you have the 45RFE. And look at the transfer case handle to determine which T-case you have.

This info helps us help you if you have questions or issues in the future :waytogo:

Bob
 

Jbergun

Full Access Member
Joined
Jun 4, 2015
Messages
1,009
Reaction score
2
Location
Chicago
Hey man everytime i try plasti dipping my logos i mess it up when trying to pick it out of the letters like the e's and the p what is the secret i have tried a couple times and once i boch it i just pull it all off
 

profdlp

Counting My Blessings
Staff member
Moderator
Joined
May 21, 2013
Messages
5,817
Reaction score
1,766
Location
Westlake, Ohio
Hey man everytime i try plasti dipping my logos i mess it up when trying to pick it out of the letters like the e's and the p what is the secret i have tried a couple times and once i boch it i just pull it all off
I used a plastic toothpick and didn't worry if there was a little extra around the inside edges. ==> http://www.jeepkj.com/forum/634387-post168.html
 

RATX5

Full Access Member
Joined
Feb 11, 2015
Messages
52
Reaction score
0
Location
Central Nebraska
Hey man everytime i try plasti dipping my logos i mess it up when trying to pick it out of the letters like the e's and the p what is the secret i have tried a couple times and once i boch it i just pull it all off

I used wooden bbq skewers. I let it sit for about a day or so and then peel it and it seems to come off fine. Just go slow and use your fingers to hold on the logos. I'd reccomend light coats to start with and as you progress further get heavier with the coats. You want your last one or two coats to be wet if you have bubbling or burring in the plastidip because it helps cover it. When masking off, leave a decent sized square around it like I did in the pics above, it definitely helps with rolling it off. When getting the plastidip out from inside of the letters roll it with the toothpick from all 3 or 4 corners instead of trying to pull from one point. Like Profdlp said there's no need to worry if there is a little bit on the edges, it will hold up fine and you can't see it unless you look at it really close up.
 
Last edited:

RATX5

Full Access Member
Joined
Feb 11, 2015
Messages
52
Reaction score
0
Location
Central Nebraska
I think what renegade 04 is asking is which model transmission and transfer case do you have. In other words, do you have the 45RFE transmission or the 42RLE? And do you have the Part Time Command Trac transfer case (no Full Time option) or the Full Time SelecTrac case (has 5 positions including a Full Time mode)?

Count the number of bolts on the ****** pan. 13 bolts you have the 42RLE, 15 bolts you have the 45RFE. And look at the transfer case handle to determine which T-case you have.

This info helps us help you if you have questions or issues in the future :waytogo:

Bob

Oh, okay. Thanks for clearing that up Bob. Just went out to the garage and checked and I have a Full Time SelecTrac case. I'm pretty sure I have a 45RFE because I counted 13 bolts and it looked like there was enough room left that I hadn't counted for 2 more bolts, but I'll have to puller her out on the driveway tomorrow and check, because spiders were starting to agitate me and I woke my pig up. Also, I took some pics of how the plastidip isn't perfect at close inspection.

You must be registered for see images attach
Getting Overzealous when peeling the plastidip.
You must be registered for see images attach
Imperfection at it's finest!
You must be registered for see images attach
Full Time 4X4 :icon_cool:
You must be registered for see images attach
Just in case someone doubted me about the pig excuse :shrug:
 

profdlp

Counting My Blessings
Staff member
Moderator
Joined
May 21, 2013
Messages
5,817
Reaction score
1,766
Location
Westlake, Ohio
I Plasti Dipped my badges while doing all five rims, which had to be done in two stages since I didn't have four jack stands. This gave me plenty of time to do the badges. As I recall, I put about eight VERY light coats on them with at least ten minutes drying time in between. When I peeled the masking off the outer edges were clean and sharp. (See the pics I linked to in my earlier post.)

PS: That is the fattest dog I've ever seen. :mexsmoke:
 

profdlp

Counting My Blessings
Staff member
Moderator
Joined
May 21, 2013
Messages
5,817
Reaction score
1,766
Location
Westlake, Ohio
Something I should have added: Make sure you give it a few quick light sprays from all angles with each coat. I think my edges turned out better because the Plasti Dip was under the letters, not just around them.
 
Top