
jeeptorino68
Full Access Member
First of all, the info i am providing is from my experience with a 2002 KJ (US model) your results may vary...
i split this project up into two parts, the first tearing down the dash and stuff in the way under the hood. the second removing/installing the heater core, and re-assembling. this was accomplished in 3-5 hour work sessions, it is nice to have a helper but i did it all on my own.
*WARNING* use caution when working on/around airbags, do so at your own risk, if you are not comfortable around them or are not sure they will be properly disabled, do not attempt.
Also if you choose to discharge your air conditioning system for this, do it in the appropriate manner. it is illegal to discharge the Freon into the atmosphere, take it to the proper mechanic for this, or rent the tools to do it.
Second, i have to give partial credit to Joejeeper420, he had some info that gave me the confidence to get started
from Joejeepers420's thread on LOST:
"I started by disconnecting the battery then removing the center console, then comes the A pillar handles; and everything screwed/clipped into the dash... All of the trim around the steering wheel, the column switch, gauge cluster, as well as both kick panels come out... Then the stereo and all HVAC controls. then the passenger side airbag came out. once that is done you can remove the swing bolts that are located behind the kick panels, then i took out the center mounting bolts as well as the plate. I then unscrewed the fuse/junction box at this point, then disconnected the wire harness starting at the brake switch and working my way over I fished most of it through the opening for the steering wheel. Then I disconnected the vacuum line and electrical connectors on the passenger side that go to the blower motor and the resistor, etc and fished them out a bit. After that its the main bolts that go into the firewall... I never dropped the steering column... I only loosened the two 13mm? Bolts that go up and through the bottom of the mid column up, they protrude just enough that you can't pull the dash towards you without backing them off till the ends are flush. Then there are
Two 10mm washer nuts on the bottom of the heater Box... And that just about finishes off the work in the cabin.
Then ON to the engine bay! You have to move the coolant overflow out of the way to get to the one remaining washer bolt on the firewall and the input output hoses On the heater core... Evacuate the AC then disconnect evaporator... Back in the cabin you can pull the dash back enough to wiggle the old heater box out. Twist it back towards you so the heater core openings face up and pull it out.
Jump around for joy at this point and look at your car in disbelief but be full of confidence because its not rocket science")
When re installing take care to be easy and not Force it in... You can make enough space to get it in without forcing it. Also take care when handling your fuse/junction box... When I buttoned everything back up my gauge cluster was dead... I had to reseat the connectors and reset the battery... After that everything should be gravy. Enjoy the heat!"
Third - thanks goes to Diggerfreek on LOST for info on taking out the center console, dash, and passenger side airbag/dash - NOTE those write ups were for a KK but very similar to a KJ
i will add to this, and pictures i took.
reference the following threads/links:
1) Link to Joejeeper420's info: Jeep Liberty Forum - JeepKJ Country - View Single Post - Heater Core? What to check / costs?
2) Center Console: LOST JEEPS • View topic - HOW TO: CENTER CONSOLE REMOVAL
3) Dash: LOST JEEPS • View topic - HOW TO: DASH DISASSEMBLE
4) Pass Dash and airbag: LOST JEEPS • View topic - Passenger side dash D&A
Tools:
screwdriver - flat and phillips - electric screw driver will help...
3/8 drive ratchet, extensions, 10mm deep socket, 10mm regular socket, 13mm deep socket, 15mm deep and regular socket, 15mm ratcheting or regular end wrench
pliers for hose clamps
trim removal tool or similar prying tool (i like a putty knife) for dash panels
T-20 screwdriver for the steering column clamshell
Parts: (this was for my 2002 KJ, check to see what YOU need for your jeep by make and model)
Murray 93029 or equivalent
my steps (roughly) [note: i chose not to evacuate and disconnect the AC lines, this added some difficulty and resulted in some bent fins on the new heater core, i was ok with the bent fins in exchange for not having to pay for the AC system evacuation and re-charge.]
1) disconnect the battery
2) remove the center console (see above link) if you do this first you do not need the auto shifter in neutral to get the HVAC controls out
3) remove the HVAC controls and radio (note there is a kind of hidden screw that is in the pocket where the ash tray is) pry the surround out with putty knife. radio has 4 screws and 3 connectors on the back. HVAC panel has multiple connectors on the back, take your time here.
5) remove the cover panel up by the windshield, pry up at the edge closest to you as you sit in the seat
drivers side:
-remove the knee bolster under the steering column, the trim on each side of the column etc. as well as the plastic cover panel above the pedals
-remove the gauge cluster trim and the gauge cluster (phillips screws)
-lower the steering column, (2) metric hex head bolts (13mm deep socket on extensions) loosen these bolts until they are not protruding through the aluminum bracket (circled in red below)

-remove the bolts holding the steering column bracket in place 10mm hex head (black bracket with silver bolts in the picture below, bolts circled in blue above)

-remove bolts that go through aluminum bracket and into dash, you can access these from below the column, they go straight up and into the bracket. 10mm hex (one on each side of the column)

-remove the kick panel and then the bolts at for the lower dash bracket, these are 13mm.
remove the ground straps (8mm)

Passenger side:
-remove the glove box
-remove the kickpanel and plastic cover panel below the heater box.
- remove the horizontal trim below the air bag (phillips screws)
-remove the airbag cover (10mm bolts)
-WARNING: be careful not to hit, bump, or otherwise disturb the airbag with it exposed.
-disconnect the air bag wiring (i looked through the windshield while doing this so my face was protected.
unbolt the airbag 4 bolts total, set aside in a safe place.
-remove some of the vacuum lines to the heater a green one to a door actuator, and black tube/valve that clips to the heater box (see picture)

-disconnect and remove the dash speakers.
-remove the misc. 10mm bolts holding the dash to the firewall.
you should be able to lift and pull the dash towards the seats. the driverside does not need to pull out as far as the passenger.
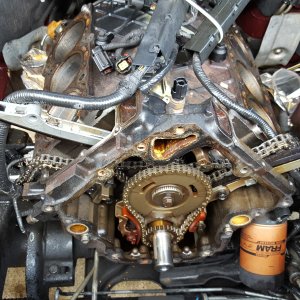
now you should see the heater core. the OE unit is brown/beige in color, the replacement i got was black (the plastic end with the fittings.
in my case i chose not to unhook the AC (again please note you will damage your new heater core fins if you do it this way too). i cut the plastic tubes on the old heater core to make pulling it out easier.
i pulled the heater box into the jeep as far as i could with the lines attached, used pry bars to wedge it there. i also cut and pulled back the dash board insulation to make more space.
i then cut the tabs that hold the heater core in, just the two that are towards the inside of the jeep, i left the two towards the engine side, this allowed me to drop the heater core in at more of an angle.
(i noticed there are two holes in the heater box, and corresponding brackets with holes in the heater core so i used screws to hold it in)
i pulled out on the heater box one more time, and shoved the heater core in - some fins were bent.
since i was missing two tabs, i used some screws to help secure the heater core.
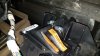
the screws i used:

the pictures are crappier than i thought, but here you can see the heater core installed, note the screws helping hold it down, because i cut the tabs off of the inner side of the heater box


reverse all the above steps and you are done.
i came out of this with only one "extra" screw, and everything working, so that is pretty good in my book. and i saved who knows how much over having a shop do the work!
i split this project up into two parts, the first tearing down the dash and stuff in the way under the hood. the second removing/installing the heater core, and re-assembling. this was accomplished in 3-5 hour work sessions, it is nice to have a helper but i did it all on my own.
*WARNING* use caution when working on/around airbags, do so at your own risk, if you are not comfortable around them or are not sure they will be properly disabled, do not attempt.
Also if you choose to discharge your air conditioning system for this, do it in the appropriate manner. it is illegal to discharge the Freon into the atmosphere, take it to the proper mechanic for this, or rent the tools to do it.
Second, i have to give partial credit to Joejeeper420, he had some info that gave me the confidence to get started
from Joejeepers420's thread on LOST:
"I started by disconnecting the battery then removing the center console, then comes the A pillar handles; and everything screwed/clipped into the dash... All of the trim around the steering wheel, the column switch, gauge cluster, as well as both kick panels come out... Then the stereo and all HVAC controls. then the passenger side airbag came out. once that is done you can remove the swing bolts that are located behind the kick panels, then i took out the center mounting bolts as well as the plate. I then unscrewed the fuse/junction box at this point, then disconnected the wire harness starting at the brake switch and working my way over I fished most of it through the opening for the steering wheel. Then I disconnected the vacuum line and electrical connectors on the passenger side that go to the blower motor and the resistor, etc and fished them out a bit. After that its the main bolts that go into the firewall... I never dropped the steering column... I only loosened the two 13mm? Bolts that go up and through the bottom of the mid column up, they protrude just enough that you can't pull the dash towards you without backing them off till the ends are flush. Then there are
Two 10mm washer nuts on the bottom of the heater Box... And that just about finishes off the work in the cabin.
Then ON to the engine bay! You have to move the coolant overflow out of the way to get to the one remaining washer bolt on the firewall and the input output hoses On the heater core... Evacuate the AC then disconnect evaporator... Back in the cabin you can pull the dash back enough to wiggle the old heater box out. Twist it back towards you so the heater core openings face up and pull it out.
Jump around for joy at this point and look at your car in disbelief but be full of confidence because its not rocket science
When re installing take care to be easy and not Force it in... You can make enough space to get it in without forcing it. Also take care when handling your fuse/junction box... When I buttoned everything back up my gauge cluster was dead... I had to reseat the connectors and reset the battery... After that everything should be gravy. Enjoy the heat!"
Third - thanks goes to Diggerfreek on LOST for info on taking out the center console, dash, and passenger side airbag/dash - NOTE those write ups were for a KK but very similar to a KJ
i will add to this, and pictures i took.
reference the following threads/links:
1) Link to Joejeeper420's info: Jeep Liberty Forum - JeepKJ Country - View Single Post - Heater Core? What to check / costs?
2) Center Console: LOST JEEPS • View topic - HOW TO: CENTER CONSOLE REMOVAL
3) Dash: LOST JEEPS • View topic - HOW TO: DASH DISASSEMBLE
4) Pass Dash and airbag: LOST JEEPS • View topic - Passenger side dash D&A
Tools:
screwdriver - flat and phillips - electric screw driver will help...
3/8 drive ratchet, extensions, 10mm deep socket, 10mm regular socket, 13mm deep socket, 15mm deep and regular socket, 15mm ratcheting or regular end wrench
pliers for hose clamps
trim removal tool or similar prying tool (i like a putty knife) for dash panels
T-20 screwdriver for the steering column clamshell
Parts: (this was for my 2002 KJ, check to see what YOU need for your jeep by make and model)
Murray 93029 or equivalent
my steps (roughly) [note: i chose not to evacuate and disconnect the AC lines, this added some difficulty and resulted in some bent fins on the new heater core, i was ok with the bent fins in exchange for not having to pay for the AC system evacuation and re-charge.]
1) disconnect the battery
2) remove the center console (see above link) if you do this first you do not need the auto shifter in neutral to get the HVAC controls out
3) remove the HVAC controls and radio (note there is a kind of hidden screw that is in the pocket where the ash tray is) pry the surround out with putty knife. radio has 4 screws and 3 connectors on the back. HVAC panel has multiple connectors on the back, take your time here.
5) remove the cover panel up by the windshield, pry up at the edge closest to you as you sit in the seat
drivers side:
-remove the knee bolster under the steering column, the trim on each side of the column etc. as well as the plastic cover panel above the pedals
-remove the gauge cluster trim and the gauge cluster (phillips screws)
-lower the steering column, (2) metric hex head bolts (13mm deep socket on extensions) loosen these bolts until they are not protruding through the aluminum bracket (circled in red below)
-remove the bolts holding the steering column bracket in place 10mm hex head (black bracket with silver bolts in the picture below, bolts circled in blue above)
-remove bolts that go through aluminum bracket and into dash, you can access these from below the column, they go straight up and into the bracket. 10mm hex (one on each side of the column)
-remove the kick panel and then the bolts at for the lower dash bracket, these are 13mm.
remove the ground straps (8mm)
Passenger side:
-remove the glove box
-remove the kickpanel and plastic cover panel below the heater box.
- remove the horizontal trim below the air bag (phillips screws)
-remove the airbag cover (10mm bolts)
-WARNING: be careful not to hit, bump, or otherwise disturb the airbag with it exposed.
-disconnect the air bag wiring (i looked through the windshield while doing this so my face was protected.
unbolt the airbag 4 bolts total, set aside in a safe place.
-remove some of the vacuum lines to the heater a green one to a door actuator, and black tube/valve that clips to the heater box (see picture)
-disconnect and remove the dash speakers.
-remove the misc. 10mm bolts holding the dash to the firewall.
you should be able to lift and pull the dash towards the seats. the driverside does not need to pull out as far as the passenger.
now you should see the heater core. the OE unit is brown/beige in color, the replacement i got was black (the plastic end with the fittings.
in my case i chose not to unhook the AC (again please note you will damage your new heater core fins if you do it this way too). i cut the plastic tubes on the old heater core to make pulling it out easier.
i pulled the heater box into the jeep as far as i could with the lines attached, used pry bars to wedge it there. i also cut and pulled back the dash board insulation to make more space.
i then cut the tabs that hold the heater core in, just the two that are towards the inside of the jeep, i left the two towards the engine side, this allowed me to drop the heater core in at more of an angle.
(i noticed there are two holes in the heater box, and corresponding brackets with holes in the heater core so i used screws to hold it in)
i pulled out on the heater box one more time, and shoved the heater core in - some fins were bent.
since i was missing two tabs, i used some screws to help secure the heater core.
the screws i used:
the pictures are crappier than i thought, but here you can see the heater core installed, note the screws helping hold it down, because i cut the tabs off of the inner side of the heater box
reverse all the above steps and you are done.
i came out of this with only one "extra" screw, and everything working, so that is pretty good in my book. and i saved who knows how much over having a shop do the work!
Last edited: