Just did mine today, and figured I should take a boat load of pictures and hopefully help someone out. I have zero knowledge about most vehicle related repairs...however, I do have a willingness to learn...and the wife always gets kind of weary and tells me to be careful haha...but I refuse to be ripped off. haha. So..here is a quick list of tools that I used starting from removing the tire all the way down:
Your KJ's Tool For Removing Lugnuts
A Jack
Jackstands!
1/2in Socket
Standard Needle-nose Pliers (or needle-nose vice grips)
Mini Needle-nose Pliers
Wire Brush
Flat Head Screwdriver (situational)
Parking Brake Multi-tool (optional)
Hammer (situational)
Let's get started!
Loosen the lugs. Jack her up
You must be registered for see images attach
Then toss under some jackstands. (I used two...cuz i'm weird like that)
You must be registered for see images attach
Pull off the rubber
You must be registered for see images attach
The caliper has two bolts. This one:
You must be registered for see images attach
And this one:
You must be registered for see images attach
Set the Caliper off to the side....no need to tie it up..
You must be registered for see images attach
Pull off the rotor. (possible hammer use here)
You must be registered for see images attach
Pull this side of the spring. Here I used the Multi-tool...but the pliers work just fine too...(I only used it because I spent $8 on it..so may as well)
You must be registered for see images attach
Set it on the ground off to the side...this will start your physical diagram. Looking at the spring now you can see why the right side won't come off.
You must be registered for see images attach
Grab the bottom spring (from either side..I'm a lefty) Place it in it's spot on your new diagram!
You must be registered for see images attach
You must be registered for see images attach
These clips are a real pain. In this picture I forgot to show how I got it off...but it's coming up on the other side! Once you pull off the clip, and the pin thru the back..the adjuster will probably fall, and your shoe will be completely detached as well
You must be registered for see images attach
Set it down in its spot!
You must be registered for see images attach
You must be registered for see images attach
Ok, here is how I got the clips off! I grabbed it like this...pushed in, and then squeezed once it cleared.
You must be registered for see images attach
U should have a full diagram now!
You must be registered for see images attach
Set up your new stuff just like it
You must be registered for see images attach
Now it's time to clean the whole area with a wire brush...and anything else you want to do with it. Now that you've done that...let's put the new stuff on!
Put the shoe in the spot...put the pin thru the back, and line up the clip.
You must be registered for see images attach
Now the pins that I got in the new pack have a hammerhead shape...so once you get them through, you then have to turn them. I did this by placing my pliers over the hole they come through, pushed in the clip, when it cleared i grabbed and twisted and thats that! Here is what it should look like!
You must be registered for see images attach
Insert your top spring just like this..and you won't get frustrated I promise!
You must be registered for see images attach
After that pull the spring over and put it through the other shoe
You must be registered for see images attach
This part is a little tricky, and requires a bit of strength. with both of your shoes attached at the top by the spring...simply pull the second shoe back and put it in place. Like this
You must be registered for see images attach
Now since you're locked in up top, the shoe is going to want to kick out on the bottom...to avoid this...pop in the new adjuster on the bottom...just to keep it from doing that...no need to set it now. Now you can put the pin through the back..and throw on the other clip!
You must be registered for see images attach
Now you should be at this stage! Both shoes on, clips on, and adjuster.
You must be registered for see images attach
Grab the bottom spring and attach it on there..again..either way.
You must be registered for see images attach
And thats it!
You must be registered for see images attach
You must be registered for see images attach
You must be registered for see images attach
Here you can see the hammerhead pin.
You must be registered for see images attach
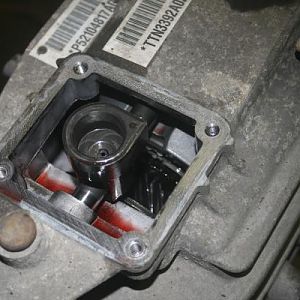
Mine pretty much needed to be done....
You must be registered for see images attach
The dealership quoted me $200 in Labor, plus $90 for parts. Instead I went to Autozone, got the shoes for $60, and the hardware for $30 and did it myself. And like I said before...I don't know much...but I just used common sense on this one. Lol. Obviously the other side is exactly the same! Throw the rotor, caliper, and tire back on and you're all set. If you guys have any questions just shoot me a message. Thanks.