'05 Renegade fixer-upper

Disclaimer: Links on this page pointing to Amazon, eBay and other sites may include affiliate code. If you click them and make a purchase, we may earn a small commission.

Leeann

Full Access Member
Joined
Mar 9, 2013
Messages
2,436
Reaction score
241
Location
Maryland
Swapped out the RBK headunit for an RAZ headunit. Cassette adapter backup for Sirius or iPod in case the box takes a dump, plus easier bass/treble and fade/balance controls.

You must be registered for see images attach
 

Leeann

Full Access Member
Joined
Mar 9, 2013
Messages
2,436
Reaction score
241
Location
Maryland
Yesterday, the bf cleaned, degreased and lightly sandblasted the Mopar skids from MoD, then put a light coat of rust converter on.

Today, put dark primer on and let each side bake in the sun. Tomorrow, will start putting coats of Rustoleum Professional gloss on.

You must be registered for see images attach


You must be registered for see images attach
 

Leeann

Full Access Member
Joined
Mar 9, 2013
Messages
2,436
Reaction score
241
Location
Maryland
Got a couple coats of paint on the skids…

You must be registered for see images attach


You must be registered for see images attach


You must be registered for see images attach
 

Leeann

Full Access Member
Joined
Mar 9, 2013
Messages
2,436
Reaction score
241
Location
Maryland
Replaced the passenger side wheel bearing/hub assembly along with both sets of sway bar bushings and end links. Hub wasn't awful, actually, but was gritty with a couple bad spots in it. Rubber on the sway bar bushings and end links also wasn't awful but was starting to weather-check and crack.

First, hub nut off
You must be registered for see images attach


Nope, not a 35mm
You must be registered for see images attach


Yup, it is 36mm
You must be registered for see images attach


Caliper removed and tied up out of the way
You must be registered for see images attach


Caliper bracket off, all bolts started in their holes so I don't lose 'em
You must be registered for see images attach


Naked hub
You must be registered for see images attach


Sprayed each bolt end with PB Blaster and hit with the wire brush to clean them up
You must be registered for see images attach


Hub bolts all came out easily with an E-14 I grabbed from Pep Boys in a 4-pc set (GearWrench, I think)
You must be registered for see images attach


Old hub off, with the puller, brass punch and BFH
You must be registered for see images attach

Loose CV axle
You must be registered for see images attach


At this point, I sprayed a little PB on all the rust on the mating surfaces, then wire brushed them clean. Cleaned up the splines with a brass brush and greased everything, including the splines, with wheel bearing grease.

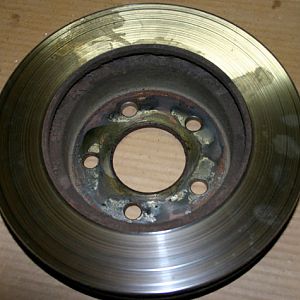
Old hub vs new…new (Timken) is quite a bit beefier in almost every respect
You must be registered for see images attach

New hub bolted in place. Before I did anything, I sprayed the hub bolts with PB and hit them with the wire brush to clean up the threads and the shanks
You must be registered for see images attach


And from the front
You must be registered for see images attach


Rotor back on
You must be registered for see images attach


Brake bracket back on
You must be registered for see images attach


Now the caliper
You must be registered for see images attach

Tightening the hub nut back down, screwdriver to hold things in place
You must be registered for see images attach


Now for bushings and end links.

First, old vs new bushings - old aren't terrible, but…
You must be registered for see images attach


Jack up lower control arm to get pressure off the components
You must be registered for see images attach


New bushing installed
You must be registered for see images attach

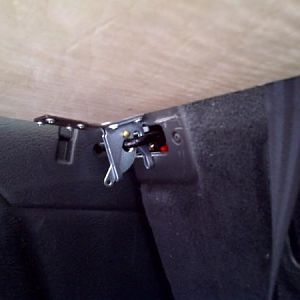
New end link in place, but not tightened down
You must be registered for see images attach


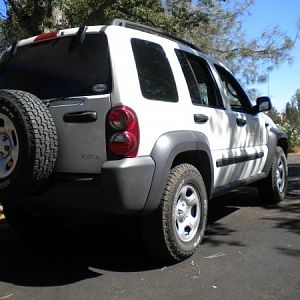
Back on the ground and tightened down
You must be registered for see images attach


Just got a report from my test driver (I'm drinking well-deserved beer): much, much quieter and smoother.
 

profdlp

Counting My Blessings
Staff member
Moderator
Joined
May 21, 2013
Messages
5,817
Reaction score
1,766
Location
Westlake, Ohio
Naked Hubs on JeepKJ! What is this site coming to? :ban:

Nice work - it is a thing of beauty! :cheers:
 

sota

Full Access Member
Joined
Apr 6, 2011
Messages
2,330
Reaction score
1,130
Location
NJ
You're reminding me I'll be doing a frightening amount of work on mine soon. refreshing all the things.
 

Leeann

Full Access Member
Joined
Mar 9, 2013
Messages
2,436
Reaction score
241
Location
Maryland
I had let my (hated) holly trees overgrow my '93 Astro with a few holes in the oil pan (previous owner neglect), so last week I trimmed back the branches. This week I pulled out the new toy and washed the poor, neglected thing. And the front of the '02 which was covered in bugs and holly tree dirt. And a little on the back of the Libby since car washes just don't get there (but no pics of that).

Toy:
You must be registered for see images attach


Filled it with oil, filled it with stabilized fuel, attached the soap concentrate siphon hose, turned it on, pulled once to get fuel to the carb and pulled a second time for vroooooom.

Before:
You must be registered for see images attach


You must be registered for see images attach


During:
You must be registered for see images attach


And after:
You must be registered for see images attach


You must be registered for see images attach


You must be registered for see images attach


Perfect? Heck, no. I didn't pull out a sponge and rub, I didn't switch tips to use more soap. However, it doesn't look like it's been sitting there for years any more. And I got to play with the new toy and figure out how things work. Put the oil in, put the gas and stabilizer in, turned the switch on, pulled once, pulled twice, vroom. It's a really nice motor.
 

profdlp

Counting My Blessings
Staff member
Moderator
Joined
May 21, 2013
Messages
5,817
Reaction score
1,766
Location
Westlake, Ohio
Hard to believe it's the same vehicle. Nice job! :cheers:
 

Leeann

Full Access Member
Joined
Mar 9, 2013
Messages
2,436
Reaction score
241
Location
Maryland
Replaced the transfer case side CV joint on the front driveshaft today. Looked underneath last week while replacing the front oxygen sensors with NTK (side note: I'd like to hurt the Chrysler engineer who decided on the length & placement of the wiring harnesses for those) and saw this:

You must be registered for see images attach


Had the replacement joint on the shelf thanks to warnings on here, so today I dug in.

Followed the same procedure I figured out during the ****** swap, using my 1-1/16" wrench against the transfer case end of the shaft and a bfh with one whack to get it loose, then tap&turn ad infinitum on the diff end to get it loose. T-case end goes up, diff end comes down, then thread the shaft out to get the t-case end out near the front of the ****** where the opening is bigger.

Boot was almost severed:
You must be registered for see images attach


Popped off the cap. Plenty of grease left, but probably not for long:
You must be registered for see images attach


Cleaned off some grease to find the snap ring
You must be registered for see images attach


And used snap ring pliers to remove it. Note placement of gasket for assembly.

Knocked joint off splines, removed remainder of boot, cleaned up shaft with degreaser and sandpaper
You must be registered for see images attach


Installed new boot
You must be registered for see images attach


And filled with grease. Greased the underside of the new joint and slid onto the shaft, then gently tapped around and around with a ball pein hammer to get it all the way on and reinstalled the snap ring
You must be registered for see images attach


Filled the top with grease, worked the joint, added more grease, worked the joint...until full. Squirted the rest on top, installed the new gasket and top cover. Then installed the new band on the boot, after using a little screwdriver to release any trapped air:
You must be registered for see images attach


Then reinstalled on the jeep using the reverse of the above method. I had marked the diff end during the ****** replacement with red china marker and the marks were still present, so I matched them up for reinstallation.

Drove it around the yard and had to keep my foot on the brake the whole way - pulled around the whole thing with no input on the skinny pedal. And no noise at all.
 

profdlp

Counting My Blessings
Staff member
Moderator
Joined
May 21, 2013
Messages
5,817
Reaction score
1,766
Location
Westlake, Ohio
That will be a nice guide for the next poor soul who has to do this.

Well done! :waytogo:
 

Leeann

Full Access Member
Joined
Mar 9, 2013
Messages
2,436
Reaction score
241
Location
Maryland
Thanks!

It's easier for me to remember how I did it in the future if I write it up with pics ;)
 

brn7508

New Member
Joined
Jul 9, 2014
Messages
6
Reaction score
0
Location
wisco
thanks so much this will come in handy when i do this job next week. my 2005 liberty has a squeek like you wouldnt believe and sometimes sound like ghosts with chains LOL. i took it to a shop this morning and they couldnt find the problem!!! what a bunch of losers!!! i come on the forum and register and ive got my answer in a few hours!! thanks so much!! you guys are great!!
 

TheBlueKJ

Full Access Member
Joined
Oct 29, 2012
Messages
1,617
Reaction score
9
Location
South Jersey
Your old joint looked exactly like mine did


Sent from my iPhone using the power of children's laughter
 

jrogers

Full Access Member
Joined
Nov 23, 2013
Messages
54
Reaction score
0
Location
Indiana
I'm in the process of replacing mine as well. The driveshaft is out and I got the cap removed and there was zero grease left in it just dust and rust. Got the snap ring off but the joint will not budge a bit. Any tips on removing the joint or do I just need to soak it with some pb blaster and get a bigger hammer?
 

Leeann

Full Access Member
Joined
Mar 9, 2013
Messages
2,436
Reaction score
241
Location
Maryland
Soak it with the PB (both sides) and whack it around, around, around, around....it'll start moving.
 

jrogers

Full Access Member
Joined
Nov 23, 2013
Messages
54
Reaction score
0
Location
Indiana
Its soaking in pb overnight. I'm gonna try again in the morning. By the looks of it the poor thing probably had been dry of any grease for a long time
 
Top