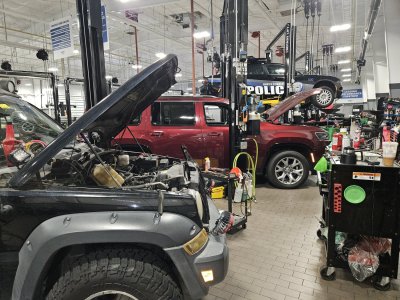
What did you do to your jeep today?

Disclaimer: Links on this page pointing to Amazon, eBay and other sites may include affiliate code. If you click them and make a purchase, we may earn a small commission.

duderz7

Full Access Member
Joined
Jan 20, 2016
Messages
1,637
Reaction score
1,428
Location
Weiser, ID
jeep may or may not have a failing passenger cat. trying some seafoam to see if that can't help clear up the problem.
No personal experience, but I think there's a product called catacleen, or something like that, supposed to actually work. I'm not usually one for the snake oil remedies, but might be worth a try.
 

burntkat

Full Access Member
Joined
Sep 14, 2021
Messages
350
Reaction score
263
Tomorrow is the day.... Finally. Going to get a good start early in the morning and R&R everything under the hood associated with the AC system. I should have functional AC in a vehicle for the first time in roughly 30 years (other than roughly 2 weeks when. I first got the Liberty).
 

seafish

Full Access Member
Joined
Jan 10, 2024
Messages
604
Reaction score
778
Tomorrow is the day.... Finally. Going to get a good start early in the morning and R&R everything under the hood associated with the AC system. I should have functional AC in a vehicle for the first time in roughly 30 years (other than roughly 2 weeks when. I first got the Liberty).

Would be great to eventually get a step by step description of what you did, as well as a parts list. ;)
 

burntkat

Full Access Member
Joined
Sep 14, 2021
Messages
350
Reaction score
263
Last edited:

burntkat

Full Access Member
Joined
Sep 14, 2021
Messages
350
Reaction score
263
Kinda sorta half-assing a livestream today...

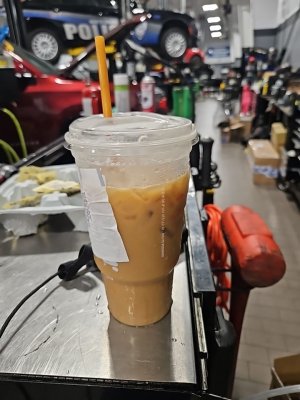
First, get a cool beverage. Preferably caffeinated.
 

Attachments

  • 5ae8242d-2fd8-4b8f-be8a-6c6fa4085e61.jpg
    5ae8242d-2fd8-4b8f-be8a-6c6fa4085e61.jpg
    96.5 KB · Views: 0

burntkat

Full Access Member
Joined
Sep 14, 2021
Messages
350
Reaction score
263
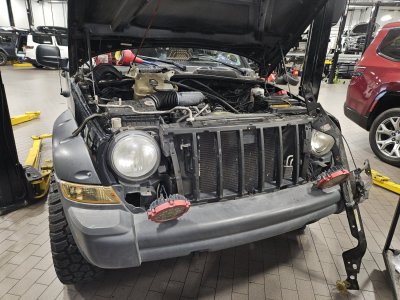
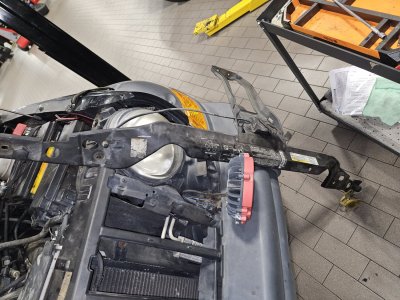
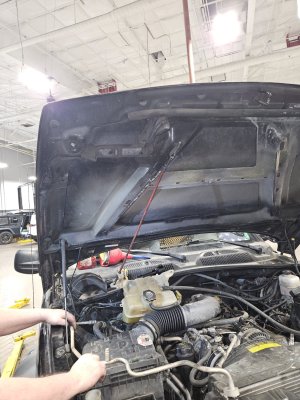
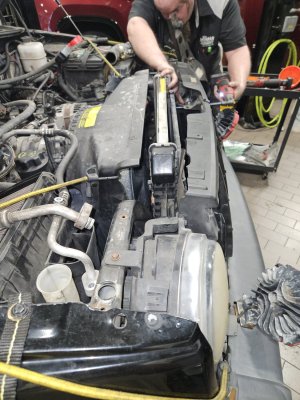
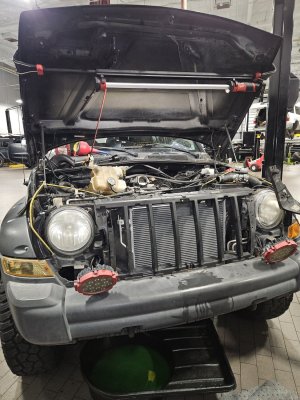
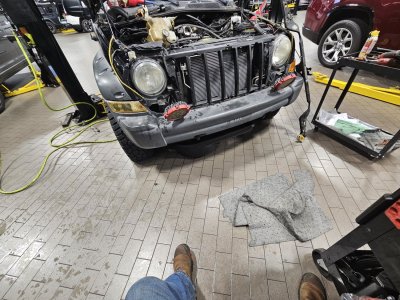
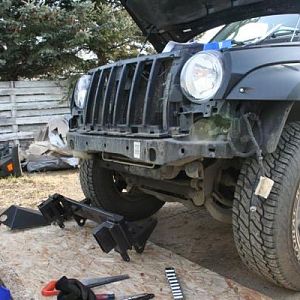
.... And remove the front grille trim panel, and radiator header panel...

Lay the header panel to the side. No need to disconnect the hood cables, unless you're really babying your Jeep. Up to you...
 

Attachments

  • 20260725_110601.jpg
    20260725_110601.jpg
    418 KB · Views: 2
  • 20260725_110608.jpg
    20260725_110608.jpg
    416 KB · Views: 2

burntkat

Full Access Member
Joined
Sep 14, 2021
Messages
350
Reaction score
263
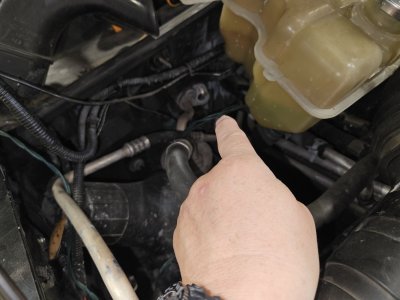
Assuming you have no pressure in the system (You MUST check first. It's a felony to let this stuff out into the atmo, and more importantly, not healthy to breathe. So having no pressure in the system, one way or another... Here's the first place to disconnect. Inboard of the PAX headlight there is a junction block. 13mm socket.
 

Attachments

  • 20260725_110616.jpg
    20260725_110616.jpg
    258.3 KB · Views: 1

burntkat

Full Access Member
Joined
Sep 14, 2021
Messages
350
Reaction score
263
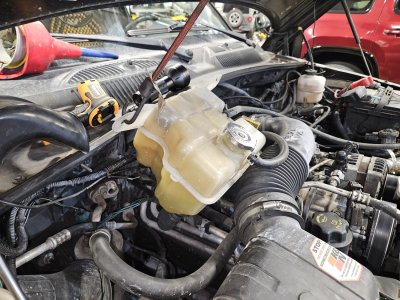
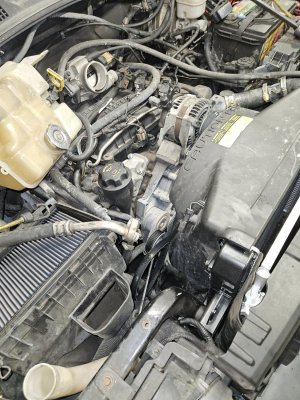
Follow it along the PAX fender to behind the coolant recovery tank. You will want to remove it and tie it out of the way.... Also, the airbox top. There's another junction block to the evaporator core (in the cabin and requires removal of the dash...beyond the scope of today's work).. Another 13mm socket for the nuts...
 

Attachments

  • 20260725_110704.jpg
    20260725_110704.jpg
    371.1 KB · Views: 3
  • 20260725_110643.jpg
    20260725_110643.jpg
    408.3 KB · Views: 3
  • 20260725_110626.jpg
    20260725_110626.jpg
    189.6 KB · Views: 3
Last edited:

burntkat

Full Access Member
Joined
Sep 14, 2021
Messages
350
Reaction score
263
And then if you have my luck... This is where you discover your 'little leak' is in each corner of the @##&##@$ radiator you just put in 2 years ago..... So dispatch the kid to pickup a radiator....
 

burntkat

Full Access Member
Joined
Sep 14, 2021
Messages
350
Reaction score
263
... And wait on the kid to get back. After all, he's getting paid well for this, and it won't be looked at kindly if I'm wrenching in this garage without him here.... Insurance and all....
 

Attachments

  • 20260725_114740.jpg
    20260725_114740.jpg
    482.3 KB · Views: 2

burntkat

Full Access Member
Joined
Sep 14, 2021
Messages
350
Reaction score
263
Kid got back with the new rad. Luckily it's a warranty job, so I will get my money back when I return this one. Just did the job 3 years ago. Enshitification continues in the modern market....

Open the new radiator...

(Hey, you're not supposed to pry with hardened steel!)

S.T.F.U, CARL!
 

Attachments

  • 20260725_122301.jpg
    20260725_122301.jpg
    228.5 KB · Views: 5

burntkat

Full Access Member
Joined
Sep 14, 2021
Messages
350
Reaction score
263
So this actually might make the job easier. R&R the condensor and radiator as an assembly. We shall see.

Yes, I am bored as I watch him work. How can you tell?
 

burntkat

Full Access Member
Joined
Sep 14, 2021
Messages
350
Reaction score
263
Nope, it's 2 bolts holding the condensor to the radiator. 10mm. It's a fool's errand trying to remove as an assembly.
 

Attachments

  • 20260725_124315.jpg
    20260725_124315.jpg
    332.1 KB · Views: 2

burntkat

Full Access Member
Joined
Sep 14, 2021
Messages
350
Reaction score
263
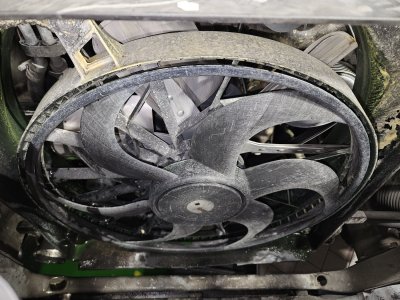
While the rad and condensor are out, got a good view of the cooling fans. I'd swapped the stock engine fan for a flex fan a while back owing to shit replacement fan couplings..

So what I have now is a severe duty cooling system. The engine fan moves as fast as the engine at all times. And yes it's noisy, because the electric fan and the engine fan blades have opposing pitch. Ie, as viewed from the front of the vehicle, the electric in the fan shroud is moving CW. The engine fan is moving CCW. This makes turbid airflow, and that equals noise.... And I just don't care. It's a Jeep. If anything, tubidity in the airflow probably is enhancing the cooling effect... After spending years in the Army driving HMMWVs, I kinda like the noise. It means my engine is properly cooling.

 

Attachments

  • 20260725_124909.jpg
    20260725_124909.jpg
    433.4 KB · Views: 1
Last edited:

burntkat

Full Access Member
Joined
Sep 14, 2021
Messages
350
Reaction score
263
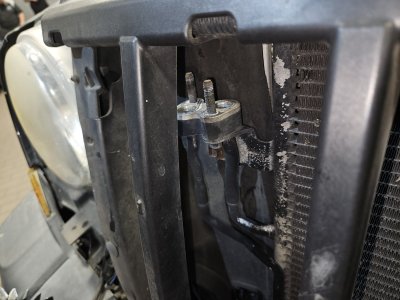
Protip- to get the rad separate from the condensor and out the vehicle, don't forget the 2 10mm bolts holding the oil cooler (probably PS cooler, but hey that's still oil) that hold the oil cooler in place. And it helps to remove the top bolts that hold the plastic subframe for the headlights and grill on, and gently pry out. Don't forget the rubber flaps that are on each side of the rad. They like to hang up on the other stuff and complicate removal.

But by all means reassemble the condensor and radiator as an assembly outside the vehicle. Don't forget the rubber flaps. They are VERY important to make sure you get proper airflow through the rad....

New rad and condensor are in now. Side quest of replacing the radiator is nearly done, back to the main job...
 

Attachments

  • 20260725_130431.jpg
    20260725_130431.jpg
    389.3 KB · Views: 0

burntkat

Full Access Member
Joined
Sep 14, 2021
Messages
350
Reaction score
263
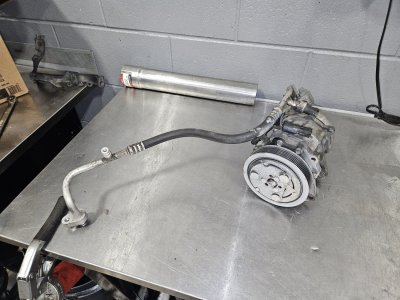
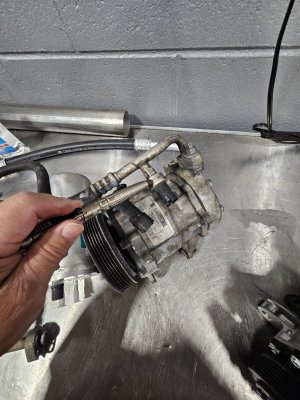
Remove the compressor. 2 15mm on the front into the timing cover and a 13mm going down into the cylinder head. Brings one of the lines with it....
 

Attachments

  • 20260725_133147.jpg
    20260725_133147.jpg
    468.5 KB · Views: 1
  • 20260725_133201.jpg
    20260725_133201.jpg
    400.4 KB · Views: 1

burntkat

Full Access Member
Joined
Sep 14, 2021
Messages
350
Reaction score
263
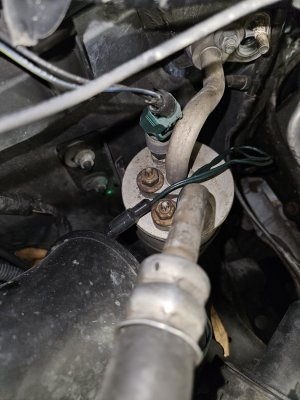
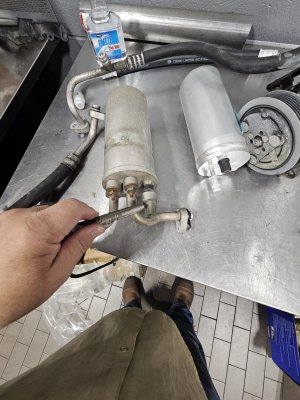
Last on our list is the accumulator aka receiver-dryer. Haven't got it out yet but looks like a 13mm for the line, and pinch bolt looks like an 8mm. See the green dot in the Pic.... The bolt is hard to see but it's right there where my laser pointer is making the dot...
 

Attachments

  • 20260725_133523.jpg
    20260725_133523.jpg
    283.5 KB · Views: 4

burntkat

Full Access Member
Joined
Sep 14, 2021
Messages
350
Reaction score
263
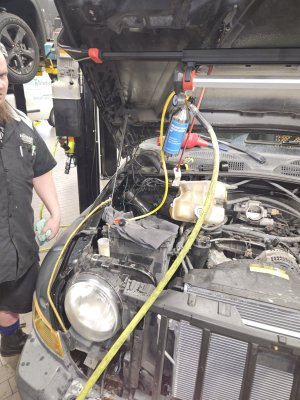
Once the Accumulator is out, it is time to blow out the evaporator core unless you are replacing it. None of the new stuff should need this. Absolutely DO NOT blow out the compressor or accumulator new components (or old if you are not replacing it).
This is a VERY messy operation. Think "automotive *******" session.... Wear your PPE.

.... And when done with the flush bottle, TURN IT OFF BEFORE REMOVING THE AIR HOSE... or you will wear it. Yes, sometimes I am a *******....

After you have flushed the evaporator both ways (backflush first, then forward flush), blow it out with shop air. LOTS of shop air. Don't stand in the cloud and breathe that crap, obviously.

Did I mention this is a messy evolution?
 

Attachments

  • 20260725_134934.jpg
    20260725_134934.jpg
    368.9 KB · Views: 5
  • 20260725_135831.jpg
    20260725_135831.jpg
    495.6 KB · Views: 4
Last edited:

burntkat

Full Access Member
Joined
Sep 14, 2021
Messages
350
Reaction score
263
So now we are at the 'installation is the reverse of removal' part of the -10 manual... (IYKYK).

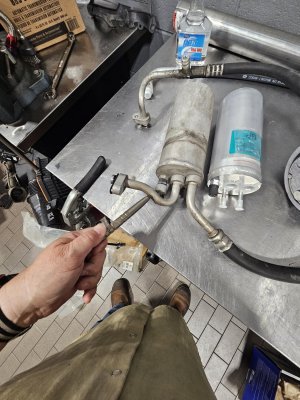
You will need to transfer over the sensor on the line at the compressor, and the sensor on the accumulator. Don't expose them to cleanser. I can't imagine it would do them any favors. You also need to save the accumulator to evaporator hardline. See the items I am touching with my pen in the pics....
Blow out any parts you are reusing *except for accumulator, compressor, and sensors*. That short piece of hardline between the accumulator and evaporator should be blown out as well. Using the cleanser is a good idea. As before, flush generously with shop air. Probably want to let the cleanser offgas too. Take a break and let it dry as much as it's going to. You won't want it to contaminate the new stuff.

This is a good time to read up on the literature that came with the compressor... How much PAG oil is needed, how to fill, etc...
 

Attachments

  • 20260725_140255.jpg
    20260725_140255.jpg
    379.1 KB · Views: 4
  • 20260725_140251.jpg
    20260725_140251.jpg
    334.5 KB · Views: 4
  • 20260725_140239.jpg
    20260725_140239.jpg
    375.6 KB · Views: 4
Last edited:

Latest posts

Members online

Top