jschenck
Full Access Member
I tried searching and finding a how to for this, but didn't have much luck. I found a few different threads with various tips and suggestions from people who have done this before. I was able to do this myself and decided to do a write up so that there would be a complete how to.
This is for the 02-04 KJ's
To start with, you will need to collect some tools.
You will need:
These are what I used, but you may find that you don't need some of these, or you need things that I haven't listed.
To get started, I ran the wiring first. Here is how I did it:
I ran the wires for the switch through this hole in the engine bay (located near the ECU) and into the fender.
From there, I ran it under the hood arm, and into the door jam.
Once I got it through the little foam piece, I ran it behind the door seal (instead of over, so that the seal isn't compromised and I don't risk any leaks) and into the fuse panel. I chose to run the wires through here because I couldn't find a hole in the fire wall, and didn't want to try to drill one. I also know that most people won't pay much attention to this area, so I figured that it would be a smart way to save time and work.
I ran the ground wire down behind the panel that covers the hood release latch (which pops off easily) and grounded it to an existing ground.
I mounted my switch on this panel, which is also easily removed. On the back side of this panel you will see where the plastic has been shaped to hold the factory switch for the Renegade roof lights. I cut the area inside this molded plastic with a dremel and a box cutter and slid my switch in. It made it a clean mount and kept the switch in an easy-to-reach place. I found it funny that when the factory printed "ON" on the switch, it was printed backwards, reading "NO" instead. (And no, I didn't put the switch in upside down, I checked that).
That's the basics for the wiring. Routing and oncealing the wiring that runs to the lights is a no-brainer and I'll leave that up to your preferences.
Now, when it comes to the mounting, this is what I did (the measurements were borrowed from another member here, whose name I don't recall now):
You will want to measure and mark 3 1/2" over from the rise in the bumper and 1" forward from the front edge of the grille.
Once you've marked this hole, get your drill and drill bit out and drill straight down through. You'll cut through the plastic fairly quickly and then you'll hit the metal of the bumper. Keep going. Once you punch through the metal you are good to go. Measure and drill the other side.
Now you'll need to slide your light brackets and lights into this hole, pushing the bolt all the way through. Have some one hold your light up straight so that you can get your bolt all the way through the hole.
Crawl under the front bumper and look straight up, where the tow hooks are mounted. If you have tow hooks, you may have to remove them. I don't, so I could access this hole easily. Using a socket and extension (6") thread your nut onto the bolt and tighten down.
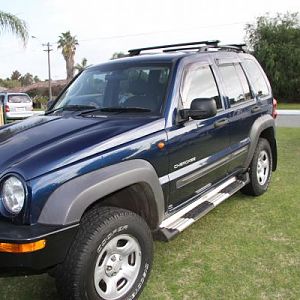
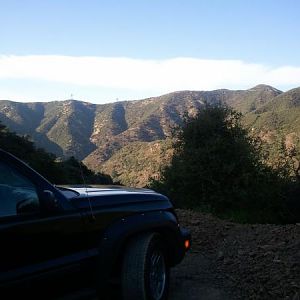
Once you get them hooked up and tightened down, this is the finished result!
If you have any questions, PM me! Good luck to those of you who try this yourself!
This is for the 02-04 KJ's
To start with, you will need to collect some tools.
You will need:
- Socket Set
- Drill/Drill Bits
- Pliers/Wire Cutters/Wire working tools
- Box Cutter and Dremel
These are what I used, but you may find that you don't need some of these, or you need things that I haven't listed.
To get started, I ran the wiring first. Here is how I did it:
I ran the wires for the switch through this hole in the engine bay (located near the ECU) and into the fender.
You must be registered for see images attach
From there, I ran it under the hood arm, and into the door jam.
You must be registered for see images attach
Once I got it through the little foam piece, I ran it behind the door seal (instead of over, so that the seal isn't compromised and I don't risk any leaks) and into the fuse panel. I chose to run the wires through here because I couldn't find a hole in the fire wall, and didn't want to try to drill one. I also know that most people won't pay much attention to this area, so I figured that it would be a smart way to save time and work.
You must be registered for see images attach
I ran the ground wire down behind the panel that covers the hood release latch (which pops off easily) and grounded it to an existing ground.
You must be registered for see images attach
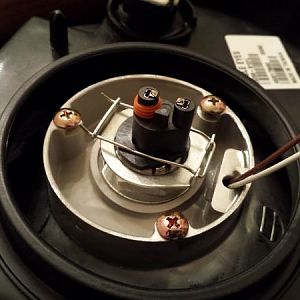
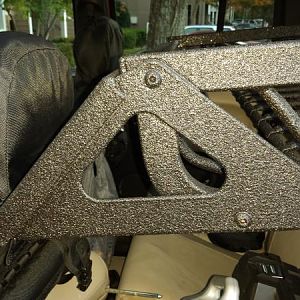
I mounted my switch on this panel, which is also easily removed. On the back side of this panel you will see where the plastic has been shaped to hold the factory switch for the Renegade roof lights. I cut the area inside this molded plastic with a dremel and a box cutter and slid my switch in. It made it a clean mount and kept the switch in an easy-to-reach place. I found it funny that when the factory printed "ON" on the switch, it was printed backwards, reading "NO" instead. (And no, I didn't put the switch in upside down, I checked that).
You must be registered for see images attach
That's the basics for the wiring. Routing and oncealing the wiring that runs to the lights is a no-brainer and I'll leave that up to your preferences.
Now, when it comes to the mounting, this is what I did (the measurements were borrowed from another member here, whose name I don't recall now):
You will want to measure and mark 3 1/2" over from the rise in the bumper and 1" forward from the front edge of the grille.
You must be registered for see images attach
You must be registered for see images attach
Once you've marked this hole, get your drill and drill bit out and drill straight down through. You'll cut through the plastic fairly quickly and then you'll hit the metal of the bumper. Keep going. Once you punch through the metal you are good to go. Measure and drill the other side.
Now you'll need to slide your light brackets and lights into this hole, pushing the bolt all the way through. Have some one hold your light up straight so that you can get your bolt all the way through the hole.
Crawl under the front bumper and look straight up, where the tow hooks are mounted. If you have tow hooks, you may have to remove them. I don't, so I could access this hole easily. Using a socket and extension (6") thread your nut onto the bolt and tighten down.
You must be registered for see images attach
Once you get them hooked up and tightened down, this is the finished result!
You must be registered for see images attach
If you have any questions, PM me! Good luck to those of you who try this yourself!
")