Ok if you have downloaded the 2003 Jeep KJ Service Manual go to Section 8W page #8W-12-29.
I know this page almost by heart as I have been here so many times!
This is going to be along story!

A few months ago I went through this procedure with someone having Fuse #34 blowing but I cannot remember what year/model he had!
So the wiring colors you see may be different to what the diagram shows..let me know what colors you have.
The wire colors are either a solid color like Black or Blue or Green etc. or more likely are a predominant color with another color as a stripe.
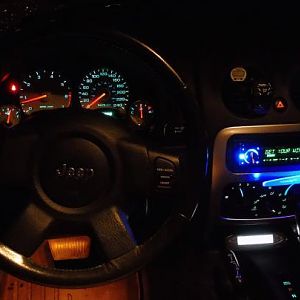
So on page 8W-12-29 you will see that fuse #34 is in the Junction Block which is the name for the Fuse Panel inside the cabin.
Wire color PK means that it is a solid Pink color. A BK/GR means a solid Black color with a Green stripe...the beginning of Section 8W explains these colors.
This Pink wire exits the Junction block on Connector number C1 pins 27, 15, and 12. also on Connector #C2 pins 19 and 18 and Connector C3 pin 29.
We have to eliminate these wires one by one to see where the excess current draw is.
One at a time pull out a connector and see if the fuse blows. I it no longer blows then that particular Connector line has the short on it.
If pulling out all the connectors does not stop the fuse blowing then that leaves the Body Control Module (BCM) which is plugged on the rear of the fuse panel.
So lets for example pull out Connector #C1 with a new fuse installed. That will isolate the Cluster, Left Courtesy Lamp and Right Courtesy Lamp.
Turn on ignition and see if the fuse blows. Let us assume the fuse no longer blows which will indicate that the short is on one of those lines. At Connector C1 you will need to physically cut each of the three suspect wire one at a time about an inch from the connector. The Index of the Section 8W will tell you where to find the page that shows the relevant Connectors with the Pin numbers....look for the Pink Wires and check which location in the Connector it is. Cut one wire and see if the fuse still blows. If it does, slip some Shrink Tubing over the cut wire, solder the cut ends together and slip the Insulation over it and heat it gently....we now know that this wire we cut does not have the problem so lets move onto to next pink wire etc.
Let us assume that C2 pin #18 has the short on it.
This goes through first Connector #C306 pin #20 and then through Connector #C308 pin #3. The Index at the beginning of Section 8W will show you where these connectors are located, what color they are and sometimes a picture of where they are are.
So disconnect Connector #C306 or #C308 which will isolate a lot of components at the bottom of the page...Lamps, Compass Mini-Trip computer if you have it. and see if the fault is in that line.
These large connectors like C#306/8 are difficult to open...they usually have a colored plastic section you have to depress or slide over before opening the connector!
Once you have found which line has the short, pull out the suspect component ie. Lamp, Radio etc. and inspect the empty sockets.
If you have nothing connected on the suspect wire then that wire is probably shorting through to engine/chassis somewhere....fairly common on these older Jeeps nowadays!
Use your Multi Meter set to Ohms to see if the suspect wire has any continuity to chassis when it has nothing connected to it. Make sure you do not touch the meter end with bare hands as this affects the reading.
You can tape a small pin/needle to one of the meter leads so that you can piece the insulation of the wire when testing it to chassis..close up the hole in the insulation with some glue or melt it when you are finished.
If you get any reading you will need to physically trace the suspect wire for damage whereby the insulation has worn through allowing the copper wire to short to engine/ground.
You will have to unwrap a lot of insulation to be able to trace the wire's path!
I you cannot physically trace the wire's complete path but you know that there is nothing connected to it such as Lamps etc.....in other words the wire should be hanging in mid air yet it shows a leak to ground....you can cut the bad wire off at both ends and replace it with a new wire soldered on at both ends and insulated.
My 2002 Export CRD had a front end collision which damaged many wires! I could not get to these bad wires so had to cut them off at both ends and replace them with new wires.
I replaced about 14 bad wires overall as time went by and marked my changes on the circuit diagrams for future reference!
Have fun....the Dealers will rather replace complete harnesses one at a time and charge you a fortune!