benibiker63
Member
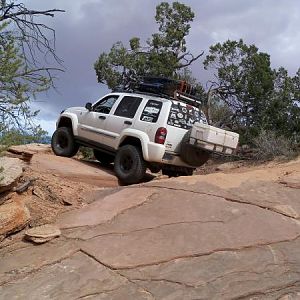
Washed and waxed after getting new tires installed.
You must be registered for see images attach


Disclaimer: Links on this page pointing to Amazon, eBay and other sites may include affiliate code. If you click them and make a purchase, we may earn a small commission.

Sure. I will have to grab a photo tomorrow. I thought I had taken one but it is of the old struts.So IFHoward can you post a pic of the new shock assemblies.
I was wanting to go with the 5100 series on the front.
But was detoured because of reading
That the bottom setting was 1” lift
This one feels like the OEM rubber compound so hopefully I will be pleasantly surprised.End nippers Will do it, 10 bucks at harbor freight. Or if you know a plumber pex clamp pliers work too. Hope you're boot lasts. I replaced one once only to have it fail quickly. It was more like flexible plastic than rubber.
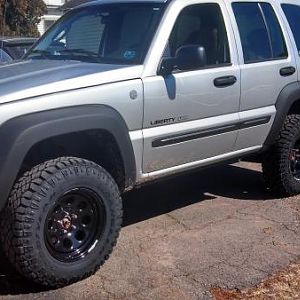
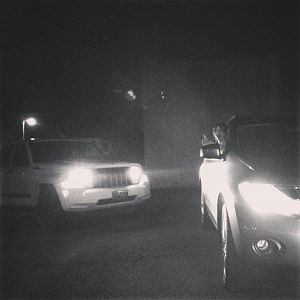
Looks great!Wrapped up the brake job. Didn't replace my hub assemblies, they felt fine. The KJ rolls again, minus warped brake rotors. Kind of a wild sensation to just hit the brakes and just, uh, slow down. No more fanfare
You must be registered for see images attach
You must be registered for see images attach
It does look great … maybe next on the to do list will be new headlamps … or at least a scrub, polish and UV seal. I used the TYC ones from Rockauto for about $30 each and then put a seal coat on them fresh out of the box.Wrapped up the brake job. Didn't replace my hub assemblies, they felt fine. The KJ rolls again,
Got any info on this? I have an old Military trailer I would like to build out.Check with the tiny trailers forum, www.tnttt.com. That’s where I learned everything I needed to build my off road camper trailer. It started as a military trailer though, so I didn’t have to go through the home built registration. That said, it passes PA trailer inspection every year.
I'm honestly surprised a 12 year old Fiat is still on the road.2004 Chrysler Sebring Convertible (stick)
2005 Chrysler Sebring Sedan (auto)
2005 Dodge Neon SRT-4 (with goodies)
2007 Jeep Liberty (stick)
2007 Chrysler T&C
2013 Fiat 500e
sooooo many choices...
I did mine 2 years ago, stock fitment, in the local Jeep dealership garage with my son (who is a mechanic there) and the proper tools... Which consisted of a 6' tall spring compressor.I have the assembled struts in my possession!!!
Each unit contains about 1600 lbs of explosive potential energy so I am giving them a wide berth until I can install them on Monday or Tuesday.
The 2927 springs from OME are rated at 400 lbs per inch of squish. Even with the proper equipment, compressing them to fit the shocks sketched out the 4x4 shop owner, who is used to working on Tacoma IFS and not Liberties. Apparently Toyotas are not as crazy.
I am about to do the same job for the front prop shaft. How about a link to those pliers? I need to buy my son a set for his box at work (so I can use them)One of the issues to repair from the lift failure incident is the CV boot on the drivers side. It got shredded by the springs exiting the chat.
You must be registered for see images attach
I ordered a Crown boot kit from Summit Racing, and watched a whole bunch of YouTube videos about how to replace a CV boot. Basically the outside joint has to come off for the boot to be replaced.
You must be registered for see images attach
In nearly every video the outer CV end has to be hammered off because there is an internal snap ring that needs to release, very much like the one that holds the axle into the diff. Here is my CV clamped in my vise with the boot cut away.
You must be registered for see images attach
I can tell you no amount of hammering with a BFH is going to get the end to release. Ask me how I know. Luckily the alloys used in the CV are harder than my hammers and it does not seem to be damaged.
You must be registered for see images attach
What ended up happening is I knocked out enough grease to discover that the snap ring has to be manually opened with snap ring pliers! In the pic above, the two ends of the ring at the 6:00 position have to be spread apart to 9:00 and 3:00 directions to release the splined shaft. Easy peasy after I figured that out.
You must be registered for see images attach
Here is the whole thing from the drivers side. The passengers side will be different because it has a long separate intermediate shaft. This photo kind of reminds me of the album cover from Rush’s Counterparts album.
You must be registered for see images attach
Here is the unit fully greased and assembled. It’s held in the vise and balanced against the band saw.
You must be registered for see images attach
I am temporarily stuck until I can get a pair of Oetiker pliers to clamp together the metal bands. They are on order and will arrive tomorrow.
You must be registered for see images attach