The $500 ScienceMobile build

Disclaimer: Links on this page pointing to Amazon, eBay and other sites may include affiliate code. If you click them and make a purchase, we may earn a small commission.

tommudd

Moderator
Staff member
Moderator
Joined
Jul 14, 2005
Messages
22,456
Reaction score
3,643
Location
Southeastern Ohio
Sitting here laughing , you mention lift kits and not needing them on BLM roads etc
Many folks say that and I just have to laugh everytime
I have aftermarket lifts on all 3 of my KJs
03 and 04 have the adjustable coilover kits that JBA sold
05 has OME kit
None of mine were done thinking it'll be better off road, all were done for better ride and handling on road as well
Since all of mine are mostly on road ( well some so called roads ) of some kind I like a better ride and handling all the time which what they all give me .
Not getting in your ideas or downing you , just an observation .
I have not owned a 4x4 in the last 45 years that kept stock suspension over a month or so after I bought it .
Ate a lot of Ramen noodles sometimes to do that but.............. , ;) ;)

Carry on , you're doing a good job of making it your own


oh wait my 04 I bought new and it was 5 months before I did first lift on it ( OME ) and even brand new it had horrible ride and handling in my opinion
And my Dodge4X4 van took a year before I got it lifted to run 38s
so wrong on two accounts
 

Johnny O

Just hangin' out.
Joined
Apr 29, 2021
Messages
2,398
Reaction score
3,234
Location
Bellevue NE
Sitting here laughing , you mention lift kits and not needing them on BLM roads etc
Many folks say that and I just have to laugh everytime
I have aftermarket lifts on all 3 of my KJs
03 and 04 have the adjustable coilover kits that JBA sold
05 has OME kit
None of mine were done thinking it'll be better off road, all were done for better ride and handling on road as well
Since all of mine are mostly on road ( well some so called roads ) of some kind I like a better ride and handling all the time which what they all give me .
Not getting in your ideas or downing you , just an observation .
I have not owned a 4x4 in the last 45 years that kept stock suspension over a month or so after I bought it .
Ate a lot of Ramen noodles sometimes to do that but.............. , ;) ;)

Carry on , you're doing a good job of making it your own


oh wait my 04 I bought new and it was 5 months before I did first lift on it ( OME ) and even brand new it had horrible ride and handling in my opinion
And my Dodge4X4 van took a year before I got it lifted to run 38s
so wrong on two accounts


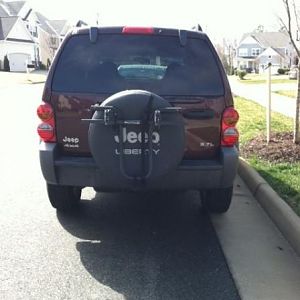
Ohhh, I agree with you 100%...however in this case, all the roads I'm taking in July I have taken before, in 2WD rentals or even one of my VWs. They are tame. (Heck, downtown Omaha is actualy rougher roads, no joke!) It is one of the advantages of having to return to the same sampling sites every year.

There are a few sites where I often just park and hike in. I hate to admit it but these days I err on the side of overly cautious in the desert. Plus, I like to hike!

Now the Sandhills, that's where it is gonna be mandatory....bouncing across ranchlands of soft sand with waist deep grasses....no roads to speak of....but I am not headed up there till September this year.


I will say this, I understand your feelings about the stock suspension. Sure, mines a bit worn, but dear god, what a sloppy mushy ride....then again, maybe because I'm just used to independent suspension in the rear and solid axel in the front.:p

In this case it is a matter of time and skill. Each weekend I decide I'm gonna do the lift, I find something more critical that needs attention soonest.
 
Last edited:

Johnny O

Just hangin' out.
Joined
Apr 29, 2021
Messages
2,398
Reaction score
3,234
Location
Bellevue NE
Put the finishing touches on the bodywork today. There wasn't much rust, but enough to warrant some skip coats of bondo and polyester fillers, plus some sanding. Got that squared away and then prepped and primed to get ready for the bed liner coat. (Pics to follow when I get it all done)

Also decided to give up on the flat floor. I'm just too tall, even with the seats down. No big deal, I can still hide in the seats when the weather gets nasty if need be. So I have redesigned to a gear/chow box that functions both in and out of the vehicle. There is a version 3, which incorporates the sink, but I haven't finished drawing it up yet.

I should note these are "rough" drawings, as during the design process I changed a few dimensions, but this shot gives you an idea of what I am up to. Version 2 has lots of hinges and folds down to the same exterior dimensions of Version 1.


You must be registered for see images attach
 

Johnny O

Just hangin' out.
Joined
Apr 29, 2021
Messages
2,398
Reaction score
3,234
Location
Bellevue NE
Getting a little discouraged. A month of learning, troubleshooting, and repairs…and I’m at that point where just when I start to see the light at the end of the tunnel a car in the train derails…

BUT, I’m used to this. One is never “done” with a high mileage vehicle.

on the way to work this morning, I can hear both parking brakes are dragging. I’ve also heard some clicks and clunks related to suspension. I’m also getting weird behavior off the infamous part time light that makes me wonder what’s going on with the stuff the sensor reads off of.
 

Johnny O

Just hangin' out.
Joined
Apr 29, 2021
Messages
2,398
Reaction score
3,234
Location
Bellevue NE
Thanks to a fine British Chap, I figured out what is wrong with my parking brakes during my lunch break. Say what you want about YouTube (personally, I hate it) but a ten minute video later and I went out and confirmed the issues in the parking lot. I'll ease Bert home shortly and rectify the issue. Wish it hadn't taken me three days to find said video though...

xc_hide_links_from_guests_guests_error_hide_media

In short, when I cleaned everything out, I neglected to understand how the cable to pad linkage works...two parts (pinion hinge? methinks it is called) are rusted together from it sitting for a year. All I have to do is tear it all down, pull them out, let 'em soak in good ol' Kano Kroil, then separate them and and clean them up. I however am going to make them better than stock by clearing the rust with Naval Jelly, giving them a coat of Rust Bonder, and then treat the two halves with a rattle can of PTFE Dry Film Lube.

I now realize at least some of the depressing noises I've been hearing are the result of seized up parking break linkages.

Sure, yet another noobie oversight on my part, but this is how we learn, right?
 

profdlp

Counting My Blessings
Staff member
Moderator
Joined
May 21, 2013
Messages
5,817
Reaction score
1,766
Location
Westlake, Ohio
Seeing that makes me want to have another crack at mine, which have never worked. I replace everything (rotors, pads, and parking brakes) a few years back and the brakes are great, just no parking brake. I have spun that goofy little star around so many times trying to get them adjusted that I have lost count.
 

Johnny O

Just hangin' out.
Joined
Apr 29, 2021
Messages
2,398
Reaction score
3,234
Location
Bellevue NE
Seeing that makes me want to have another crack at mine, which have never worked. I replace everything (rotors, pads, and parking brakes) a few years back and the brakes are great, just no parking brake. I have spun that goofy little star around so many times trying to get them adjusted that I have lost count.
Same problem here. Just pulled driverside out…sure enough seized into one piece! Of course mines rusted in the “on” position. Kroil to the rescue! Time for more swearing. Can’t believe I missed such an obvious detail on so simple a system…:rolleyes:
 

tommudd

Moderator
Staff member
Moderator
Joined
Jul 14, 2005
Messages
22,456
Reaction score
3,643
Location
Southeastern Ohio
Getting a little discouraged. A month of learning, troubleshooting, and repairs…and I’m at that point where just when I start to see the light at the end of the tunnel a car in the train derails…

I’m also getting weird behavior off the infamous part time light that makes me wonder what’s going on with the stuff the sensor reads off of.

Idiot light for transfer case is just that
I've known people who have ran with it coming on and off for years LOL
 

Johnny O

Just hangin' out.
Joined
Apr 29, 2021
Messages
2,398
Reaction score
3,234
Location
Bellevue NE
Idiot light for transfer case is just that
I've known people who have ran with it coming on and off for years LOL
Yeah! I read all about it…though in my case it’s starts “vibrating” as the xfer goes under load at freeway speeds.
Took a good long look at idle, and sure enough, there’s a bit of bounce around in it when I had a coworker rev it a bit. I might mount my go pro and take a look at it on the drive to work tomorrow. I’m guessing a rusted out/missing mount…but that’s based of a similar issue VW transaxles get.
 

Johnny O

Just hangin' out.
Joined
Apr 29, 2021
Messages
2,398
Reaction score
3,234
Location
Bellevue NE
OK, it is 97F and the driveway was HOT…but got the parking brakes freed up.

For reference, i was able to get both sides freed up without pulling the hubs! Used lots of Kroil and my trusty Knipex water heater pliers, plus some gentle tapping with a screwdriver and mallet.

heres what it looks like with parking brake ON:
You must be registered for see images attach

And off: Note it’s still a little hung up…tab should contact nub. Worked the brake a few times and both sides working properly.
You must be registered for see images attach


Just need to adjust frakkin tension stars now.

Still easier than same on a VW…
 
Last edited:

Johnny O

Just hangin' out.
Joined
Apr 29, 2021
Messages
2,398
Reaction score
3,234
Location
Bellevue NE
should not be that much vibration
That’s what I thought. Good news is students are gone…and I have an air conditioned garage attached to my greenhouse at our outdoor research facility…so I’ll park it in there and take a good hard look at the mounts and such.

I know my driver front motor mount has the BUNA squashed out, hopefully it’s something like that. In the meantime I’m gonna hit the books and figure out what I need to look at!
 

Johnny O

Just hangin' out.
Joined
Apr 29, 2021
Messages
2,398
Reaction score
3,234
Location
Bellevue NE
Well, just scorched myself good out in the driveway, but sure enough...got a rusted out transmission mount. Ordered a new one for install on Thursday.

Been looking for proper rock guards for my headlights. Put a lot of effort into restoring them, plus rock guards are kind of a tradition on my vehicles. Of course, there are none for KJs that aren't in a bull bar shaped for KK headlights for some reason.

So, decided to make my own. Measured and sketched and planned...but couldn't find the proper sieve mesh that scales properly with our oddball 8 inch-ish diameter lenses.

Then I had an epiphany. As a rockhound and fossil hunter I own a number of "U.S. Standard" type geologic sieves-all salvage. I rarely use the larger mesh sizes so I have tons sitting around unused...and they look like antiques as they are all hand soldered brass and copper even though most are only a decade or so old. So I figure I can steal the mesh out of a pair to fab my guards.

Sure enough...not only did I find a mesh size (AKA sieve) that looks good...US standard geologic sieves are the correct diameter and fit perfectly into the plastic front grill over each headlamp! So a mad dash through old boxes of science junk I have both at home and at work, and darned if I didn't find another! So with minimal effort and minimal modification to the vehicle or the sieves I get a custom pair of rock guards for Bert.

I have them in the parts washer right now. I'll media blast them and prime and paint. A ring of automotive adhesive double sided tape and done!

For those unfamiliar with what I am talking about:

Gonna turn a pair of these with 9.4mm mesh opening (0.371 in):

You must be registered for see images attach

Into a pair of these, but for an 07 KJ:
You must be registered for see images attach
 

Johnny O

Just hangin' out.
Joined
Apr 29, 2021
Messages
2,398
Reaction score
3,234
Location
Bellevue NE
Got up at 0400 today and replaced the rusted out trans mount. It was NOT fun. But had to do it early before the dangerous heat kicks in today.

Funny how 100F @ 0% humidity doesn’t bother me, but 100F @ 80% ***** my will to live…
 

Johnny O

Just hangin' out.
Joined
Apr 29, 2021
Messages
2,398
Reaction score
3,234
Location
Bellevue NE
Got me a tank of the good detergent 87 today on the way to work. 20 miles later the MIL shuts off. Guess some injectors were a bit dirty eh? (Course new plugs and COPs all around helped even more)

waiting on a few parts, but get the recalled rLCAs replaced Saturday.

Monday, dropping it off at the shop for a lift and alignment!
 

tommudd

Moderator
Staff member
Moderator
Joined
Jul 14, 2005
Messages
22,456
Reaction score
3,643
Location
Southeastern Ohio
Have they ever installed a lift on a Liberty ?
Seems a lot of places never have and the owner is less than satisfied due to poor install
Not knowing how to install bumpstops etc
 
Joined
Jun 23, 2020
Messages
340
Reaction score
187
Location
Avon Lake, Ohio
So far here is the list of stuff so far:

Just to get it road worthy for now (it is literally six blocks to work, so I figure it is a good time to drive it and find out what else it needs!)

Regulator and motor assembly for passenger rear window- ready to install this sunday

Drive train: (ready to install this weekend once the weather figures out what it is going to do)

Front drive shaft (as the previous owner lost the one that was in there)
CV rebuild kit

Suspension: (will install once all bits arrive, weather is decent, and I confirm the local off road joint can align libertys)
2 ea OME springs 2297
2 ea OME springs 2948
2 ea OME struts
2 ea OME rear shocks
Note- got these all as a 1.5" heavy weight lift set via Quadratec...apparently is a minor back order type thing going on...and I kind of gave up on trying to comprehend Jeep Shocks and Struts numbers

2 ea Terraflex 1903200 front bump stops

4 hockey pucks, 2.5" 3/8" bolts, washers, nuts (as suggested earlier...will add baling wire and duct tape as needed...;))

To be ordered/scavenged/traded for my firstborn, etc. etc. etc. :
2 ea JBA UCAs
5 ea Toyo Open Country AT III @ 225/75r16
5 ea wheels for the Toyos (more research needed)
something to replace those plastic roof rails
Replacement interior panel for driver side front door armrest


And likely a bunch of other stuff I don't know about or haven't discovered needs replacement yet...

What color door panel do you need? I have a set of grey panels from an 06 Sport (Black exterior) that I'm no longer using. Armrests included. They're just sitting in my parts pile. Shoot me a message if you're interested.
 

Johnny O

Just hangin' out.
Joined
Apr 29, 2021
Messages
2,398
Reaction score
3,234
Location
Bellevue NE
What color door panel do you need? I have a set of grey panels from an 06 Sport (Black exterior) that I'm no longer using. Armrests included. They're just sitting in my parts pile. Shoot me a message if you're interested.
I ended up getting creative with JB Weld and Apoxy Sculpt and was able to fully restore the original armrest and get it back on the door panel! Thank you though!
 

Johnny O

Just hangin' out.
Joined
Apr 29, 2021
Messages
2,398
Reaction score
3,234
Location
Bellevue NE
Very cool! Send a pair my way!
We shall see if they come out as planned. It has been too dang hot around here thanks to the corn humidity to do much work. I keep sweating up the old bifocals to the point I can't see...LOL. Today, by the time I got home from work, it was 110F in my driveway. Been too humid to breathe here in the flatlands. (Sad, but the weather is nicer in Millard County, Utah than it is in Omaha Metro right now.)

The only real work I have to do on these is to remove the bead lip on the top edge, and remove the stacking ring from the bottom edge. I will have to cut the main cylinder at a tricky angle to get proper fitment, but shouldn't be too hard. Today I fabricated two rings of the appropriate size and scale out of heavy card stock. I can trim those with scissors to get a good fit, then use them as a template to cut the brass. Once cut, I'll do the planned media blast and primer coat, Then give them a good rattle can of bedliner black. Haven't decided yet if I am going to rivet them or just use heavy duty tractor trailer bumpstop adhesive to fit them permanently into the grille.

I probably wont get to these till Sunday however. Friday is a short work day for me, so I plan to work on cosmetics. Got all the body work finished and primed, so will get the remainder of the bed liner sprayed and get the door bump guards reinstalled. I painted them the same red as the grille and then hand enameled the "liberty" in the same white as the rest of the body. Should look pretty sharp against the black bedliner.
 

Members online

No members online now.
Top