
jfortier777
Full Access Member
So quite a few of you have been asking, and here the info.
Underbody/Interior lighting on a jeep liberty.
For those of you who are blind, I have an 05 renegade.
And let me preface this by saying, it is incredibly simple to do, and it can make your Liberty stand out 300% better than before(As per results from an independant research company).
Moving on.
Here are some of the final result pictures. I am going kind of backwards with the pictures here since I kind of installed them spur the moment and havent taken the detailed shots yet. (Don't worry I set aside time tomorrow morning for the photo session.)
Anyway. Here we go. Information will follow this set of pictures.
Power Inverter for the interior lights
You say Bull Bar. I say workbench.
Parts and Panels begin to fly. (Hey that could be a song)
Old lights
Old lights on right, new lights on left.
Its so incredibly easy to crawl under this thing.
I put four 12" bulbs under the back set.
All set.
Now to make it all wireless.
Straight from China, home to every random electronic accessory you can think of.
A closer look.
The relays. SPDT with connections for both NC and NO
Couple of poses.
Hot.
Ok then; on to the information you are going to want now.
Please take note that I have included the links.
Materials Needed to Complete Project: "Glowing Liberty"
1 - Green Led underbody kit. Comes with mounting hardware. - buy -
1 - Power drill
10-20 - Self tapping screws ( SHORT! )
Tons - Zip ties
A bit - of finesse
6 - 12" Green Cold Cathodes - buy -
2 - 600V cathode Inverters (comes with a cathode kit, try not to buy them seperate)
1- Wireless control module - buy- (Scroll down to see mine S12-4T with C-4 remotes)
2 - 600V Dual Cathode inverters (You'll understand later)
1 - wire stripper
1 - crimp tool
Underbody/Interior lighting on a jeep liberty.
For those of you who are blind, I have an 05 renegade.
And let me preface this by saying, it is incredibly simple to do, and it can make your Liberty stand out 300% better than before(As per results from an independant research company).
Moving on.
Here are some of the final result pictures. I am going kind of backwards with the pictures here since I kind of installed them spur the moment and havent taken the detailed shots yet. (Don't worry I set aside time tomorrow morning for the photo session.)
Anyway. Here we go. Information will follow this set of pictures.
You must be registered for see images attach
Power Inverter for the interior lights
You must be registered for see images attach
You say Bull Bar. I say workbench.
You must be registered for see images attach
Parts and Panels begin to fly. (Hey that could be a song)
You must be registered for see images attach
Old lights
You must be registered for see images attach
Old lights on right, new lights on left.
You must be registered for see images attach
Its so incredibly easy to crawl under this thing.
You must be registered for see images attach
I put four 12" bulbs under the back set.
You must be registered for see images attach
All set.
Now to make it all wireless.
You must be registered for see images attach
Straight from China, home to every random electronic accessory you can think of.
You must be registered for see images attach
A closer look.
You must be registered for see images attach
The relays. SPDT with connections for both NC and NO
You must be registered for see images attach
You must be registered for see images attach
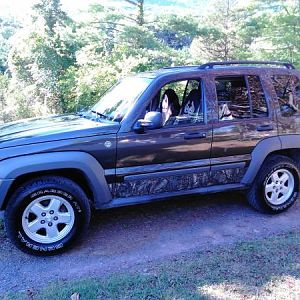
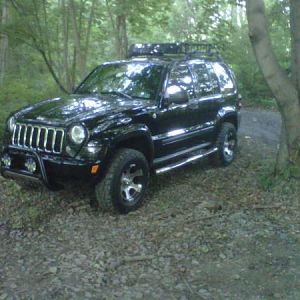
Couple of poses.
Hot.
Ok then; on to the information you are going to want now.
Please take note that I have included the links.
Materials Needed to Complete Project: "Glowing Liberty"
1 - Green Led underbody kit. Comes with mounting hardware. - buy -
1 - Power drill
10-20 - Self tapping screws ( SHORT! )
Tons - Zip ties
A bit - of finesse
6 - 12" Green Cold Cathodes - buy -
2 - 600V cathode Inverters (comes with a cathode kit, try not to buy them seperate)
1- Wireless control module - buy- (Scroll down to see mine S12-4T with C-4 remotes)
2 - 600V Dual Cathode inverters (You'll understand later)
1 - wire stripper
1 - crimp tool
As an eBay Associate we earn from qualifying purchases.
 /
/