Sludge Death.....

Disclaimer: Links on this page pointing to Amazon, eBay and other sites may include affiliate code. If you click them and make a purchase, we may earn a small commission.

dougmac

Full Access Member
Joined
Apr 20, 2015
Messages
67
Reaction score
1
Location
Lake Stevens, WA
Sludge pictures......

Here are a couple pictures of the sludge build-up in the heads. Its no wonder the sludge found it way to the pan and plunged the oil pump suction screen.

You must be registered for see images attach


You must be registered for see images attach


You must be registered for see images attach


You must be registered for see images attach

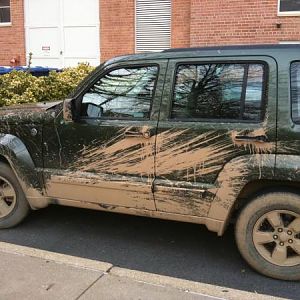
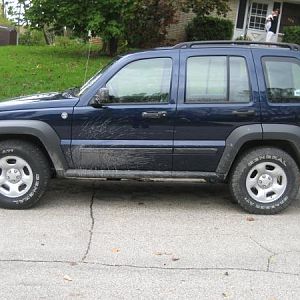
At least they took care of the outside :emotions34:
 

CzarKJ

Full Access Member
Joined
Mar 3, 2013
Messages
2,605
Reaction score
3
Location
Townsend, MA
This makes me want to go change my oil... and I just did...

Glad you are treating her right.
 

dougmac

Full Access Member
Joined
Apr 20, 2015
Messages
67
Reaction score
1
Location
Lake Stevens, WA
Going back together.....

Today I was able to start putting her back together. I was able to get the lower end done. I got started on the heads. They are disassembled and I have stared cleaning them to put them back on the beast.

You must be registered for see images attach


Block honed, cleaned, painted and ready to start assembling.

You must be registered for see images attach


Bearing clearance checked and crank installed.

You must be registered for see images attach


Bed plate installed and torqued up.

You must be registered for see images attach


Pistons in next...

You must be registered for see images attach


Rod bearing clearances measured. Connecting rods all torqued.

You must be registered for see images attach


Time to get started on the heads

You must be registered for see images attach


I rolled it out of the garage and cleaned the engine bay all up. Just waiting to finish the engine so I can stuff it in....
 

libertybob

Full Access Member
Joined
Jan 31, 2015
Messages
210
Reaction score
3
Location
Lilburn
Question...

Why did you decide to acquire a donor engine rather than rebuild the original? The original crank could have been ground (or built up with weld material and re-ground if the scoring was too deep), one rod replaced, and the block hot tanked. Was the decision based on economics (cheaper to buy a good engine rather than re-build the original) or some other reason? I usually like to rebuild the original if possible but sometimes economics or un-repairable damage dictate getting a replacement. Am very interested in why you chose the donor route as this may be the way most of us should go in future engine rebuilds. Good work - thanks for sharing your experience. Very interesting!
 

dougmac

Full Access Member
Joined
Apr 20, 2015
Messages
67
Reaction score
1
Location
Lake Stevens, WA
Some parts I like to see matched as they came out of the factory. For example the crank and all of the rods. With the precision machining of today's parts I am not even sure of that even makes much sense.

Different from your preference, I don't see any value in maintaining the original parts in the engine. In addition to the expense to get the crank repaired, I am not a fan of welded cranks. I would much rather get a used crank and have it machined than have one welded. Additionally, I had a good crank and a set of rods that matched in my possession.
 

TwoBobsKJ

Full Access Member
Joined
Jan 28, 2011
Messages
2,637
Reaction score
17
Location
Northern Ohio
Dougmac, your shop makes me jealous - looks like a NASCAR shop!! :icon_lol:

Just had a thought... Did you transfer the reluctor ring from the crankshaft and camshaft tone ring from your original engine to the donor? If the donor block came from a model that used a different computer then you'll have a frustrating time come start-up.

Not being a smart*** - you have professional wrenching experience and I'm a weekend hack. If maybe I can save some aggravation then my day is complete :waytogo:

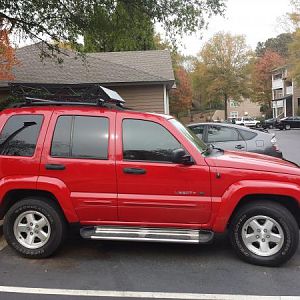
P.S. The mechanicals on the Liberty are pretty easy to work on and maintain - but if the body gets cancer it's pretty much over. But the Jeep you picked up looks amazing!

Bob
 
Last edited:

dougmac

Full Access Member
Joined
Apr 20, 2015
Messages
67
Reaction score
1
Location
Lake Stevens, WA
Dougmac, your shop makes me jealous - looks like a NASCAR shop!! :icon_lol:

Just had a thought... Did you transfer the reluctor ring from the crankshaft and camshaft tone ring from your original engine to the donor? If the donor block came from a model that used a different computer then you'll have a frustrating time come start-up.

Not being a smart*** - you have professional wrenching experience and I'm a weekend hack. If maybe I can save some aggravation then my day is complete :waytogo:

P.S. The mechanicals on the Liberty are pretty easy to work on and maintain - but if the body gets cancer it's pretty much over. But the Jeep you picked up looks amazing!

Bob

Thanks Bob!
My shop is my favorite place to hang out. :)

I read here about the reluctor ring change from the different model years. Both engines were 2004's and I double checked to be sure they were the same. Thanks for mentioning it anyway... I'll bet its a pretty sad day when you have to take the thing back out to change that!

I did mange to get the heads cleaned up and put back on the beast today. When I did it, I used my TV as a monitor to display the torque sequence. It worked really slick.

You must be registered for see images attach


You must be registered for see images attach
 

dougmac

Full Access Member
Joined
Apr 20, 2015
Messages
67
Reaction score
1
Location
Lake Stevens, WA
Timing Chains....

Saturday morning it was time to put the cams and timing chains in the beast. the complicated timing chains are not for the weak at heart....

Installing the cams were first up..... At TDC the pin that aligns the sprocket should be straight up

You must be registered for see images attach


The left cam was in a neutral position and laid easily in the straight up position.

You must be registered for see images attach


The right cam did not want to hold the postion, I left it rotated a few degrees to the left so I could rotate it in the direction of rotation to the proper position.

You must be registered for see images attach


I paint marked the balance shaft timing mark on the idler gear.

You must be registered for see images attach


Marked the cam chain timing marks. Front sprocket at the 8:00 position is the mark for the right cam. Rear sprocket at the 4:00 position is the left cam mark.

You must be registered for see images attach


Marked the primary chain timing marks.

You must be registered for see images attach


Pressed the primary gear onto the idler assembly and transferred the cam chain marks to the window where I could see them with the chains in place. (8:00 left, 4:00 right)

You must be registered for see images attach


Marked the chains and the cam sprockets.

You must be registered for see images attach


Marked the balance shaft.

You must be registered for see images attach


Lined up all of the marks and bolted everything in place. Made a couple of revolutions to make sure everything worked. This picture is taken after I turned it a couple of times... so the chain marks are out of place.
 

dougmac

Full Access Member
Joined
Apr 20, 2015
Messages
67
Reaction score
1
Location
Lake Stevens, WA
It runs!!

You must be registered for see images attach


Assembly complete, off of the engine stand and ready to install.

You must be registered for see images attach


All bolted up and ready to put the rest of the stuff on so I can fire it up.

You must be registered for see images attach


Fire in the hole!! It ran perfect.... except for a bit of an oil leak.... doh, left the oil pressure sensor loose. :emotions34:

You must be registered for see images attach


Installation complete!! Time to drive it and see how it performs!

You must be registered for see images attach


Made a last minute repair to the completely stupid battery cable clamps that came on the beast.

You must be registered for see images attach
 

LibertyTC

Well-Known Member
Staff member
Moderator
Joined
Oct 24, 2008
Messages
9,099
Reaction score
1,766
Location
B.C. Canada
That is awesome work! Glad it runs well!
I wish I had a shop, any shop LOL...
Back to post #21 where all the sludge is present...
Is this simply an owner not changing their oil frequently or PCV plugged up and 10,000 mile intervals? Any ideas here?
I would hope no 3.7 looks like that at 3500 mile oil changes.
 

twowings

Full Access Member
Joined
Nov 23, 2014
Messages
802
Reaction score
3
Location
Tulsa, OK
Congratulations! Thanks for sharing all the great information!! :happy160:
 

TwoBobsKJ

Full Access Member
Joined
Jan 28, 2011
Messages
2,637
Reaction score
17
Location
Northern Ohio
That's fantastic!

Makes me want to clean the engine and engine bay to get it looking new like yours :waytogo:

Those timing chains are interesting, aren't they? I think I read that section of the FSM 20 times to make sure I did it right. A buddy came over to help me install the chains - nice to have another set of hands - and he was cross-eyed thinking about the timing marks that had to be lined up.

Dude, you've got yourself a new Jeep Liberty!! :happy160:

Bob
 

dougmac

Full Access Member
Joined
Apr 20, 2015
Messages
67
Reaction score
1
Location
Lake Stevens, WA
That is awesome work! Glad it runs well!
I wish I had a shop, any shop LOL...
Back to post #21 where all the sludge is present...
Is this simply an owner not changing their oil frequently or PCV plugged up and 10,000 mile intervals? Any ideas here?
I would hope no 3.7 looks like that at 3500 mile oil changes.

That is definitely the big question.... how neglected was it?

One thing I did notice, it has 170,000 miles on the odometer. There was a quick-lube sticker on the windshield that said next change is due at 152,000.... could it have had at least 21,000 miles on the oil? Looking at the inside of the engine, it seems likely....
 

Aztimer2

Full Access Member
Joined
Aug 9, 2016
Messages
112
Reaction score
2
Location
Glendale,AZ
Here are a couple pictures of the sludge build-up in the heads. Its no wonder the sludge found it way to the pan and plunged the oil pump suction screen.


You must be registered for see images attach


You must be registered for see images attach


You must be registered for see images attach


You must be registered for see images attach


At least they took care of the outside :emotions34:


This was great to read through. Thanks for the pictures to help tell the story. Like the other guys said, that's a nice garage! Is she still on the road?


Sent from my iPhone using Tapatalk Pro
 

dougmac

Full Access Member
Joined
Apr 20, 2015
Messages
67
Reaction score
1
Location
Lake Stevens, WA
This was great to read through. Thanks for the pictures to help tell the story. Like the other guys said, that's a nice garage! Is she still on the road?

Yes, it is still looking good and going down the road. I commute 70 miles round trip each day in the ole girl. It has gone 40,000 miles since the rebuild. :)
 
Last edited:

wheeee32

Full Access Member
Joined
Feb 27, 2009
Messages
1,349
Reaction score
14
Location
Not the mountains.
Yes, it is still looking good and going down the road. I commute 70 miles round trip each day in the ole girl. It has gone 40,000 miles since the rebuild. :)

Hell yeah! I love to see reliable vehicles running like new again.:happy160:
 
Top