blue_kjR417
Platinum Renegade
HOW TO: Order and Install Rear Coil Spring Isolators - Completed
Briefing and Reasoning
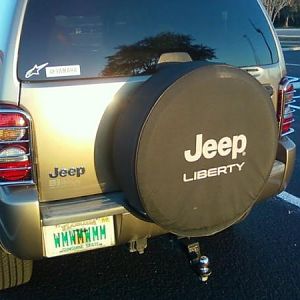
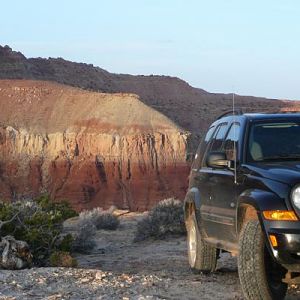
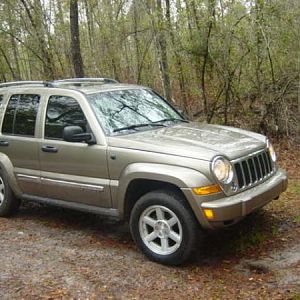
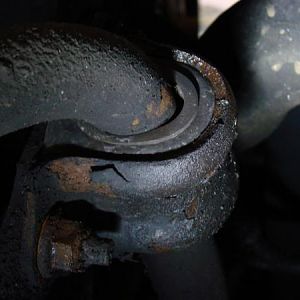
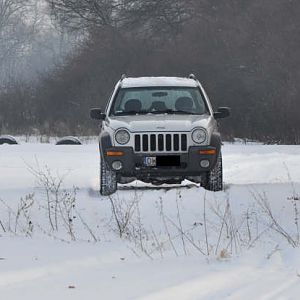
I did a "Clevis Lift" on my KJ in late 2009. The actual lift amount results vary tremendously between the Liberty's when doing clevis lifts. I'm not sure why, but they do. My KJ took very well to the clevis modification. Well enough that now my front end is higher than the rear. So I decided to steal the fix from the guys with un-level OME/Rancho lifts. They commonly have the same problem with the front being higher than the rear when doing a full suspension lift. To fix it they buy extra rear coil spring isolators to stack above the rear coil spring to add height and level out the stance. The KJ comes from the factory with 1 isolator above each of the rear coil springs, for a total of 2. You can add 1 to each of the existing isolators, for a total of 4, and gain about 1/4" of lift in the rear. You can also add 2 to each of the existing isolators, for a total of 6, and gain about 1/2" of lift in the rear. I measured from the ground to the bottom edge of my fender flare on the front drivers side and read a 32 1/2". Then measured the same on the rear drivers side and read 32" even. With those reading I decided to go with the 1/2" lift set up to try and get it level.
Ordering
After deciding which set up I wanted to use, I ordered 4 rear coil spring isolators from Chrysler Parts Direct.com. Click the link and after the page loads scroll down the page and you'll see on the left you'll see a series of drop down menus. Fill out the menus on the far left under the "Replacement Parts" section. It's label "A", then click search. After the next page loads, finish filling out the "Mechanical Catalogs" section. The site will automatically redirect you to the catalog for your Jeep. Then on the left of the screen, there are several titles such as: "Alternator, Automatic transmission, Body hardware, Brakes, Clutch". Click the title that says "Rear suspension" and a list of subtitles will appear. Click the subtitle "Suspension components" and another section of subtitles will appear below "Suspension components". Click the subtitle "Spring insulator" and in the main window you will see two rows come up under the description it says "Spring insulator, liberty, upper" and below that "Spring insulator, liberty, lower" be sure to select the upper, because the lower pieces will not stack together. You can either click the view illustration button to look at the exploded view of the assembly or go ahead and click the add to cart button. After adding to cart I figure most of you know how to check out from an internet based buying system. So after ordering they'll be shipped to you and now its time for the next section of this "HOW TO:".
P.S.
The CPD site has the isolators listed as $10.37 each. For 4 the total came to $41.48 without shipping. CPD makes it very clear that they do not charge shipping costs until after the order has been shipped that way they only charge what they need. Therefore be sure to account for that extra amount to be used when you purchase. They sent me an invoice for $41.48 but took from $52.37 my bank account when shipped. That extra $10.89 was for shipping charges. The invoice will say $0.00 for shipping charges but that is only because they have not set the shipping price yet. So, be prepared to have that extra money for shipping after they send you an invoice.
Install
Estimated Time Required: + or - 1 Hour and 30 Minutes
Suggested Tools:
Floor Jack
2 Jack Stands
3 6" 2"x4" Blocks
2 8" 2"x4" Blocks
Large Hydraulic Jack
Small Hydraulic Jack
Tire Iron or Impact Wrench with 3/4" Socket
5/8" Combination Wrench
19mm Socket and Socket Wrench
STEP 1:Unpackaging
After my order from CPD was delivered by UPS I opened the package to find my 4 isolators wrapped in plastic and ready to go!
This photo shows how I plan to install 2 stacked together above each ccil spring in the rear.
STEP 2:Park, Jack, Wheel Removal
Find a place to park your Jeep that is good and solid. Ideally a shop floor, but unfortunately for me my shop floor was occupied by our 27" SeaRay and my Dads motorcylce. So I used the drive in front of the shop, it's relatively solid chat.
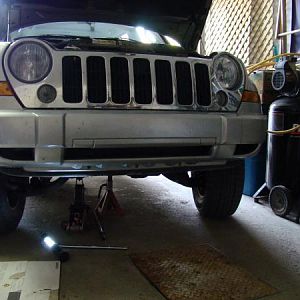
After parking your Jeep in a solid location drag out your floor jack. Slide the jack under from the rear of your rig with lift point directly under the rear differential. If you're using a tire iron to remove your rear wheel lug nuts you might want to loosen them before jacking up the jack. If you're using an impact wrench like me, you can go ahead and jack it up first. Jack the jack until the rear tires are a several inches off the ground.
Slide your 2 jack stands under your rig just in front of the rear tires. Place one 6" 2"x4" block above each of the jack stands, so that is between the stand and your rig (save the third for later). Position the stands, with the wood blocks on them, under the frame, just in front of the rear lower control arms. Be sure to raise the stands up to the highest point possible then lock them. This will keep the Jeep at the same height when lowering the floor jack.
Now you can slowly lower the floor jack, but only lower it until the frame is setting on the jack stands. After the frame has seated on the stands, then either finish loosening to the lug nuts on the rear wheels if you started earlier with a tire iron or start removing them with the impact wrench like I did. Collect all the lug nuts and place them in some type of container to prevent losing any, I prefer my Craftsman magnetic tray. Now you can completely remove the rear wheels from the Jeep.
Briefing and Reasoning
I did a "Clevis Lift" on my KJ in late 2009. The actual lift amount results vary tremendously between the Liberty's when doing clevis lifts. I'm not sure why, but they do. My KJ took very well to the clevis modification. Well enough that now my front end is higher than the rear. So I decided to steal the fix from the guys with un-level OME/Rancho lifts. They commonly have the same problem with the front being higher than the rear when doing a full suspension lift. To fix it they buy extra rear coil spring isolators to stack above the rear coil spring to add height and level out the stance. The KJ comes from the factory with 1 isolator above each of the rear coil springs, for a total of 2. You can add 1 to each of the existing isolators, for a total of 4, and gain about 1/4" of lift in the rear. You can also add 2 to each of the existing isolators, for a total of 6, and gain about 1/2" of lift in the rear. I measured from the ground to the bottom edge of my fender flare on the front drivers side and read a 32 1/2". Then measured the same on the rear drivers side and read 32" even. With those reading I decided to go with the 1/2" lift set up to try and get it level.
Ordering
After deciding which set up I wanted to use, I ordered 4 rear coil spring isolators from Chrysler Parts Direct.com. Click the link and after the page loads scroll down the page and you'll see on the left you'll see a series of drop down menus. Fill out the menus on the far left under the "Replacement Parts" section. It's label "A", then click search. After the next page loads, finish filling out the "Mechanical Catalogs" section. The site will automatically redirect you to the catalog for your Jeep. Then on the left of the screen, there are several titles such as: "Alternator, Automatic transmission, Body hardware, Brakes, Clutch". Click the title that says "Rear suspension" and a list of subtitles will appear. Click the subtitle "Suspension components" and another section of subtitles will appear below "Suspension components". Click the subtitle "Spring insulator" and in the main window you will see two rows come up under the description it says "Spring insulator, liberty, upper" and below that "Spring insulator, liberty, lower" be sure to select the upper, because the lower pieces will not stack together. You can either click the view illustration button to look at the exploded view of the assembly or go ahead and click the add to cart button. After adding to cart I figure most of you know how to check out from an internet based buying system. So after ordering they'll be shipped to you and now its time for the next section of this "HOW TO:".
P.S.
The CPD site has the isolators listed as $10.37 each. For 4 the total came to $41.48 without shipping. CPD makes it very clear that they do not charge shipping costs until after the order has been shipped that way they only charge what they need. Therefore be sure to account for that extra amount to be used when you purchase. They sent me an invoice for $41.48 but took from $52.37 my bank account when shipped. That extra $10.89 was for shipping charges. The invoice will say $0.00 for shipping charges but that is only because they have not set the shipping price yet. So, be prepared to have that extra money for shipping after they send you an invoice.
Install
Estimated Time Required: + or - 1 Hour and 30 Minutes
Suggested Tools:
Floor Jack
2 Jack Stands
3 6" 2"x4" Blocks
2 8" 2"x4" Blocks
Large Hydraulic Jack
Small Hydraulic Jack
Tire Iron or Impact Wrench with 3/4" Socket
5/8" Combination Wrench
19mm Socket and Socket Wrench
STEP 1:Unpackaging
After my order from CPD was delivered by UPS I opened the package to find my 4 isolators wrapped in plastic and ready to go!
You must be registered for see images attach
You must be registered for see images attach
You must be registered for see images attach
You must be registered for see images attach
This photo shows how I plan to install 2 stacked together above each ccil spring in the rear.
STEP 2:Park, Jack, Wheel Removal
Find a place to park your Jeep that is good and solid. Ideally a shop floor, but unfortunately for me my shop floor was occupied by our 27" SeaRay and my Dads motorcylce. So I used the drive in front of the shop, it's relatively solid chat.
You must be registered for see images attach
After parking your Jeep in a solid location drag out your floor jack. Slide the jack under from the rear of your rig with lift point directly under the rear differential. If you're using a tire iron to remove your rear wheel lug nuts you might want to loosen them before jacking up the jack. If you're using an impact wrench like me, you can go ahead and jack it up first. Jack the jack until the rear tires are a several inches off the ground.
You must be registered for see images attach
You must be registered for see images attach
You must be registered for see images attach
You must be registered for see images attach
Slide your 2 jack stands under your rig just in front of the rear tires. Place one 6" 2"x4" block above each of the jack stands, so that is between the stand and your rig (save the third for later). Position the stands, with the wood blocks on them, under the frame, just in front of the rear lower control arms. Be sure to raise the stands up to the highest point possible then lock them. This will keep the Jeep at the same height when lowering the floor jack.
You must be registered for see images attach
You must be registered for see images attach
You must be registered for see images attach
You must be registered for see images attach
Now you can slowly lower the floor jack, but only lower it until the frame is setting on the jack stands. After the frame has seated on the stands, then either finish loosening to the lug nuts on the rear wheels if you started earlier with a tire iron or start removing them with the impact wrench like I did. Collect all the lug nuts and place them in some type of container to prevent losing any, I prefer my Craftsman magnetic tray. Now you can completely remove the rear wheels from the Jeep.
You must be registered for see images attach
You must be registered for see images attach
You must be registered for see images attach
You must be registered for see images attach
You must be registered for see images attach
You must be registered for see images attach
Last edited: