Hello's from Rosamond- Dash Removal

Disclaimer: Links on this page pointing to Amazon, eBay and other sites may include affiliate code. If you click them and make a purchase, we may earn a small commission.

John Sannes

Member
Joined
Dec 6, 2020
Messages
35
Reaction score
11
Hey thank you soooo much DadOSix. I ordered the Creative steel ones just now. I have a ball joint press that should work to press out the bushing that come in the new rack.
Many thanks.
 

John Sannes

Member
Joined
Dec 6, 2020
Messages
35
Reaction score
11
So, been waiting for Rocky Road to send me my upper control arms (really the last part I needed) - and I guess they really weren't going to send them. Bought from JB off road came in a week or so.

xc_hide_links_from_guests_guests_error_hide_media

Anyone have suggestions on replacing the passenger side axle seal? It's recessed and I am not replacing the bearing (otherwise you just pull both at same time). Kinda concerned that I'll end up with a mashed seal that's still installed.
 

John Sannes

Member
Joined
Dec 6, 2020
Messages
35
Reaction score
11
I bought a used Driver's steering knuckle from e-bay, then decided that I should just take what I got to a shop.
Air-Hammer = Success. Knuckle is now mine, I got the lower call joints out of it.
I just have to get with the programme and get the rack out of it. I am hoping that I can get that in gear here pretty soon.
Tested the electric fan (towing package has mechanical on top of that). Found that the electric fan was dead. Not working even with full battery voltage applied.
Ordered one of those from e-bay - and figured out how it mounts to the plastic lattice (std. fan is not in the correct shroud). Ordered a used standard fan, now can put that motor into my tow pack shroud.

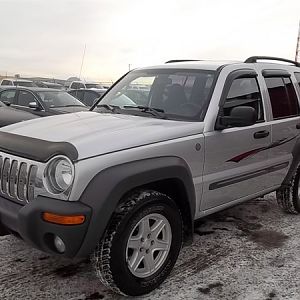
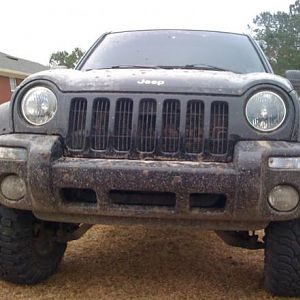
The one thing that gets me is that the Jeep looks like I ruined it. It looks like a total wreck. :(
Too bad I have a full time job that keep me busy, oh and paying the bills. :)
 

John Sannes

Member
Joined
Dec 6, 2020
Messages
35
Reaction score
11
So, tonight the steering rack came out of the Jeep. I replaced the front axle tube seals. The one that is recessed was not fun. I did get it out with the seal puller, but I did nick the oil seal area a bit. Smoothed out the area and used some gear-oil resistant RTV around the perimeter of the seal. Of those seals, the driver side was pretty dry, but the passenger side was wet, not horrible, but it was going.

I am hoping that tomorrow I can get the new rack in, and then really start the process of reassembly. On the old rack the rack bushing were crap. Soft, they came apart as I pulled the through bolts out. I'm spending a little more than I wanted to but I am still within my budget - I knew there would probably be quite a number of things that had been unattended in 120,000.
 

John Sannes

Member
Joined
Dec 6, 2020
Messages
35
Reaction score
11
1. So, the rack is in. It's actually easier if you tip the rack towards the back of the Jeep, pull it under the oil pan, and then rotate towards you again to fully exit.
2. I got the passenger side axle oil seal out with the seal puller, but don't do what I did. It put a couple of nicks in the aluminum housing. I didn't damage the inner bearing, but better if you just pull the bearing and the seal together - or you get a seal puller for your slide hammer. I put some gear oil resistant RTV on outside of the new seal, hopefully I didn't screw that up.
3. I put the upper control arm, lower control arm, strut assembly (OME) and the axle shafts in.
4. I put the ball joints in and attached the new hub bearings.

It's starting to look like a vehicle again, I think that I can probably get it back on it's wheel this weekend. I am unsure how difficult it'll be to get the fork -thing (Clevis) back into the lower control arm. I am wondering if it might be easier to undo the lower control arm from the frame, install the clevis into it, and then push it back into the frame.

Oh, and on the rack, when I took the mounting bolts out the whole top of the bushings (on both sides) ripped off on the passenger side and pretty much were not there at all on the driver side.
Not going to be drivable just yet as I'm going to replace the water pump and thermostat.
 

John Sannes

Member
Joined
Dec 6, 2020
Messages
35
Reaction score
11
Actually, I do have a question.
I bought a new power steering pump. Came with a rubber O-ring for the high pressure line (I'm sure that'll be fun to reattach), but there's a white plastic washer in the kit too, but no instructions telling me what is is or where it goes. The old pump did not seem to have one of those, just the small rubber o-ring. Ideas??
 

John Sannes

Member
Joined
Dec 6, 2020
Messages
35
Reaction score
11
Well, she's back on her wheel. Right this second I am involved in the water pump, Rad hoses and a thermostat.
xc_hide_links_from_guests_guests_error_hide_media
 

John Sannes

Member
Joined
Dec 6, 2020
Messages
35
Reaction score
11
So, the Jeep is together and running. Lucky I have the mechanical fan as it looks like the electric fan might not be working. I replaced it with a used on (I'm an idiot, if I'd realized I could get just the motor, I'd a done that instead - almost the same price with shipping). I'm gonna try to get the Jeep aligned tomorrow morning.
1. Bleeding the cooling system with that bleeder plug was great, I wish more vehicles had that - now I have to wait for a "toxic roundup" though to get rid of the coolant.
2. I trimmed just a little bit of plastic off the bottom of the fan shroud and now I can take the electric fan out without having to take both fans off at the same time.
3. Bleeding the power steering was super easy too. Pull the steering wheel L /R a bunch of times (maybe 20 times left/right) with the engine off and wheels up in the air. Bloop! About 3/4 of the fluid ran into the reservoir disappeared into the rack. When I started the engine for the first time, the pump and rack were super quiet
4. The new OME springs and shocks are super nice. The Jeep rides firm but not harsh, and getting the lower clevis back into the lower control arm with the 2 inch lift was no challenge at all.
5. I decided to add some LED daytime running lights from Phillips. I was hoping to put them inside the bumper, but realized that they were going to be a little too wide, but mounted them just below the bumper - super easy to remove if they quit working.

I'll post a little video within a day or so about how it looks. Funny, the 2 inch lift really doesn't look that tall - ha ha.
 

John Sannes

Member
Joined
Dec 6, 2020
Messages
35
Reaction score
11
So what have I learned so far?

1. OME lift only gave me one (1) inch of lift over stock Hmmmm. Having said that, I probably got more like 2.25 inch lift because the front springs and shocks were OEM from 2002 and had sagged really bad. Rear lift was also one inch? Front from Rocky Road also had a 1/4 inch spacer, and the stance is not level. - big sigh- The OME coils and shocks though are very nice and give a very good ride.

2. I had bought 2 used fans - don't do that. I had my electronic fan relay go bad (probably was bad but didn't know it until I got the A/C compressor to spin). Saw a youtube video on a Grand Cherokee say that an old fan can put an extra load on the electronic relay and damage it. For what I paid for the used fan and shroud, I could have bought a new motor. Well didn't know. I bought the aftermarket (supersize) relay, I used one bolt in the OE position and then I used super strong 3M double sided tape. I did not feel good about drilling a hole into the fender right next to where my new power steering lines were (and without knowing what's behind the fender area). I will check again later, but felt very solid.

3. I made a thin notch in the bottom of the fan shroud so that I can remove the electric fan from the engine compartment and not have to take both fans (mech / elect) out at the same time. I tried many times to get them out separate but they would not come. Now it's a super breeze.

4. I really like the DRL add-ons from Phillips. I still need to aim the headlights, but I have to sneak out the rear of my local supermarket for a flat wall and a flat surface and haven't done that yet.

5. I bought from 1/8 inch foam to stick under the door panels (both passenger doors rattle a little going over bad pavement).

Other than that, it seems as though the used car lot guy did not change the oil before sale (engine sounds super quiet now that I changed it). It runs and drives very well, I can't help but be kind a impressed by the Jeep.
 

tommudd

Moderator
Staff member
Moderator
Joined
Jul 14, 2005
Messages
22,450
Reaction score
3,649
Location
Southeastern Ohio
One inch over stock height ????
What OME springs did you use ?
What shocks ?
What do you measure now , from middle of the wheel ( hub ) to bottom of the flare on left side front ???????????
If you used 927/948 combo then I have never seen one that did not sit level after installation with 2.5 inches of new stock height
Oh and be glad the rocky road UCAs never came in, JBAs are far superior to the RROs junk
 

John Sannes

Member
Joined
Dec 6, 2020
Messages
35
Reaction score
11
What OME springs did you use ? I'm sorry, I didn't catch the number, but they all came in OME boxes.
What shocks ? OME yellow shocks

What do you measure now , from middle of the wheel ( hub ) to bottom of the flare on left side front? Yes, from wheel centre to the low edge of the flare. Sits at 20 inch front and 21 inch in the rear.

It's not awful, but it was not really what I expected. I like the ride and I have confidence in the quality, but not what Rocky Road told me.


If you used 927/948 combo then I have never seen one that did not sit level after installation with 2.5 inches of new stock height
 

John Sannes

Member
Joined
Dec 6, 2020
Messages
35
Reaction score
11
According to the ARB off road site, looks like all the springs for the front should give 1.5 inches of lift.
So, I don't know.
 

tommudd

Moderator
Staff member
Moderator
Joined
Jul 14, 2005
Messages
22,450
Reaction score
3,649
Location
Southeastern Ohio
According to the ARB off road site, looks like all the springs for the front should give 1.5 inches of lift.
So, I don't know.
They advertise their springs to give 1.5 inches of lift for insurance reasons in Australia
So you can not go by what they advertise over there

We all know that 925s give you about an inch is what they must have sold you , what a shame, but that is RRO for ya, plus you now have stock length rear shocks , upgraded , yes but ...

At least now the 925 springs you have up front are rated at 350, just what the KJ should of had from the factory and as mentioned give you an inch of lift
926s , give you 1.5-1.75
927s give you the 2.5 inches
Those are all the different front springs for a KJ/KK
after installing over 60 sets of OMEs , know real well what you will end up with
 

John Sannes

Member
Joined
Dec 6, 2020
Messages
35
Reaction score
11
Thank you Tom for your quick response and the info (that I wouldn't have known otherwise).
I ordered a clevis spacer from JB-offroad - the medium spacer, which should get me close to level.
I am not really interested in having to remove the spring again - or buy new spring.
I should also say that I had RRO put the spring pack for the front together. Yes, you are right, that's the customer service that RRO offers.
 

tommudd

Moderator
Staff member
Moderator
Joined
Jul 14, 2005
Messages
22,450
Reaction score
3,649
Location
Southeastern Ohio
Thank you Tom for your quick response and the info (that I wouldn't have known otherwise).
I ordered a clevis spacer from JB-offroad - the medium spacer, which should get me close to level.
I am not really interested in having to remove the spring again - or buy new spring.
I should also say that I had RRO put the spring pack for the front together. Yes, you are right, that's the customer service that RRO offers.

You do not need a spacer for the clevis , they do not do anything at all and all we use them for is basically for quick measurement purposes
Just put 3/8 inch between clevis and bottom of the ring ( for 3/4 inch lift ) on the shock ( where it sat down into the clevis and tight pinch bolt up, will hold
 

John Sannes

Member
Joined
Dec 6, 2020
Messages
35
Reaction score
11
I got my 3/8 spacers. I spent yesterday after work installing them.

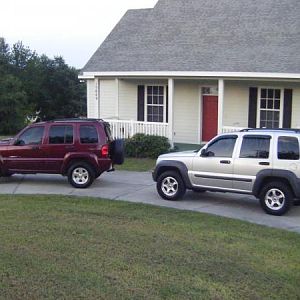
1. I did get the lift that I wanted. 20 inch + almost 3/4, not quite in the nose, 21 full inch lift in the rear. So, I have a pretty stock length OME spring :( I have a 1/2 inch spacer on top of the strut (courtesy of RRO), and now I have a 3/8 spacer above the clevis. what a cobbled together crap shoot this is.

2. At full droop, the passenger side is no problem at all. Nothing touching anything bad.

3. Driver's side, at full droop, the clevis band around the strut is just kissing (touching) the CV boot. I super don't like that. However, with the Jeep on it's wheels, there is miles of space. In fact the CV axle is about straight onto the wheel.

4. Next step will be (I think) to put new tires on it and then get the alignment done again. I'm gonna go with a 245/70-16. like 29.5 inch diameter. About 6/10 of an inch taller just to fill the wheel well a little more, a tiny bit more ground clearance.

I notice that at full droop, the spring on the driver's side is really close to the sheet metal of the inner fender also. Makes me wonder how people get higher lifts. It's too bad that no one makes a lower control arm with the clevis bushing just a slight bit farther out on the lower control arm.
 

tommudd

Moderator
Staff member
Moderator
Joined
Jul 14, 2005
Messages
22,450
Reaction score
3,649
Location
Southeastern Ohio
Never had any issues with springs coming in contact with the sheet metal
when correct alignment is done, JBA UCAs etc you have plenty of room, of course after 3.25-3.5 inches you have spring/UCA contact on bumps and jumps
 

John Sannes

Member
Joined
Dec 6, 2020
Messages
35
Reaction score
11
Damaged rear wheel stud repair.

Used the ball joint separator that looks like two fingers hinged in the middle and the stud came super easy.

So, when I bought the Jeep, the lug nut covers had all come off and rust (San Francisco CA area) had gotten to one of the lugs bad, or it was damaged in place. I bought a set of Dorman studs, but they are sized a little too big. I know it's supposed to be interference fit, but dang. So decided today was the day for this job. The damaged stud that came out had a shank of 0.6612 inch. The Dorman stud is 0.678. Maybe if I had the axle shaft out and hydraulic press... So, I chucked the Dorman stud in my drill and put it against a flat file until I got to 0.668 I think it was. There was still more than enough knurl still on there. I put a spacer (used a roller wheel from Harley lifter). What happened? The stud jammed in the flange after only pulling in about 1/2 way. Because I'm a dummy, I did not take into account the swell just before the knurling coming through the flange. Stud had jammed in my Harley spacer. Take 2. A large I.D. washer (also from my Harley stock) and the stud went in fine. I used some red locktite to take up any space for a better interference fit - insurance.

After the spacer lift, I put tires on the Jeep 245/70-16 Cooper Discoverer AT3 (living dangerously as they were just recalled - but not in my size). Haven't driven it much as I hadn't gotten the Jeep aligned. Doing that tomorrow. The last thing to need fixing is the A/C. When they (previous owner) removed the dash, I think they just shoved it back together and tried to put refrigerant in it without fully evacuating the system (least I hope that's what happened). There was no indication of A/C problems in the car fax - looks like they pulled the dash just to do the heater core.

Jeep rides really well. I did buy some 1/8 inch foam to apply to the passenger doors (one sided problem?), where the plastic panels were vibrating. It's a pretty quiet ride all things considered. I do smell just a little bit of transmission fluid when I stop and it's hot. Power steering system is all new and not wet. So, I think I'm smelling a little bit of dying transmission.
 
Last edited:

John Sannes

Member
Joined
Dec 6, 2020
Messages
35
Reaction score
11
Bought a fuel filter - that looks amazingly fun to do as you must remove the sound deadening in order to get the access panel off (I guess I should be happy that it has an access panel rather than having to drop the tank).

I found that the passenger seat belt buckle clasp is sticking and isn't really working. I looked at Youtube and saw they use oils - I tried that. But it feels like something in the mechanism is jamming. I ordered a replacement from ebay (mopar unit), but I am thinking I'm going to try prying off the outer cover and see if I can figure it out. Worst thing is I have to replace it anyway.

(Update), pulled the seat out, - man how do you get the seat belt buckle wiring out from in between the seat parts?. Doused the buckle with multi-purpose lube oil one more time - but from the bottom- and boom! - it's fixed.
 
Last edited:

Latest posts

Members online

Top