kjpilot
Full Access Member
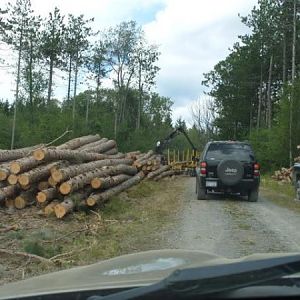
After nearly 2 years of staring at my spare NP-242, I finally did the deed! Unfortunately, my spare 242 has a 27-spline output shaft, & the KJ needs 32 splines. That issue, plus spare time available are the reasons I didn't do it before.
Anyway, I had to do it now, because that mystery clunking/scraping noise I described in another thread, was my 231 case informing me that he was ready for retirement.
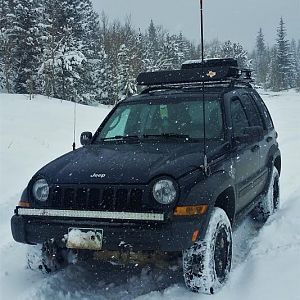
My brother-in-law has a well modified XJ, & he recently installed a slip yoke eliminator. The XJ & WJ have 27 spline slip yokes, so I was thinking about using his, & that might have worked but I can't say for sure, because I went a different route. My BMW is OTS for a while, making the KJ the only family car, so I needed to do it as fast as possible. I found several used 242s from KJs in the area for under $300, so I bought one... in other words, I'm still staring at the 27-splined 242 I bought 2 years ago.
I also had to buy a new Selec-Trac selector handle from the dealer($70), but that was it. The parts guy sold me the seals that go in the case & the transmission around the input shaft of the t-case for $37, but I didn't use them. They require a special tool for install that I didn't know about, & the originals looked fine. He only suggested them, because I was in there anyway.
I started by draining the fluid from the case. Then I removed the rear driveshaft completely. Then I removed all the bolts from the front driveshaft, but left it in place. It's just about impossible to get it past the exhaust downpipe without potentially damaging it, until you remove the crossmember.
I had to remove the rear cross member which is not as big if a deal as it looks. I modified my floor jack into a light-weight transmission jack, by bolting a 16" 2X8 board to the cup. this helped raise the transmission slightly while removing the X-member. I removed the 4 bolts securing the transmission to the X-member, then jacked up the transmission just enough to take the weight off the X-member. Then I removed the 8 bolts holding the x-member to the frame rails. This is a heavy chunk of steel, so I put jack stands under it for support while removing & did the same during re-installation.
I then lowered the rear of the transmission onto a jack stand, which I placed where the x-member mounts bolt to the transmission. before it comes down, there is an exhaust mount on the passenger side of the transmission, the nuts have to be removed & the mount slid back off of the studs. It can't be removed, but it doesen't have to be; in this condition, it will rotate as needed when the transmission is lowered. Then I lowered the transmission, it has to come down far enough to get a wrench to the top mounting nuts on the t-case. For a rough idea of how far, I counted 6 exposed notches on the neck of my jack stand. now you have access to the other stuff that has to be removed. The t-case selector cable comes first. pull the end of the cable off ot the actuating lever on the t-case. The cable is held in place on a bracket by a spring that can be compressed like a ring clip, then slide it down. After that, remove that bracket, there are 3 bolts holding it to the transmission. unplug the wires to the position switch, & the vent hose, both on the t-case. Now you have access to 4 of the 6 nuts holding the t-case in place. be sure you support the T-case with the jack before completely removing the nuts! It slides off remarkably easy.
Then on the passenger side, I had to remove a long heat shield above the exhaust. This is also easier than it looks. Remove the nuts slide it rearward & inward, it takes finesse, but I was able to do it without distorting its shape. Now it is time to remove the other 2 nuts. If you were looking for an excuse to buy those ratcheting box-end wrenches, this is it! They are essential for this job, you just have to have it. The space is very tight on this side, especially at the top, by the way, that is why the heat shield came out. Now slide the t-case out, using the jack... this is an even heavier chunk of metal.
Before you install the 242, be sure you inspect it thoroughly! The first one I got was a 231 not a 242 as it was sold, the second one had a cracked case where the vacuum switch bolts in! On the third one, I inspected everything from the ID tag to movement of the position actuator and movement of the shafts! Then I cleaned it up. I drained every drop of old fluid out, by tipping it back so all the fluid could find its way to the drain hole. I also filled it with the proper amount of new fluid on the bench; if this was gonna leak, it was going to do so before I installed it! It's also easier to fill it now than after it's installed. I applied a thin layer of ATF+4 to the inside & outside of the input shaft to ease installation.
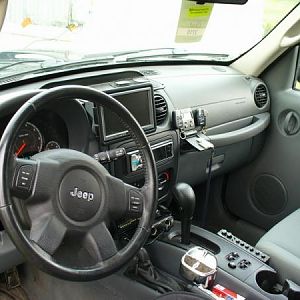
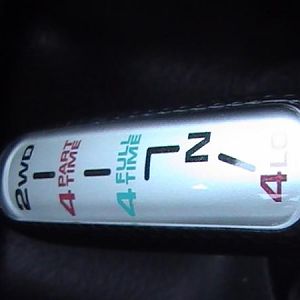
The selector handle is easy as pie. Remove the center console, remove the 4 nuts holding the selector to the car, pull it out! Put the new one in, & replace the console.
Installation is the reverse of removal, & goes smoother. the only tip I have at this stage is have the transmission & T-case in neutral, this will allow for movement of all the shafts, which makes alignments of splines, studs & holes easier. When you attach the selector cable to the t-case, put the handle in neutral as well, then all of that will line up properly too!
It's a straight forward job, but it's all heavy stuff so I'd say it's hard work, but an easy job...if that makes sense. My biggest frustration was the wrong cases. I don't get to work on my cars until later at night, when all stores & yards are closed. I discovered the 231 dressed as a 242 problem at 3:30 AM on a Saturday, & the yard was closed til Monday at 8 am. Then I found the crack on the replacement at 11 PM on Monday night. It's now to the point that when I took my 4-year-old to the yard to get the good case, He saw a T-case for a Silverado on the floor, & with no information given to him by me or the clerk, said "Hey dad, will that transfer case work? " Kinda made me proud, but I couldn't help think that it was a sign that the scope project had grown a bit large!
Oh well, tonight I rest!(Alcy)
Unfortunately, my spare 242 has a 27-spline output shaft, & the KJ needs 32 splines. That issue, plus spare time available are the reasons I didn't do it before. Anyway, I had to do it now, because that mystery clunking/scraping noise I described in another thread, was my 231 case informing me that he was ready for retirement.
My brother-in-law has a well modified XJ, & he recently installed a slip yoke eliminator. The XJ & WJ have 27 spline slip yokes, so I was thinking about using his, & that might have worked but I can't say for sure, because I went a different route. My BMW is OTS for a while, making the KJ the only family car, so I needed to do it as fast as possible. I found several used 242s from KJs in the area for under $300, so I bought one... in other words, I'm still staring at the 27-splined 242 I bought 2 years ago
.I also had to buy a new Selec-Trac selector handle from the dealer($70), but that was it. The parts guy sold me the seals that go in the case & the transmission around the input shaft of the t-case for $37, but I didn't use them. They require a special tool for install that I didn't know about, & the originals looked fine. He only suggested them, because I was in there anyway.
I started by draining the fluid from the case. Then I removed the rear driveshaft completely. Then I removed all the bolts from the front driveshaft, but left it in place. It's just about impossible to get it past the exhaust downpipe without potentially damaging it, until you remove the crossmember.
I had to remove the rear cross member which is not as big if a deal as it looks. I modified my floor jack into a light-weight transmission jack, by bolting a 16" 2X8 board to the cup. this helped raise the transmission slightly while removing the X-member. I removed the 4 bolts securing the transmission to the X-member, then jacked up the transmission just enough to take the weight off the X-member. Then I removed the 8 bolts holding the x-member to the frame rails. This is a heavy chunk of steel, so I put jack stands under it for support while removing & did the same during re-installation.
I then lowered the rear of the transmission onto a jack stand, which I placed where the x-member mounts bolt to the transmission. before it comes down, there is an exhaust mount on the passenger side of the transmission, the nuts have to be removed & the mount slid back off of the studs. It can't be removed, but it doesen't have to be; in this condition, it will rotate as needed when the transmission is lowered. Then I lowered the transmission, it has to come down far enough to get a wrench to the top mounting nuts on the t-case. For a rough idea of how far, I counted 6 exposed notches on the neck of my jack stand. now you have access to the other stuff that has to be removed. The t-case selector cable comes first. pull the end of the cable off ot the actuating lever on the t-case. The cable is held in place on a bracket by a spring that can be compressed like a ring clip, then slide it down. After that, remove that bracket, there are 3 bolts holding it to the transmission. unplug the wires to the position switch, & the vent hose, both on the t-case. Now you have access to 4 of the 6 nuts holding the t-case in place. be sure you support the T-case with the jack before completely removing the nuts! It slides off remarkably easy.
Then on the passenger side, I had to remove a long heat shield above the exhaust. This is also easier than it looks. Remove the nuts slide it rearward & inward, it takes finesse, but I was able to do it without distorting its shape. Now it is time to remove the other 2 nuts. If you were looking for an excuse to buy those ratcheting box-end wrenches, this is it!
They are essential for this job, you just have to have it. The space is very tight on this side, especially at the top, by the way, that is why the heat shield came out. Now slide the t-case out, using the jack... this is an even heavier chunk of metal.Before you install the 242, be sure you inspect it thoroughly! The first one I got was a 231 not a 242 as it was sold, the second one had a cracked case where the vacuum switch bolts in! On the third one, I inspected everything from the ID tag to movement of the position actuator and movement of the shafts! Then I cleaned it up. I drained every drop of old fluid out, by tipping it back so all the fluid could find its way to the drain hole. I also filled it with the proper amount of new fluid on the bench; if this was gonna leak, it was going to do so before I installed it!
It's also easier to fill it now than after it's installed. I applied a thin layer of ATF+4 to the inside & outside of the input shaft to ease installation.The selector handle is easy as pie. Remove the center console, remove the 4 nuts holding the selector to the car, pull it out! Put the new one in, & replace the console.
Installation is the reverse of removal, & goes smoother. the only tip I have at this stage is have the transmission & T-case in neutral, this will allow for movement of all the shafts, which makes alignments of splines, studs & holes easier. When you attach the selector cable to the t-case, put the handle in neutral as well, then all of that will line up properly too!
It's a straight forward job, but it's all heavy stuff so I'd say it's hard work, but an easy job...if that makes sense. My biggest frustration was the wrong cases. I don't get to work on my cars until later at night, when all stores & yards are closed. I discovered the 231 dressed as a 242 problem at 3:30 AM on a Saturday, & the yard was closed til Monday at 8 am
. Then I found the crack on the replacement at 11 PM on Monday night. It's now to the point that when I took my 4-year-old to the yard to get the good case, He saw a T-case for a Silverado on the floor, & with no information given to him by me or the clerk, said "Hey dad, will that transfer case work? " Kinda made me proud, but I couldn't help think that it was a sign that the scope project had grown a bit large!Oh well, tonight I rest!(Alcy)