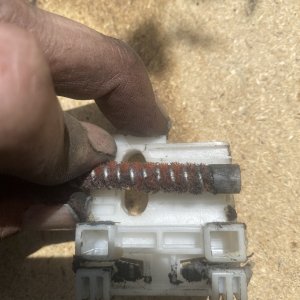
You said the pin holding the spider gears in place has play, what do you think is worn, the pin or cast casing.
I'm thinking you may need a new case that the pin goes in.
Also, where did you get all your parts from, can you share part numbers too.
Mine whines like yours does and needs attention too.
I own a stock LSD too
I know when I changed my diff oil last year, my spider and side gears are spalling and destructively pitted. The crown and pinion look in excellent shape.
You also need a tool made up to adjust the casing bearings. Seen a guy make up the tool using a pipe reducer bushing 1-1/2"-1/2"
Need 2 of them and a 1/2" NPT pipe long enough to go where the axles go in.
Then he used a 1-1/2" socket to turn it with.
I don't know if it's the pin or the case that's worn or if they used the wrong pin? It's all going in the recycle dumpster at work anyway since the new pre-assembled LSD replaces the carrier and spider gear assembly. My spider gears actually looked good but I suppose looks can be deceiving.
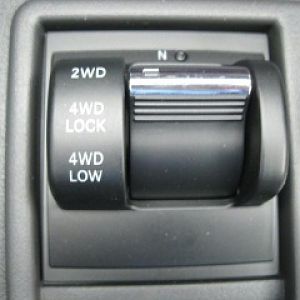
It sounds like you have an open diff currently, not a LSD.
I just got these parts yesterday: (both from eBay)
Powertrax Grip Pro GT308229 LSD - $495 (from drivetrainlasvegas)
Yukon Gear & Axle YK C8.25-B Master Overhaul Kit - $109 (from some guy who bought the wrong kit)
The Powertrax is a beautiful looking piece of kit - hopefully it works as well as advertised. It is a helical gear or Torsen type so doesn't wear out like a clutch style LSD. The extra $150 seemed worth it. I have a Mazda Miata race car with a Torsen and it has taken a beating (140k miles) and still works perfect. The clutch style ones in the Miata seem to last 15 - 20k in that application when abused - anyway, that's my limited experience with LSDs that helped me make my decision.
The Yukon Gear kit has Timken, made in the US bearings, and an extra crush sleeve and I don't see a weak point in there.
That's funny about the tool - I saw the same youtube video and made it up last weekend. Except that I got one 1" x 1/2" bushing and one 3/4" x 1/2" bushing. I don't have a 1-1/2" or 35mm socket and the (cheaper, yeah!) 3/4" bushing has a 30mm hex. I did have to shorten the length of the 3/4" bushing (bench grinder) so that it would fit in my non-deep 30mm socket. Not sure if I need to grind down the 1"x1/2" bushing the same way to engage with the adjuster? We'll see I guess. I don't have a welder so I just cranked the fittings together super tight which should be more that adequate. I think I spent like $17 on fittings at Home Depot - I thought it would be cheaper and turns out I could have bought the actual tool off eBay for about the same. Oh well, I'll have some fittings available for my next plumbing project.
Another tool I plan to borrow from Autozone or O'Reilly's is a Bearing Race / Bushing / Seal Driver Set.
And hopefully a buddy will let me use his press to press on the bearings.
I bought a cheap dial indicator and magnetic base off eBay that seems to work well.
And then there's the seemingly controversial? 1/4" beam style torque wrench I'll borrow from another buddy to gauge the pinion bearing preload.
I think that's it? Tentatively planning to do it this weekend so can report back my successes and failures. The plan is to do it solo but the 1/4" torque wrench guy needs to do his 4Runner diff too at some time so I may have another set of hands.