Inc's Jeep Build

Disclaimer: Links on this page pointing to Amazon, eBay and other sites may include affiliate code. If you click them and make a purchase, we may earn a small commission.

Inc

Free
Joined
Jan 12, 2009
Messages
355
Reaction score
0
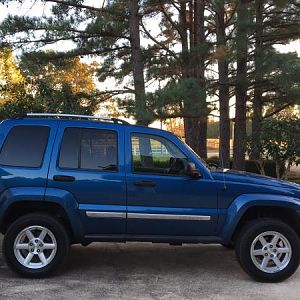
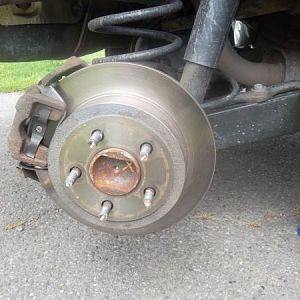
You are making it ******* me Mike.... I'm getting an itch to cut in to my KK....

Do it!!!!!!!!!

You could be the first person in the world to SAS a KK = awesomeness. :cool:

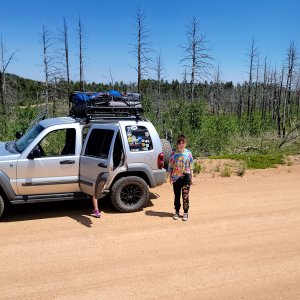
It is a serious project but it is so worth it the first time you wheel it.
 

OHIO04KJ

Full Access Member
Joined
Aug 20, 2009
Messages
117
Reaction score
0
Location
Stow, Ohio
That has got to be the sickest thing I've seen. It has the raw rock crawler look from the front and that bada$$ lifted 4x4 from every other angle.....plain sick!!!!! My KJ just pi$$ed in the driveway :p
 

Inc

Free
Joined
Jan 12, 2009
Messages
355
Reaction score
0
Thanks for the compliments guys.

It handles great Tony, as good as it did before the lift for sure. I ac cruise down the freeway at 75 or 80mph easily and it soaks up bumps and handles great. No complaints. :D
 

Inc

Free
Joined
Jan 12, 2009
Messages
355
Reaction score
0
I almost finished the belly skid that goes from the rear half of the t-case crossmember back 13" or so, to protect the t-case. It turned out really well, I just need to decide if I want to go with nutzerts (can't find the tool here in town to install them) or to weld in a bolt or something into the frame for the last 2 bolts.The other 4 bolts work great, but the last 2 are going to take finessing. Otherwise the skid came out great.
 

Ry' N Jen

Banned
Joined
Dec 26, 2006
Messages
9,242
Reaction score
12
Location
Slightly North of the 49° th. Parallel... In HongC
I almost finished the belly skid that goes from the rear half of the t-case crossmember back 13" or so, to protect the t-case. It turned out really well, I just need to decide if I want to go with nutzerts (can't find the tool here in town to install them) or to weld in a bolt or something into the frame for the last 2 bolts.The other 4 bolts work great, but the last 2 are going to take finessing. Otherwise the skid came out great.

Harbour freight sells the rivit gun for those nutserts.
 

Inc

Free
Joined
Jan 12, 2009
Messages
355
Reaction score
0
Man that thing looks amazing, awesome Jeep buddy!

Thanks. :D

I went by Harbor Freight yesterday for the nutzert tool, and they didn't have one either. My buddy said he just piked one up at a garage sale so I headed over to his place last night to get the last 2 installed. Turns out his gun was made for aluminum nutzerts and wouldn't work on the steel ones, but we made out own, homemade tool to get it done and it worked perfectly. I got the belly skid all mounted up and it turned out awesome. I am going to be testing it out today and will post pictures tonight. There will be ton of rigs going since it is the 1st Annual Trent Fabrication Halloween Trick or Wheel event. There will be 40-50 rigs there and we are doing a decent trail, so there should be some good photos.
 

Inc

Free
Joined
Jan 12, 2009
Messages
355
Reaction score
0
Here is the rear half of the belly skid. Not sure what I will do about the front half yet.

It is made of 1/4" steel and there is some channel steel welded on top of it so it won't bend. I used 2 existing nutzert mounts from the factory skid locations, 2 of the t-case crossmember bolts, and then I added 2 more nutzerts into the new frame we added. I'm very pleased with how it came out. Especially for $35 in steel. :D

You must be registered for see images

You must be registered for see images

as you can see in the pics, the skids have already been tested.

I don't think I ever posted pics of the seat covers or the rear door cargo pockets I added after I bought them from a member on here. They add a ton of extra carrying capacity for tools and stuff. I love em.

You must be registered for see images

You must be registered for see images
 

Inc

Free
Joined
Jan 12, 2009
Messages
355
Reaction score
0
I chopped off the parts of my unibody today, the pieces that go out past my front bumper on the ends. I like it. :D
 

OHIO04KJ

Full Access Member
Joined
Aug 20, 2009
Messages
117
Reaction score
0
Location
Stow, Ohio
I bought a new HD ball mount:
You must be registered for see images


a 3' Firestik antenna:
You must be registered for see images


a 10' coax cable:
You must be registered for see images


and finally a CB & AM/FM splitter:
You must be registered for see images


Works awesome.
One last question. Did you need any special connector for the cb/radio or does the coax take care of everything? On the splitter, does that male fitting plug in the back of the stock radio?

Thanx.....
 

Inc

Free
Joined
Jan 12, 2009
Messages
355
Reaction score
0
One last question. Did you need any special connector for the cb/radio or does the coax take care of everything? On the splitter, does that male fitting plug in the back of the stock radio?

Thanx.....

I did not need any special connectors. The stock radio has a wire that plugs into the wires coming from the stock radio antenna. Just plug the male wire coming from the stock radio, into the splitter. For the new antenna and coax connection you will need to cut off one end of the coax and then split the wires, one will be in the center plastic covered tube, and the other wire is kind of a pain because it is braided around the inner plastic tube covering the first wire. Those two wires will connect to the new ball mount and there should be directions on how they connect on the back of the ball mount package. Hope that makes sense.
 

OHIO04KJ

Full Access Member
Joined
Aug 20, 2009
Messages
117
Reaction score
0
Location
Stow, Ohio
I did not need any special connectors. The stock radio has a wire that plugs into the wires coming from the stock radio antenna. Just plug the male wire coming from the stock radio, into the splitter. For the new antenna and coax connection you will need to cut off one end of the coax and then split the wires, one will be in the center plastic covered tube, and the other wire is kind of a pain because it is braided around the inner plastic tube covering the first wire. Those two wires will connect to the new ball mount and there should be directions on how they connect on the back of the ball mount package. Hope that makes sense.

That's all I needed to know. My stuff should be here today and wanted to get it done today:D

Thanks for all your help and the quick response rockon.gif
 

Latest posts

Members online

Top