Ugh... Rust

Disclaimer: Links on this page pointing to Amazon, eBay and other sites may include affiliate code. If you click them and make a purchase, we may earn a small commission.

Luke

Interloper
Joined
Oct 21, 2008
Messages
4,066
Reaction score
485
Location
Bancroft, Canada
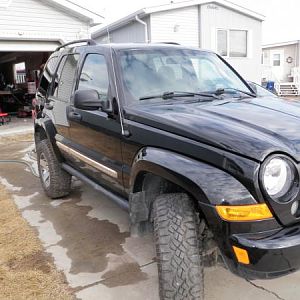
I noticed some small rust spots on the bottom inside rear door when I was removing my (disposable) rock rails to attack some rust spots. As I began to file them down I realized that almost the entire length of the door at the seam, under the body coloured caulking is completely rusted! :favorites68:

I checked the other doors and one is rusting but not as badly. So now the long process of trying to minimize the future destruction begins. Once I get it ground down and sealed I'm going to Diggerize the belt line (and inside bottoms of doors).

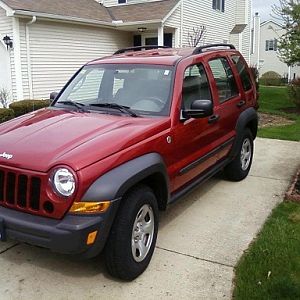
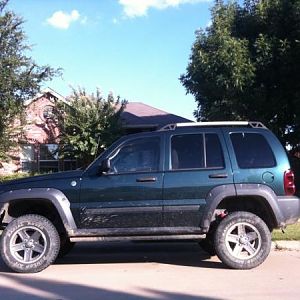
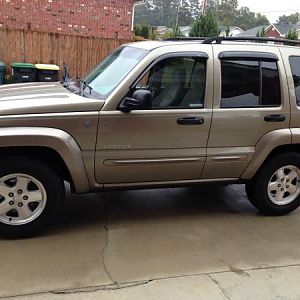
My question is which looks better to your eye? higher or lower? I know it's hard to squeeze an opinion out of you guys but don't be shy :D

P.S. My roof and rock rails are now liner-ed

You must be registered for see images attach


You must be registered for see images attach
 

HoosierJeeper

Gold Supporter/Admin
Staff member
Administrator
Joined
Jan 20, 2009
Messages
20,858
Reaction score
268
Location
Western WI
I kinda like going above the door trim, finishes it more naturally IMO.
 

Luke

Interloper
Joined
Oct 21, 2008
Messages
4,066
Reaction score
485
Location
Bancroft, Canada
If I wasn't left with that divot that it sits in I would agree with ya Surf. I could bed liner the molding too of course ... btw can anybody confirm that the side molding is on with just adhesive? Anybody know what it actually looks like underneath?

So many questions ...
 

Luke

Interloper
Joined
Oct 21, 2008
Messages
4,066
Reaction score
485
Location
Bancroft, Canada
I think I agree with all of you ... the highest belt line it is. Now about that side molding.

another Pshop'd test...

You must be registered for see images attach
 

Luke

Interloper
Joined
Oct 21, 2008
Messages
4,066
Reaction score
485
Location
Bancroft, Canada
And I'll add this shot ... just because I love it! :D

You must be registered for see images attach
 

Dave

Administrator
KJ Supporting Member
KK Supporting Member
Joined
Feb 22, 2006
Messages
15,567
Reaction score
15
Location
on here
I like the last pic Luke.

Dave
 

ridenby

Gold Supporter
Joined
Apr 19, 2009
Messages
4,276
Reaction score
3
Location
Kentucky
Do the whole thing.
You must be registered for see images attach
 
Last edited:

Geep

Full Access Member
Joined
Sep 16, 2011
Messages
101
Reaction score
0
Location
Michigan
I have the same issue with one of my doors where the caulk failed at the seam between the exterior and inner skin. I cleaned up the seam on the inside as best as I could then body filled it so the water will roll off the bottom of the door. The inside of the bottom of my doors kind of look like an airplane wing now. That stock seam is a terrible spot to collect water.

I can't decide whether to liner coat 1 1/2" up or color match.
 

Luke

Interloper
Joined
Oct 21, 2008
Messages
4,066
Reaction score
485
Location
Bancroft, Canada
I have the same issue with one of my doors where the caulk failed at the seam between the exterior and inner skin. I cleaned up the seam on the inside as best as I could then body filled it so the water will roll off the bottom of the door. The inside of the bottom of my doors kind of look like an airplane wing now. That stock seam is a terrible spot to collect water.

I can't decide whether to liner coat 1 1/2" up or color match.

It is an obvious spot for water to collect but what the hell ya gonna do right? There has to be a seam there I suppose. An inch or so of the lip is actually bulged due to the rust pushing it away from the door. It's going to be a :favorites68: to get in that fold and at the rust ...

dremel stylus makes a big difference though!
 

Luke

Interloper
Joined
Oct 21, 2008
Messages
4,066
Reaction score
485
Location
Bancroft, Canada
More PShop madness .. with simulated bed-liner-grain ... :D

You must be registered for see images attach


and what it *might* look like without the moldings .. ie divot :D

You must be registered for see images attach
 

Ry' N Jen

Banned
Joined
Dec 26, 2006
Messages
9,242
Reaction score
12
Location
Slightly North of the 49° th. Parallel... In HongC
Is it on there with adhesive? or some kinda :favorites68: plastic fastener?

Yup, it's held on with press fit adhesive.
Probably 3M double sided tape.
From the Full Service Manual:

"BODY SIDE MOLDINGS
REMOVAL
(1) Using a trim stick C-4755 or equivalent,
remove and discard the molding from the outside of
the door.
INSTALLATION
(1) Thoroughly clean all residue from the body side
molding attachment area of the door.
(2) Wipe area clean with a 50% solution of water
and alcohol and wipe dry.
(3) Apply new body side molding using the locators
in the door and apply pressure of approximately 40
p.s.i. over the entire surface of the molding

So I would just mask around the body side molding and
the spray it after the rest of the sheet metal has been
coated.
Then mask around the body and coat the side molding
That way once you are done it will still look like an individual
piece of trim and look "separate" like it does stock.
 
Top