Rear Pinion Seal?

Disclaimer: Links on this page pointing to Amazon, eBay and other sites may include affiliate code. If you click them and make a purchase, we may earn a small commission.

bmrrwolfe

Full Access Member
Joined
Jul 23, 2009
Messages
1,756
Reaction score
0
Location
North Olmsted, OH
As I rolled 70k I did my check of the KJ and noticed that the rear diff looks to be leaking out the pinion/input seal.
Is this something I could fix or it is something to take to the dealer?
Is it like the front where you need to get to it internally?
Thanks!
 

ridenby

Gold Supporter
Joined
Apr 19, 2009
Messages
4,276
Reaction score
3
Location
Kentucky
If it is just moist around the pinion would not worry about it,pouring or steady drip might concern me.
 

bmrrwolfe

Full Access Member
Joined
Jul 23, 2009
Messages
1,756
Reaction score
0
Location
North Olmsted, OH
If it is just moist around the pinion would not worry about it,pouring or steady drip might concern me.

Its not pouring or steady, but I guess a little more then being moist.
I figured if it was easy/cheap enough I would get it done, if not I would just keep an eye on the level until it was necessary.
I have some extra money at the moment so I figured I would use it on the Jeep.
I guess I will get some new front rotors and pads cause I do have a slight pulsating when braking and I know it should be done before winter!
 

LibertyFever

Full Access Member
Joined
Aug 17, 2007
Messages
936
Reaction score
3
Location
New Brunswick, Canada
Try to keep an eye on the level of the fluid in the diff. I once had an axle that was leaking out the axle seal. I failed to check my diff fluid level and the pinion bearing eventually seized :(

I'm not positive if you can simply remove the driveshaft, pop the old pinion seal out and pop in a new one. But I would like to know.
 

ericautopart

Full Access Member
Joined
Jan 13, 2010
Messages
163
Reaction score
1
Location
Jersey Shore, NJ
I'm going to have to disagree w/ you guys here. This is something you DO NOT want to ignore at all. I also wouldn't take it to the dealer either. You've got to take everything out of the diff to replace it. It's a labor intensive job. It's a good idea to purchase a master kit. This will give you a chance to do all the diff bearings and such while you are in there. Kind of like doing a water pump during a timing belt replacement. It makes sense, but find a reputable shop whose capable of doing differentials.
 

ShafferNY

Full Access Member
Joined
Dec 1, 2007
Messages
640
Reaction score
0
Location
Ticonderoga, NY
If it's not pouring out, just check the oil level. Then check it in about a week or so. If it hasn't changed in a week's time, then check it every two weeks.

Although Eric is right; if you're going to change the pinion seal, you might as well freshen up the whole axle; I wouldn't plan on a complete overhaul just yet.
 
Last edited:

HoosierJeeper

Gold Supporter/Admin
Staff member
Administrator
Joined
Jan 20, 2009
Messages
20,858
Reaction score
269
Location
Western WI
My Durango needed it done, and the dealer just removed the driveshaft to do the install.
 

LibertyFever

Full Access Member
Joined
Aug 17, 2007
Messages
936
Reaction score
3
Location
New Brunswick, Canada
My Durango needed it done, and the dealer just removed the driveshaft to do the install.

On some axles the pinion seal is easier to replace than others.

I have to agree with Eric too. If you're taking it apart to replace one seal then go ahead and replace all of them. Say, while you're in there why don't you slip in an ARB locker? ;)

And finally yes, dealership shop rates can be astronomical :eek:See if you can find a shop that has experience with axle rebuilding.
 

tjkj2002

Full Access Member
Joined
Dec 17, 2006
Messages
10,612
Reaction score
39
Location
Somewhere between being sane and insane!
Replacing the pinion seal on a 8.25 is not that bad but it's not a simple job either as the crush sleeve and pinion nut must be replaced.

From the FSM............

PINION SEAL​
REMOVAL​
(1) Raise and support the vehicle.
(2) Remove wheel and tire assemblies.
(3) Remove rear brake rotors drums.
(4) Mark propeller shaft and pinion yoke for
installation reference.
(5) Remove the propeller shaft from the yoke.
(6) Rotate pinion gear three or four times and verify
that pinion rotates smoothly.
(7) Measure and record torque to rotate the pinion
gear with an inch pound dial-type torque wrench.
(8) With a short piece of pipe and Spanner Wrench​
6958 remove the pinion nut and washer
(9) Remove pinion companion flange with Remover
C-452 and Flange Wrench C-3281. (Fig. 32)
(10) Remove pinion seal with Remover 7794-A and​
a slide hammer

INSTALLATION​
(1) Apply a light coating of gear lubricant on the
lip of pinion seal. Install seal with an appropriate
seal installer (Fig. 34).
(2) Install yoke on the pinion gear with Installer​
C-3718 and Spanner Wrench 6958
(3) Install a​
new nut on the pinion gear. Tighten
the nut only enough to remove the shaft end
play.

CAUTION: Do not exceed the minimum torque 271
N·m (200 ft. lbs.) when installing the pinion yoke
retaining nut at this point. Damage to collapsible
spacer or bearings may result.​
(4) Rotate the pinion a minimum of ten times and
verify pinion rotates smoothly.
(5) Measure and recore pinion torque to rotate
with an inch pound torque wrench. Torque to rotate
should be equal to the reading recorded during​
removal, plus 0.56 N·m (5 in. lbs.)
(6) If rotating torque is low, hold pinion yoke with
Wrench 6958 (Fig. 37) and tighten pinion shaft nut
in 6.8 N·m (5 ft. lbs.) increments until rotating
torque is achieved.​
CAUTION: If maximum tightening torque is reached
prior to reaching the required rotating torque, the
collapsible spacer may have been damaged.​
Replace the collapsible spacer.
(7) Align the installation reference marks on the
propeller shaft and pinion yoke and install the propeller​
shaft.
(8) Fill differential with gear lubricant.
(9) Install the brake drums
(10) Install wheel and tire assemblies.​
(11) Lower the vehicle.

REMOVAL​
(1) Raise and support the vehicle.
(2) Remove wheel and tire assemblies.
(3) Remove rear brake drums.
(4) Mark the propeller shaft and pinion yoke for
installation reference.
(5) Remove the propeller shaft from the yoke.
(6) Rotate the pinion gear three or four times.
(7) Measure and record torque to rotate the pinion
gear with an inch pound dial-type torque wrench.
(8) Hold pinion yoke with Spanner Wrench 6958
and remove pinion nut and washer.
(9) Remove the pinion yoke with Remover C-452​
and Flange Wrench C-3281
(10) Remove pinion shaft seal with a pry tool or a
slide hammer mounted screw.
(11) Remove front pinion bearing using a pair of
pick tools. Pull the bearing straight off the pinion
gear shaft. If the bearing becomes bound on the pinion
shaft, lightly tap the end of the pinion gear with
a rawhide/rubber hammer.
(12) Remove the collapsible spacer.​
INSTALLATION​
(1) Install a​
new collapsible preload spacer on pinion
shaft.

(2) Install pinion front bearing.
(3) Apply a light coating of gear lubricant on the
lip of pinion seal and install a​
new seal with an

appropriate installer
(4) Install yoke with Screw 8112, Cup 8109 and​
Spanner Wrench 6958
gear. Tighten the nut to 271 N·m (200 ft. lbs.).​
CAUTION: Never loosen pinion gear nut to decrease
pinion gear bearing rotating torque and never
exceed specified preload torque. If preload torque
or rotating torque is exceeded a new collapsible​
spacer must be installed.
(6) Using yoke with Spanner Wrench 6958 and a
torque wrench set at 474 N·m (350 ft. lbs.), (Fig. 41)
slowly tighten the nut in 6.8 N·m (5 ft. lbs.) increments
until the rotating torque is achieved. Measure
the rotating torque frequently to avoid over crushing
the collapsible spacer (Fig. 42).​
NOTE: If more than 474 N·m (350 ft. lbs.) torque is
required to crush the collapsible spacer, the spacer​
is defective and must be replaced.
(7) Check rotating torque with an inch pound
torque wrench (Fig. 42). The rotating torque of the
pinion gear should be, the reading recorded during
removal plus an additional 0.56 N·m (5 in. lbs.).
(8) Install propeller shaft with reference marks
aligned.
(9) Install rear brake drums.
(10) Add gear lubricant, if necessary.
(11) Install wheel and tire assemblies.​
(12) Remove supports and lower vehicle.
 

J-Thompson

Full Access Member
Joined
Jul 10, 2007
Messages
2,048
Reaction score
0
Location
just south of doucheville
Install a pinion seal is very simple as out lined above
installing a masting install/over haul kit is a little
more complicated because you need to reshim the gears
if you are going to install a master over haul kit then you just as well
install a locker because the cost will only go up by the cost of the locker
 

Straight6Jeff

Full Access Member
Joined
Jan 10, 2006
Messages
44
Reaction score
0
Location
Salem, NH
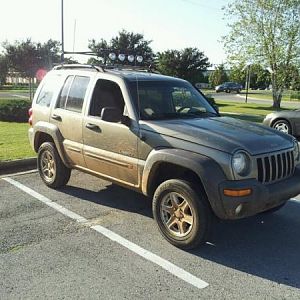
I replaced mine about a month ago, original seal metal was completely rusted through. Clean the yold, nut, and threads well with a wire brush, then index the nut and pinion shaft with a punchmark. If you have an inch-pound torque wrench, measure the rotating force of the pinion. In order to do this, the rear should be completely drained, brake drums/rotors removed so there is as little drag as possible to get a true pinion reading. Idealy, the shafts would be removed. This will allow you to return the pinion nut to the original position. Once you remove the nut, yolk and old seal, clean the snot out of the entire area. Ensure the threads on the pinion and nut are clean.

On my differential, the lead-in radius for the seal was only half-machined, meaning the drivers side had no radius, and the passenger side looked as though a beaver gnawed at the radius. Implications were the seal that had the pre-applied silicone would not seat properly because the silicone had no area to sit. I had another seal from a previous 8.25 build that did not have pre-applied silicone. A small bead was run at the shoulder of the seal and installed.

Use a thread locking compound, such as loctite 272 on the old pinion nut to prevent the nut from backing off. Align the punchmarks.

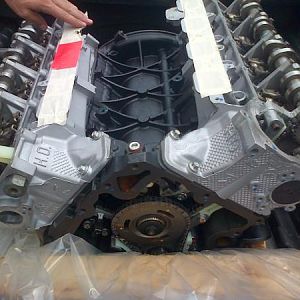
The above is assuming your bearings and gears are in good shape and not toasted.
 
Top