Installing Rusty's 2.5" Lift

Disclaimer: Links on this page pointing to Amazon, eBay and other sites may include affiliate code. If you click them and make a purchase, we may earn a small commission.

eric af blkltd

New Member
Joined
Jan 21, 2005
Messages
35
Reaction score
0
Location
NorCal
Sweet week this is!!! Just picked up my lift at the post office today and plan on installing it myself next weekend when my spacers and tires get in. I was wondering if anybody with a service manual can post any factory torque values for anything dealing with the suspension components. I plan on posting the install on here once I take all the pictures.
 

Marlon_JB2

Kombat Edition Jeep
Joined
Nov 20, 2004
Messages
15,052
Reaction score
106
Location
Harrison Township, MI
You lucky bastard!!! I'm jealous! =D> =D> You rock.

Good luck on the install. In your write up, could you list all the tools you need? Thanks. I'm going to buy Rusty's 2.5 kit later this year.
 

eric af blkltd

New Member
Joined
Jan 21, 2005
Messages
35
Reaction score
0
Location
NorCal
marlonjbt said:
You lucky bastard!!! I'm jealous! =D> =D> You rock.

Good luck on the install. In your write up, could you list all the tools you need? Thanks. I'm going to buy Rusty's 2.5 kit later this year.

Lucky...nah...bastard...maybe \:D/ I just talked to the offroad shop about my tires coming in and now I'm doing the install this weekend so I'll let you know how it goes. The tools you'll need are some jack stands, some sockets, wrenches, and a strut/spring compressor but after I do it I'll list the specific sizes of everything. Awesome weekend coming up!!!
 

grogiefrog

Full Access Member
Joined
Oct 5, 2004
Messages
3,405
Reaction score
1
Location
Near Indy
Be sure to post pictures! It would be great to see some "in progress" photos. =D>
 

eric af blkltd

New Member
Joined
Jan 21, 2005
Messages
35
Reaction score
0
Location
NorCal
Well I'm getting ready to do the install. Just a quick question with the front struts and coils...with the factory struts/coils there are rubber pieces on the top and bottom of the coils. Well for anyone that has the Rusty's lift installed already are the rubber pieces still on the top and bottom with the new struts and coils or are the top and bottom coils sitting against metal???
 

Bennett

Active Member
Administrator
Joined
Sep 8, 2004
Messages
5,387
Reaction score
2
Location
Green Bay
eric af blkltd said:
Well I'm getting ready to do the install. Just a quick question with the front struts and coils...with the factory struts/coils there are rubber pieces on the top and bottom of the coils. Well for anyone that has the Rusty's lift installed already are the rubber pieces still on the top and bottom with the new struts and coils or are the top and bottom coils sitting against metal???

You keep the rubber pieces or else you're gonna hear some strange noises.

Nemmett
 

eric af blkltd

New Member
Joined
Jan 21, 2005
Messages
35
Reaction score
0
Location
NorCal
It's done!!!

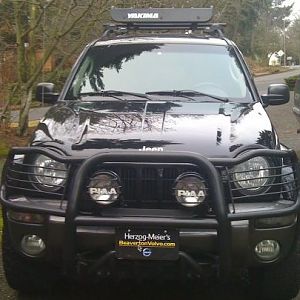
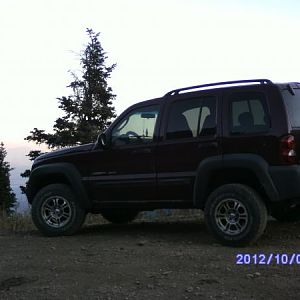
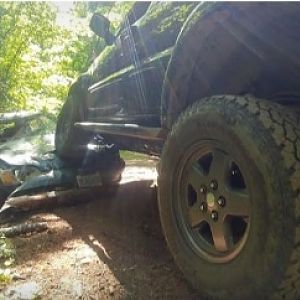
Well here it is after the lift and new tires today...have some minor rubbing but a sawzall will take care of that! :-k I'll get back with the installation tips...til then heres what my KJ looks like for now...

You must be registered for see images
 

Eddo

Full Access Member
Joined
Jan 29, 2005
Messages
501
Reaction score
0
Location
USA
Looks great man! Looking foward to the tip because I will be installing in about a month.
 

SRotblat

Full Access Member
Joined
Dec 29, 2004
Messages
414
Reaction score
0
Location
LOST #666
It ***** having my Rusty's lift sitting in my garage and no time to put it on...please post any tips since I cant seem to find any directions in the boxes :-k
 

eric af blkltd

New Member
Joined
Jan 21, 2005
Messages
35
Reaction score
0
Location
NorCal
SRotblat said:
It ***** having my Rusty's lift sitting in my garage and no time to put it on...please post any tips since I cant seem to find any directions in the boxes :-k

Yeah it ***** that the kit didn't come with instructions and when you take off the wheels and see the front end it kinda looks intimidating at first but I will say it was my first time installing a lift kit and it not very hard at all. Its going to take me a bit to upload some of the pictures I have of the install but I will post them as soon as I can! I can list most of the steps though for now and if you want you can go from there...The tools you will need are: 10mm, 13mm, 17mm, 18mm, and 21mm deep/shallow sockets and combo wrenches, a medium sized crescent wrench, a hammer, a jack and some jack stands and thats it. All those sizes are for the front end. For the rear end all you need is a 18mm and a 15mm wrench..

I used the skyjacker kit instructions when I did the install but I found out that most of the stuff they told me to remove you may not have to (it saves a ton of time!).

Front Installation Procedures
1. Remove the air box by popping it out, theres three places on the bottom of it that pop out. Then remove the battery, battery tray, and fuse box (you'll need the 10mm and 13mm sockets) and place the battery tray out of the way. Chock the rear tires and lift the front end supporting it with jack stands. Remove the wheels.

2. Disconnect the upper and lower a-arms using a 21mm socket (you may have to use a hammer to loosen the a-arms).

3. Remove the upper and lower bolts on the clevis bracket and remove the bracket from the strut.

4. Remove the 4 retaining nuts on top of the strut using a 18mm socket and remove the strut assembly.

At this time I reccomend that you take the assembly to a shop to have them disassemble and assemble the new strut (should cost around $25 bucks a strut) unless you have access to a machine strut compressor.

However, if you want to do it yourself w/o a machine then just be careful. I have a nice gash in my chin from using the hand compressors =D>

You will compress the spring enough to remove the nut on top of the strut and remove the strut bracket, washer and the two rubber seats. You will reuse these.

5. Assemble the new strut/coil assembly using a spring compressor. The nut on the upper strut bracket should be torqued to about 20 Ft. Lbs.

6. Install the new coil assembly. First attach the upper mount using the 4 retaining nuts removed earlier. Don't tighten these bolts yet.

7. Slide the clevis bracket onto the bottom of the new strut. If you want the clevis adjustment slide only about an inch of the strut into the bracket. Torque the upper clevis bolt to 65 Ft. Lbs. and re-attach the lower bolt on the clevis bracket back to the lower a-arm.

8. At this time tighten the 4 strut retaining nuts and re-attach the a-arms. Torque everything to factory specs (Bennett has a link in a previous post on this thread). Repeat for the other side and your done.

Your done with the front! Just install the battery tray, battery and airbox. Now for the easy part...the rear installation.

1. Set the emergency brake and chock the front tires. Raise the rear of the vehicle and install the jack stands. Remove the wheels.

2. Using an 18mm and 15mm wrench remove the rear shocks.

3. By either having someone stand on the brake drum or by jacking up the other end of the axle, lower the axle on your side enough to remove the old spring.

4. Install the new spring (notice how much bigger it is than stock!!!) then install the new shocks. The washers supplied with the kit will be used as shims since the new shocks aren't wide enough at the attchment points.

5. Repeat for the other side and torque everything to factory specs.

6. Put the wheels back on, lower it off the jacks and take a trip around the block in your lifted KJ!!!

Make sure you re-torque all your bolts/nuts after 100 miles and before you get an alignment, get the new tires (if you plan on it) and make sure the lift is what you want. Obviously if you have the lift in your garage then you already thought about that... \:D/ I'll post the pics once I upload them and good luck with the install...let me know how it goes and if you have any questions feel free to send me a message. HAVE FUN!!!
 

SRotblat

Full Access Member
Joined
Dec 29, 2004
Messages
414
Reaction score
0
Location
LOST #666
wonderful write up!! thanks a lot. do you know about how much time it took you to do??
 

eric af blkltd

New Member
Joined
Jan 21, 2005
Messages
35
Reaction score
0
Location
NorCal
SRotblat said:
wonderful write up!! thanks a lot. do you know about how much time it took you to do??

It took me a few days because I had other things I needed to take care of. After doing the install though I'm thinking it can be installed in about 3-4 hours. The key is having access to a machine strut/spring compressor. If you don't have that then look at spending an extra hour or two compressing a strut with hand tools. Thats why I would reccomend you have a shop do the struts for you if you can't access a machine. Being in the Air Force, I'm lucky to have an auto shop on base that I can take my car to and work on whatever I need to.
 

brnrancid

New Member
Joined
Mar 2, 2005
Messages
11
Reaction score
0
great write up

great write up!!! did you ever get those pics you were going to upload?
 

jctoth

New Member
Joined
Apr 3, 2005
Messages
6
Reaction score
0
Eric, now that you have some time on the lift what are your thoughts? Any strange noises or binding? Is the ride as plush as stock? Thanks.
 
Top