
Shanecrabtree
New Member
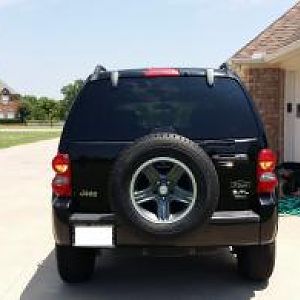
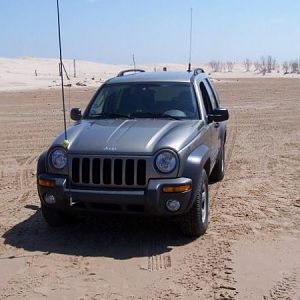
I thought I would add the first project I did when I got my Libby last year. It was in nearly perfect condition EXCEPT someone backed into something and caved in the bumper cover. I first tried the old trick of pouring boiling water over it, and it helped some but looking at the condition of it I decided that it may be better to replace it.
I didn't get pictures of everything, but I'll try to give you the essentials but really this is an extremely easy project that will take almost no time at all. I purchased all the parts from Amazon (and got free shipping on all the small parts too with Amazon Prime). NOTE: You will need both the clips
in the parts list and the nylon expansion rivets to complete this project
Parts List:
OE Replacement Jeep Liberty Rear Bumper Cover (Partslink Number CH1100406) - Amazon, comes with free shipping $119.20
Chrysler Fender Flare Moulding Clips Jeep Liberty 55157055AA - Amazon, $5.72
Jeep Liberty Rocker Panel & Bumper Fascia Clips - Amazon, $11.99
Nylon Expansion Rivets 1/4 Hole Dia. 2-3/16 Length - Amazon, $5.99
Paint of your choice, I used Dupli-Color bumper and trim paint from Autozone - $8.99
Strong adhesive, I used JB Weld from Autozone - $5.99
Total - $157.88 + tax
Now, you are going to need these tools:
Drill
Nippers (work the best when cutting off the nylon rivets)
Nylon rivet gun (you can find these cheap at Harbor Freight or more expensive models at the parts store. Harbor freight also includes an assortment of rivets)
Trim removal tool - This is a must, don't use a screwdriver for this unless you don't care about scratching the paint.
pliers
socket drive and 10mm socket
utility knife
screwdriver - philips head
Getting it done...
I'll walk it through the way I remember it:
1. Remove the license plate and any external accessories that may get in the way. If you're clumsy, you might want to take out the tail lights (T20 Torx) to prevent breakage (I didn't and it's not necessary) and open the gate.
2. Remove the rear fender flairs. This is easiest if you put the jeep on jack stands and remove the wheels. Trust me, you'll thank me for that later. Use your drill and drill out the nylon rivets, I think there were five of them on each side. Check for the one hiding at the very end of the fender flair.
make sure the drill bit is about the same size as the middle part of the river and drill right through it, then use your trim removal tool to pry out the washer that is left. Now, gently pull the fender flairs straight off, you may need to use the trim tool here too.
It will look something like this now
3. Look underneath the rear bumper, guess what, more rivets (2 if I remember correctly). Drill those out too.
4. Now take out your handy screwdriver and remove the screws for the license plate light, no need to take it off but be aware when you go to take the bumper off the wiring is held onto it with a clip and you'll need to reach in there and pull the clip out.
5. While you're back here, look between the bumper and the rubber seal, you can pull the seal off to see it easier, you have 3 screws/bolts attaching it to the rear of the body. Take those out too.
6. Remove the bolts that attach the cover on the sides (under the fender flairs you removed, 2 on each side).
7. Now it will either drop off or you need to pull it straight back (don't forget about the wiring for the license plate light). Put the cover aside, you're going to need it again in a few minutes. Now you should have something like this.
8. Now is the time to evaluate the damage underneath. It looks like the person that owned my libby before backed into something really hard, and you can plainly see that it's damaged. After doing some measurements and comparison I determined that the damage will not effect the placement of the cover, so I really don't need to do anything for it. You may want to paint bare metal or use undercoat since you have it off if necessary.
9. Now take a look at your old bumper cover, you're going to need to remove the step pads as the new cover does not come with them. If your's are damaged, you may need to get some new ones but just a word of caution, I can't find new ones for less than $75.00 each. Mine are sound though the right one is slightly warped so I'm reusing the old ones. Flip the cover over so you can see underneath it. The step pads are held on by a nub that had been melted down to hold it in place (worst design ever), take your utility knife and carefully cut around the nubs until the step pad releases.
10. Clean up the step pads and prep the new cover for painting. Now those with black (like mine) are going to be tempted to not paint it...stop! You need to paint it because it will fade if you don't. I used the trim and bumper paint and it came out very well. Leave it to dry and cure overnight if possible, otherwise you're going to end up having to touch it up. Don't forget to repaint the step pads too, the pads don't need to be perfect but you want them to be at least the same color.
11. Now you're ready to put it back on. It's helpful if you have a second pair of hands for this part to avoid scratching the new paint. Place the cover back up into position and clip the wiring back in for the license plate light. Have a helper hold the cover while you put the bolts back in. Now put the nylon rivets back in using your rivet gun and make sure the rivets are trimmed flush with the nippers.
12. Now the cover is in place, use your adhesive to attach the step pads back into place. This is much easier with the cover attached. I used JB weld but you can really use and good quality adhesive.
13. The new cover will need a couple of holes drilled into it for the light and the license plate. Chose a drill bit smaller than your screws and drill out the indentation that are there. You can now use your old screws and they will thread right into the holes. Reattach the license plate and the light.
14. Now inspect your fender flairs. I bet you broke at least a couple of clips on each one. For whatever reason, they decided 2 different type of clips on the fenders was a good design....so replace and damaged ones and re-attach the fender flairs to the body.
15. Almost done, now remember when I told you to take the wheels off, this now comes into play as you put the new rivets in. It is VERY difficult to put the rivets in with the wheels on, but it can be done in a pinch but just be aware you won't be able to get the rivets in tight.
16. Put the wheels back on and off the jack stands and you're done! Time invested - less than 2 hours excluding paint dry time. This will get you body shop quality at home and really make the jeep look new again.
You must be registered for see images attach
I didn't get pictures of everything, but I'll try to give you the essentials but really this is an extremely easy project that will take almost no time at all. I purchased all the parts from Amazon (and got free shipping on all the small parts too with Amazon Prime). NOTE: You will need both the clips
in the parts list and the nylon expansion rivets to complete this project
Parts List:
OE Replacement Jeep Liberty Rear Bumper Cover (Partslink Number CH1100406) - Amazon, comes with free shipping $119.20
Chrysler Fender Flare Moulding Clips Jeep Liberty 55157055AA - Amazon, $5.72
Jeep Liberty Rocker Panel & Bumper Fascia Clips - Amazon, $11.99
Nylon Expansion Rivets 1/4 Hole Dia. 2-3/16 Length - Amazon, $5.99
Paint of your choice, I used Dupli-Color bumper and trim paint from Autozone - $8.99
Strong adhesive, I used JB Weld from Autozone - $5.99
Total - $157.88 + tax
Now, you are going to need these tools:
You must be registered for see images attach
Drill
Nippers (work the best when cutting off the nylon rivets)
Nylon rivet gun (you can find these cheap at Harbor Freight or more expensive models at the parts store. Harbor freight also includes an assortment of rivets)
Trim removal tool - This is a must, don't use a screwdriver for this unless you don't care about scratching the paint.
pliers
socket drive and 10mm socket
utility knife
screwdriver - philips head
Getting it done...
I'll walk it through the way I remember it:
1. Remove the license plate and any external accessories that may get in the way. If you're clumsy, you might want to take out the tail lights (T20 Torx) to prevent breakage (I didn't and it's not necessary) and open the gate.
2. Remove the rear fender flairs. This is easiest if you put the jeep on jack stands and remove the wheels. Trust me, you'll thank me for that later. Use your drill and drill out the nylon rivets, I think there were five of them on each side. Check for the one hiding at the very end of the fender flair.
You must be registered for see images attach
make sure the drill bit is about the same size as the middle part of the river and drill right through it, then use your trim removal tool to pry out the washer that is left. Now, gently pull the fender flairs straight off, you may need to use the trim tool here too.
It will look something like this now
You must be registered for see images attach
3. Look underneath the rear bumper, guess what, more rivets (2 if I remember correctly). Drill those out too.
You must be registered for see images attach
4. Now take out your handy screwdriver and remove the screws for the license plate light, no need to take it off but be aware when you go to take the bumper off the wiring is held onto it with a clip and you'll need to reach in there and pull the clip out.
You must be registered for see images attach
5. While you're back here, look between the bumper and the rubber seal, you can pull the seal off to see it easier, you have 3 screws/bolts attaching it to the rear of the body. Take those out too.
You must be registered for see images attach
6. Remove the bolts that attach the cover on the sides (under the fender flairs you removed, 2 on each side).
You must be registered for see images attach
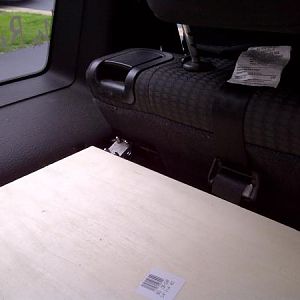
7. Now it will either drop off or you need to pull it straight back (don't forget about the wiring for the license plate light). Put the cover aside, you're going to need it again in a few minutes. Now you should have something like this.
You must be registered for see images attach
8. Now is the time to evaluate the damage underneath. It looks like the person that owned my libby before backed into something really hard, and you can plainly see that it's damaged. After doing some measurements and comparison I determined that the damage will not effect the placement of the cover, so I really don't need to do anything for it. You may want to paint bare metal or use undercoat since you have it off if necessary.
You must be registered for see images attach
9. Now take a look at your old bumper cover, you're going to need to remove the step pads as the new cover does not come with them. If your's are damaged, you may need to get some new ones but just a word of caution, I can't find new ones for less than $75.00 each. Mine are sound though the right one is slightly warped so I'm reusing the old ones. Flip the cover over so you can see underneath it. The step pads are held on by a nub that had been melted down to hold it in place (worst design ever), take your utility knife and carefully cut around the nubs until the step pad releases.
You must be registered for see images attach
You must be registered for see images attach
10. Clean up the step pads and prep the new cover for painting. Now those with black (like mine) are going to be tempted to not paint it...stop! You need to paint it because it will fade if you don't. I used the trim and bumper paint and it came out very well. Leave it to dry and cure overnight if possible, otherwise you're going to end up having to touch it up. Don't forget to repaint the step pads too, the pads don't need to be perfect but you want them to be at least the same color.
You must be registered for see images attach
You must be registered for see images attach
You must be registered for see images attach
You must be registered for see images attach
11. Now you're ready to put it back on. It's helpful if you have a second pair of hands for this part to avoid scratching the new paint. Place the cover back up into position and clip the wiring back in for the license plate light. Have a helper hold the cover while you put the bolts back in. Now put the nylon rivets back in using your rivet gun and make sure the rivets are trimmed flush with the nippers.
You must be registered for see images attach
12. Now the cover is in place, use your adhesive to attach the step pads back into place. This is much easier with the cover attached. I used JB weld but you can really use and good quality adhesive.
You must be registered for see images attach
13. The new cover will need a couple of holes drilled into it for the light and the license plate. Chose a drill bit smaller than your screws and drill out the indentation that are there. You can now use your old screws and they will thread right into the holes. Reattach the license plate and the light.
14. Now inspect your fender flairs. I bet you broke at least a couple of clips on each one. For whatever reason, they decided 2 different type of clips on the fenders was a good design....so replace and damaged ones and re-attach the fender flairs to the body.
15. Almost done, now remember when I told you to take the wheels off, this now comes into play as you put the new rivets in. It is VERY difficult to put the rivets in with the wheels on, but it can be done in a pinch but just be aware you won't be able to get the rivets in tight.
You must be registered for see images attach
16. Put the wheels back on and off the jack stands and you're done! Time invested - less than 2 hours excluding paint dry time. This will get you body shop quality at home and really make the jeep look new again.
You must be registered for see images attach
Last edited: