Evic Install in a 03 Liberty Sport 3.7

Disclaimer: Links on this page pointing to Amazon, eBay and other sites may include affiliate code. If you click them and make a purchase, we may earn a small commission.

Craigo

Member
Joined
Jun 8, 2020
Messages
27
Reaction score
32
Location
Nebraska
Hi everyone, I know this has been covered many times before but after coming across this install in this How To section I realized that most of the links did not work and none of the pics showed any more. In my books a pic is worth a thousand words so after reading between the lines of all these installs that have been done in the past I went ahead and did it and now want to show an up to date How To with a lot of pics. I am not going to go into specifics on what Evic fits what models, there are plenty of info on that already out there, this is more for after you have everything and want it done so here goes.....

The parts you will need, the Evic which in my case is off a 01 300M Serial #ending in AC, a spool of trailer wiring, a fuse buddy connector, wire connectors with built in solder and of cause the pig tail off the Evic..

You must be registered for see images attach


First I started by making my wiring loom,at this stage it does not matter what color you connect to what color, that will only matter when it comes to hooking up to the Diagnostic plug. But I did try to match colors to make sense of it all.

I used these connectors because they give a good join and they heat shrink them selves plus the colored bands are actually glue which also melt around the wire, I still used heat shrink tubing over them for added protection.

You must be registered for see images attach


You must be registered for see images attach


Next it was onto the over head lights, remove them by getting your fingers under the edges of the side and pull down, you may have to wiggle it a little bit once you have one side off the other side comes out easier. It is held in place by spring clips that pop into a slot in the mounting bracket.

You must be registered for see images attach

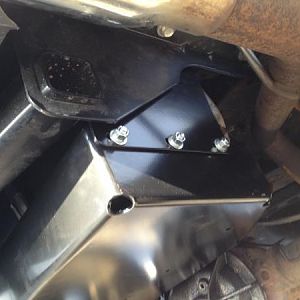
Inside if you are lucky 02,03 models and maybe 04 you will find a mounting bracket, if not then you will have to source one from some where like flea bay or dealers.
 

LibertyTC

Well-Known Member
Staff member
Moderator
Joined
Oct 24, 2008
Messages
9,081
Reaction score
1,747
Location
B.C. Canada
Thanks for the How 2 re the Evic.
One day I got to get out to the Jeep wreckers & find one!
 

Craigo

Member
Joined
Jun 8, 2020
Messages
27
Reaction score
32
Location
Nebraska
Here is the pic of the mount.

You must be registered for see images attach

Since my wiring loom was done I want to install that. First remove the plugs in your 'A' pillar and remove the 2 T20 torque screws, remove the the 2 philips screws from the drivers side sun visor and pull out the end holder, I was not sure how that came out but I just kept on pulling on it till it pulled out.

You must be registered for see images attach


I then pushed in the wiring loom towards the 'A' pillar and down to the dash pass the fuse box and under the dash to the Diagnostic plug, it took about 7 feet of wiring. You can also pull down the head liner a little bit and feed it over the top also if you wanted.No pics as it was pretty basic.

Next it was onto the console hole, I pulled the Evic out of the housing and used the housing as a template to mark the housing onto the roof lining with a pencil. I then marked a line all around about half of an inch in where I want to cut. I used a box cutter and the lining cut really easy and felt like stiff sponge, just be careful of the visor light wiring on the sides. Once you have cut it will see a place for the bottom screw of the Evic to screw to.

Then all there was to do was refit the Evic into the housing and plug in the the looms and mount it. I had trouble finding the bottom screw hole so I put the screw (1"x1/8' wood screw) in first a couple of threads and then popped in the spring clips.

You must be registered for see images attach
 
Last edited:

Craigo

Member
Joined
Jun 8, 2020
Messages
27
Reaction score
32
Location
Nebraska
Next it was the wiring splicing to the OB11 plug wires, take out the the 2 Philips screws holding the plug, it does not pull out far from the dash which makes it a little more awkward for room to splice the wires but still doable. Find the correct colors that you need that correspond with the colors on the wiring for the Evic, here is a pic of the wiring set up with note on the main loom colors that I made at the beginning.

You must be registered for see images attach


The wiring done and plug remounted.

You must be registered for see images attach


I then added the fuse buddy to the power ignition on wire, pull out the fuse in the #13 slot of the fuse block and install the fuse buddy instead. At this stage nothing will work until you put in 2 10 amp fuses into the fuse buddy, first one will bring on the dash icons and the second will power up the Evic

You must be registered for see images attach


Now is the time to mount your Ambient Temp Sensor, it is in the front of the engine bay to the right of the hood latch behind the grill (may need to remove grill, mine was already off) The 02 and 03 models did not have them fitted from factory, the 04 on wards did. I got mine from O'Rielly parts store for about $20. Push ******* the plug and make sure it snaps in place on the connector.

You must be registered for see images attach


Now to test the Evic, I turned on the ignition and everything works, steps,menu, instant miles , door ajar, the only thing that seemed off was the temp. It was reading -38F, I pulled the sensor and read -40F, reconnected and it still read -38. So I left it for a couple of hours and tried again and then it read 86F, it just needed time to calibrate, I heard it takes samples every 5 minutes.

You must be registered for see images attach

You must be registered for see images attach

At this stage it is all done and complete, cleaned up the tools, patted myself on the back and went inside, it was damn hot out there today (garage already had 2 cars in there)

Thanks for reading.....cheers.
 

DadOSix

Full Access Member
Joined
May 20, 2020
Messages
671
Reaction score
358
Location
Cumberland, MD.
Well done!

I don’t know how it applies to evic but wanted to point out that on 06, the A-pillar screws are a bastard size. They are 5.5mm and not T20 heads.

I just happened to have a 5.5mm deep socket acquired ages ago whilst replacing a hall effect module on an 84 ford p/u
 

Latest posts

Members online

Top