02 Liberty Renegade Limited...Resurrection

Disclaimer: Links on this page pointing to Amazon, eBay and other sites may include affiliate code. If you click them and make a purchase, we may earn a small commission.

JeepCoMJ

Full Access Member
Joined
Nov 29, 2010
Messages
629
Reaction score
10
Location
SE WI
Today we;

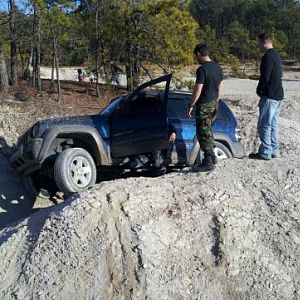
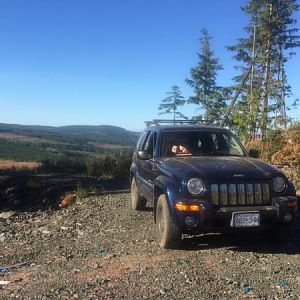
installed the rear end and lift

swapped the yoke on the rear end out for one without a broken ear

pulled the brand new (flash rusted slightly from sitting) brakes from the tboned one and put them on the limited. drilled and slotted front rotors, premium rears. few hundred bucks worth of brake parts that I wasn't expecting to have. Old brakes were almost new as well, but I can't resist high quality.

bled rear brakes

pulled front bumper again, inner fender, fender flares so I can do the mods necessary to clear the tires without rubbing

oil change

installed driveshafts

confirmed detroit full carrier locker, 4.10 gears in the rear axle, new fluid in it

pics.

You must be registered for see images attach


didn't bother scuffing or cleaning the light rust off the discs, they will wear in in under 10 miles

You must be registered for see images attach


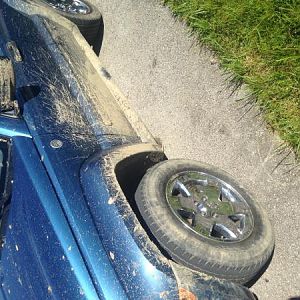
inner fender, fender flare removed

You must be registered for see images attach


pinch weld beat in so it's out of the way. currently has new paint (color match of course) drying on it after i took the pic.

You must be registered for see images attach


that's a bit more room

You must be registered for see images attach
 

JeepCoMJ

Full Access Member
Joined
Nov 29, 2010
Messages
629
Reaction score
10
Location
SE WI
I will post pics in the morning, but today we;

finished bolting up everything in the front suspension and front clip

finished modifying the pinch welds in the front wheel well. I did attempt to keep the inner fenders in one piece by folding and plastic welding the area where the pinch welds were. the 32" tires still rubbed while turning, so I ended up cleanly cutting that area out of the inner fender completely, but retaining most of it. Bedlined that area and called it good. Eventually I will do something nicer, but the fact that there was 1/4" too much material there made it more worth my time to go this route.

installed front tow hooks

installed gas tank skid plate

installed transfercase skid plate. couldn't get nutcerts big enough for the body side, so I made a nut strip to slide into the frame rail instead.

Tomorrow we just have to finish up fluid changes, then put the tboned renegade back together to move it outside so this one can see daylight for the first time in a couple weeks. and a bath.
 

JeepCoMJ

Full Access Member
Joined
Nov 29, 2010
Messages
629
Reaction score
10
Location
SE WI
You must be registered for see images attach


You must be registered for see images attach


before filing the edge and color matching the cut edge.

You must be registered for see images attach


You must be registered for see images attach
 

JeepCoMJ

Full Access Member
Joined
Nov 29, 2010
Messages
629
Reaction score
10
Location
SE WI
Went and bought another one today. Price too good to resist.

'02 limited 2wd from texas. No motor or trans. Leather, Sunroof, power everything, heated seats, cruise, etc. Good set of rims, crap tires. Going to convert it to 4x4, swap the motor and everything from the tboned renegade in, and sell it.

You must be registered for see images attach


You must be registered for see images attach


Class 3

You must be registered for see images attach


nice leather
You must be registered for see images attach


Front
You must be registered for see images attach


Sunroof
You must be registered for see images attach


empty engine bay
You must be registered for see images attach


2x4 k-member
You must be registered for see images attach


Old renegade in the final 24 hours of it's life before we send it to heaven.
You must be registered for see images attach
 

JeepCoMJ

Full Access Member
Joined
Nov 29, 2010
Messages
629
Reaction score
10
Location
SE WI
Stripped the rest of the first rolled renegade out today. pics before I pulled bumpstops and rear side glass. ready for scrap.

You must be registered for see images attach


You must be registered for see images attach


You must be registered for see images attach


You must be registered for see images attach


You must be registered for see images attach


You must be registered for see images attach


This is the complete wiring harness, front to back, 100% of it with the ends cut off. filled a 5 gal bucket. Stripping that down took about 2 hours. the rest of the jeep, 20 min./door to strip them down and remove them, about 2 hours into stripping the parts off the body etc.

You must be registered for see images attach


Loading and scrapping it tomorrow.
 

JeepCoMJ

Full Access Member
Joined
Nov 29, 2010
Messages
629
Reaction score
10
Location
SE WI
junk body loaded and heading out.

You must be registered for see images attach


Here is how we loaded it.

You must be registered for see images attach


You must be registered for see images attach


Before strapping it down.

You must be registered for see images attach


You must be registered for see images attach


Limited #2 moved into it's place to be fixed. finishing up interior work (swapping in new pass. rear window motor, etc.) then on to the 4x4 conversion, new motor, new trans, etc.

You must be registered for see images attach


And shop reorganized.

You must be registered for see images attach


Getting a start on this blue one tomorrow while the silver one is at the dealership getting keys programmed and one more keyless entry remote added, then dropped off at a friend's shop to have A/C recharged and alignment checked and perfected.
 

JeepCoMJ

Full Access Member
Joined
Nov 29, 2010
Messages
629
Reaction score
10
Location
SE WI
Scrapped, goodbye.


You must be registered for see images attach


You must be registered for see images attach


towed like a dream, as always.
 

teckman02

Full Access Member
Joined
Aug 3, 2008
Messages
713
Reaction score
0
Location
trotwood ohio
You must be registered for see images attach


did you scrap out all that wire? i always looking for OEM wire to extend wiring harness for my builds
 

JeepCoMJ

Full Access Member
Joined
Nov 29, 2010
Messages
629
Reaction score
10
Location
SE WI
Yeah, it's gone.

I have another KJ that's getting stripped (the tboned one), so it still has all the ends on it. any specific chunks you're looking for?
 

JeepCoMJ

Full Access Member
Joined
Nov 29, 2010
Messages
629
Reaction score
10
Location
SE WI
More work done today. Had errands in the A.M. then had to get a few more Meyer snowplow pumps ready, but got back at it.

Removal
You must be registered for see images attach


You must be registered for see images attach


out
You must be registered for see images attach


You must be registered for see images attach


You must be registered for see images attach


You must be registered for see images attach


You must be registered for see images attach


You must be registered for see images attach


You must be registered for see images attach


You must be registered for see images attach


cleared out

You must be registered for see images attach


door off so we can walk around it easier. Hell of it is, both d/s door glass and regulators were still straight.

You must be registered for see images attach


just having some fun...
You must be registered for see images attach


You must be registered for see images attach


You must be registered for see images attach
 

JeepCoMJ

Full Access Member
Joined
Nov 29, 2010
Messages
629
Reaction score
10
Location
SE WI
I have to say this is awesome. I know it's swapping stuff but you two (I assume your brother is in on it with you) are making a small livelihood out of swapping, saving, and modding KJs. Love it.

Lol. Well, it's a pain in the butt without a car lift, but My brother and I get it done.

The silver one is a keeper...not going to trail it, I'll build another xj for that. There is no sense wheeling a $7000+ vehicle, IMHO, when you can build an xj for $3k and total it, and not give a darn.

The blue one will not be a "livelihood" per se, but it will negate all costs of building the silver one, and set us back to zero when we sell it. (OK, maybe we'll make some profit off parts, and a bit off the blue one, but that will take some time)

Thanks for your appreciation!

Engine/trans/tcase/crossmember are IN, wiring layed back out, shift cables hooked up, now time to align it, and toss the front coils back in, then finish her up

You must be registered for see images attach


You must be registered for see images attach


and no, we didn't lift that in with a floor jack...we pushed it in with a pallet jack, then aligned the body over it with the engine hoist, set it down, bolted her up. floor jack is just so I could align it side to side.

Tomorrow we will;
align front crossmember
install trans crossmember
hook up exhaust
install front coils, brakes, upper a-arms, sway bar
hook up wiring
install battery box
install cruise motor
install computers
install radiator
swap a/c pumps out as we didn't want to discharge this one
change all fluids
test fire
tune up


We may get around to installing the front clip again tomorrow, but that's a long shot at the moment.

Also dropping off two rims for two new tires to match the 3 other new ones on it.

on the home stretch now!
 

JeepCoMJ

Full Access Member
Joined
Nov 29, 2010
Messages
629
Reaction score
10
Location
SE WI
Didn't do much the past couple days. Just about finished it today.

Rotors and pads up front on one of the KJ's were just about new, but flash rusted from sitting. So I popped them in the bead blast cabinet and blasted the rotors, blasted the braking surface of the pads quick to scuff them, and the sliding surfaces of them. Also blasted the caliper brackets, all of the slides, and relubed and installed them after paint.

After blasting the rotors, I just used my fine pad on my gasket remover to polish them back up. Took the rear brakes apart, cleaned up in there, they were almost new but whoever installed them didn't put any anti-seize on them (presumably because this sucker is from texas), so I got that done.

aligned the K-member and installed the bolts for that, cleaned and painted the sway bar, lower a-arms, coilover bases, calipers, and k-member after we did the oil change.

Then picked up the two new tires for it, as I had a set of 2 new tires and one 70%, so now I've got a set of 4 new and one very good Nokian Vativa 235/70R16's on this beast.

Then reinstalled the engine wiring harness, hoses, cruise motor, computers, air box, battery box, throttle cable, radiator, trans crossmember and rear driveshaft, and header panel. That's where we called it a day.

Pics

You must be registered for see images attach


You must be registered for see images attach


You must be registered for see images attach


tires on
You must be registered for see images attach


front suspension done, tires on
You must be registered for see images attach


Scuffed the bottom of the A arm with the jack stand, will repaint tomorrow.
You must be registered for see images attach


You must be registered for see images attach


You must be registered for see images attach
 

JeepCoMJ

Full Access Member
Joined
Nov 29, 2010
Messages
629
Reaction score
10
Location
SE WI
Pic fuzzed out, but the front end is all back together, tow hook brackets and non-liberty NOS stainless hooks and clips installed.

You must be registered for see images


all back together. Doing the windshield tomorrow, then letting that cure, and it's time to wash and detail her out.
 

JeepCoMJ

Full Access Member
Joined
Nov 29, 2010
Messages
629
Reaction score
10
Location
SE WI
Well, not much of an update, but today on the blue one we;


Installed the front skid, tcase skid, gas tank skid, put coolant in it, did the trans fluid, and took it for a test drive. Once that was done, we dropped it off to have the windshield done. I got about halfway through pulling the windshield from the tboned renegade when it decided to let loose all the stress from having been tboned, and royally destroy itself. Oh well.


Picking it up tomorrow p.m., washing and detailing it, inspecting it, marking all of the fluid changes and intervals in the owner's manual, and re-checking all of the bolts for proper torque.


Have a prospective buyer coming to look at it on saturday.
 

JeepCoMJ

Full Access Member
Joined
Nov 29, 2010
Messages
629
Reaction score
10
Location
SE WI
thanks. It really wasn't that bad, and only took as much time as it did because I didn't work hard.
 
Top