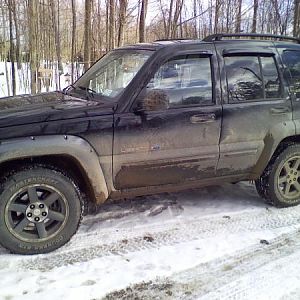

Re-Imagining our "Beast" build. 4.7- Solid axle- bed conversion

Disclaimer: Links on this page pointing to Amazon, eBay and other sites may include affiliate code. If you click them and make a purchase, we may earn a small commission.

simplesam88

Active Member
Joined
Aug 18, 2025
Messages
41
Reaction score
125
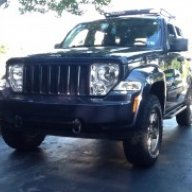
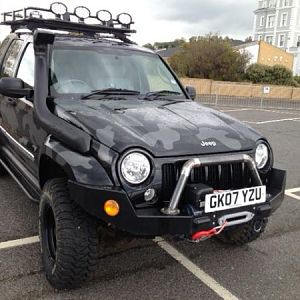
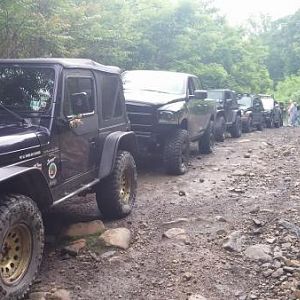
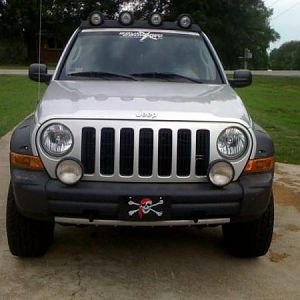
Sharing this epic build on my friends Liberty. I often join forums when I'm building something. This build has been off and on for 5+ years. We are nearing completion now and I have lots of photos to share. If you have questions ask away. If you know the rig and the owner feel free to speak up.

Let me start with the history.

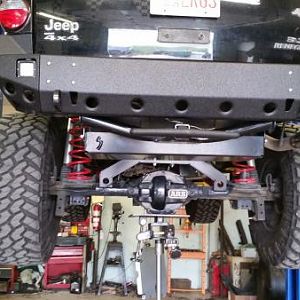
Purchased in 2003 and starting as a black liberty, it had wheeled several west coast trails and Moab. Along they way as wheeling skills improved the vehicle was solid axle swapped with a solid axle swap around 2006. To do the swap, and Nth Degree kit from a Jeep LJ was modified to fit the uni odyssey as a subframe to support the new four links. The axles were Dana 30/35 from a cherokee and coils overs to hold it up.

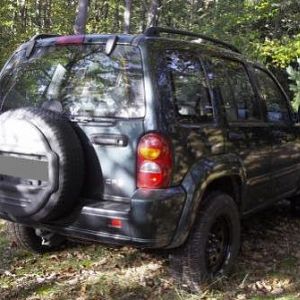
A few years later a roll cage was installed by some other friends. At this time, the roll cage guys talked my buddy into cutting the rear open to make it like a - i don't know, kinda a convertible. It definately looked different. So they did some strong work. For example they wrapped the quarters to the roof with .120 wall steel. The main hoop was attached at the reinforced section of the unibody. All the welding was excellent! Here is the not so good. They beat the body sheet metal back to the hoop to attach it. This really caused issues for me later. Because the rear was open, even with the canvass top on it became a dust collector. It also made the heater and a/c non-existent. The noise was unbearable. Not bad on the trail when it was slow, but on the highway you weren't taking any calls.
About 5 years ago it overheated bad and blew the motor. Here is where I came in. Its always been a little underpowered with the larger tires, so lets do a v8 swap. The body needed to be fixed, I had a plan. The suspension was worn out, lets refresh it. How about a custom interior? Sure that too. While we're at it, lets update the paint also.

Photos are coming, they are all in this phone and i have a lot! Hopefully you find this entertaining. I didn't notice, but this is all on instagram, if we're allowed to share i will. But only after I've caught everyone up and with approval from the mods.
 

simplesam88

Active Member
Joined
Aug 18, 2025
Messages
41
Reaction score
125
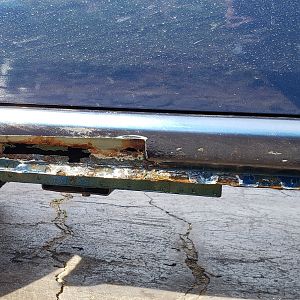
Sure, at first this looks pretty good. Mostly from 50 feet. Upclose it was showing its age.
You must be registered for see images attach
well, this is where the story begins. Unfortunately during a phone upgrade some photos of the engine pull and initial stripping of the paint are gone.
You must be registered for see images attach
 

simplesam88

Active Member
Joined
Aug 18, 2025
Messages
41
Reaction score
125
Here is the new engine. A donor motor taken from a same year grand Cherokee. The compression test was solid. So we pulled the heads and had them gone trough, cleand and ground the seats and new seals. We replaced the timing chain set. New oil pump, new water pump, new a/c compressor, new alternator and a new hydraulic pump. Basically, we feel confident our power plant is good.
You must be registered for see images attach

Because the engine was out. We pressure washed and heavily scotch brighted the engine compartment. Then a coat of sealer. I decided to use Gobi color from jeep as our base color. This KJ was originally black. I didn't want to open the hood and see a different color.
You must be registered for see images attach
 

simplesam88

Active Member
Joined
Aug 18, 2025
Messages
41
Reaction score
125
Then just like that, we set the 4.7. Well no, since i lost the photos from my old phone. I will recount what actually happend. We put the new motor in and out about 3 times. We mix matched the engine mounts from the original engine and the donor motor. In the end I cut the mounting points off the frame and rewelded them in place to make sure everything fit nice. Because this kj already had a solid axle swap, steering had been changed to a ford ps box and the exhaust could easily fit using the cherokee manifolds.
You must be registered for see images attach
 

simplesam88

Active Member
Joined
Aug 18, 2025
Messages
41
Reaction score
125
If you look carefully at the previous photos, you might notice the engine mount points on the frame had been moved.
After a late night of work, we reassembled a bunch of the engine compartment to start figuring out space. This liberty has a snorkel and we found it best to reuse the factory intake and air cleaner assembly. Plus, thought it a little funny that it clearly says 3.7 V6 right on top. Well, I needed a break at work, but, I need to go back to the grind. More to come.
You must be registered for see images attach
 

simplesam88

Active Member
Joined
Aug 18, 2025
Messages
41
Reaction score
125
So about now, we have the engine in place. The engine harness and computer have returned from the shop that modified it to work in this new environement. This photo here might not seem impressive, but we were minutes away from the first test fire of the motor. It ran great, for about 3 seconds. Then we realized the SKIS , hadnt been programmed out. Back to the programmer.
You must be registered for see images attach

So this is where our build journey takes a turn. A while back my friend got help from another buddy to add a roll cage in back. Not that he asked for it mind you. His friend wanted to practice some tubing and the owner said sure go ahead. At the time we were in old down Vegas throwing back cheap beers and would have said yes to about anything. In fact when the idea to cut the back off and make it an open back I think we both said "cool". Well its not cool. You cut the back open and even with a canvass top on it. All the trail dust smokes out the cabin. The a/c and heater become non-existent. Plus the way it was done created all sorts of water retaining issues.
You must be registered for see images attach
 

simplesam88

Active Member
Joined
Aug 18, 2025
Messages
41
Reaction score
125
So what is the answer? Sure we could leave it like this. Thing is, I like to do wierd ****. I sit back and and really assess what I'm seeing. It not only appears they cut the rear open, but they also clad the side with .120 wall steel. Then it looks like they used a hammer to beat the remaining body back to the roll bar and welded it all together. Plus the whole thing was covered with roll on bed liner. Ill see if I have more photos to share of this.
 

simplesam88

Active Member
Joined
Aug 18, 2025
Messages
41
Reaction score
125
You must be registered for see images attach
 

simplesam88

Active Member
Joined
Aug 18, 2025
Messages
41
Reaction score
125
So before I could make a decision on the repair, I had to strip back 3 coats of two different bed liner material and of course factory paint. Did you look at the roof. I'm shaking my head even now in disbelief. The good news is, I'm going to share the repair plan next. Everything you see here is about to get turned upside. The bad news is, you will have to wait until tomorrow's update to see the idea I came up with.
 
Last edited:

simplesam88

Active Member
Joined
Aug 18, 2025
Messages
41
Reaction score
125
I got thinking, what if instead of trying to return it back to where it was, I instead embraced it. How could I turn it into something that looked like it came that way. I started with this concept. I'm going to cut the back off another liberty and blend it back into this one. But more like the back end of a truck.
You must be registered for see images attach

Seems like it could work. So to the wrecking yard with my grinder and 3 unsuspecting friends.
You must be registered for see images attach

Full disclosure. Shortly after I finished cutting this off, I got uninvited from our local Pick and Pull because no grinders allowed. Thankfully it was after I was done.
 

simplesam88

Active Member
Joined
Aug 18, 2025
Messages
41
Reaction score
125
So sure sounded neat at first, but had I known....well I would have still done it. Why? Cause I'm a little stupid i guess. I threw the part up there to see what it would look like. I didnt hate it.
You must be registered for see images attach

The Liberty actually gets narrower at the back so in this next picture you will see the tap extensions i made to account for how much i had to stretch it.
You must be registered for see images attach
 

simplesam88

Active Member
Joined
Aug 18, 2025
Messages
41
Reaction score
125
So, now to make those filler pieces a little more permanent. I cut a couple squares of 21guage to size and quickly figured out no simple bend woukd make the curves I need. A night of plying my wife with wine and I had successfully convinced that a shrinker and stretcher was all we needed to bridge the gap to solve all the problems our house could have. I hadn't bothered to mention I have never touched one or that I'm not sure what great household chores would be solved by having them. On a side note, I did get some great practice making those filler pieces.
You must be registered for see images attach
 

simplesam88

Active Member
Joined
Aug 18, 2025
Messages
41
Reaction score
125
Well, I knew the rear window would never work in a bed. Obviously now that I've widened it, that window will never have a chance again. Can't leave a hole in the back of it though either.
You must be registered for see images attach

Its a big opening, I've done the math and decided, time to just do it. Let's get some flat steel and the bead roller out. I've also found a good window option for the back.
You must be registered for see images attach

Well, there's something.
You must be registered for see images attach
 

simplesam88

Active Member
Joined
Aug 18, 2025
Messages
41
Reaction score
125
if only a had some cool tools like a shrinker and stretcher. I could do something like wrap the edges to match the contour of that new frame I just installed.
You must be registered for see images attach

How about that profile?
You must be registered for see images attach

Ok, this is really rough. I feel like until I get the bottom half sorted out, it's really incomplete. Too bad its going to cover up that nice x brace roll bar. Let's try to keep the coolness of what's behind it.
You must be registered for see images attach
 

simplesam88

Active Member
Joined
Aug 18, 2025
Messages
41
Reaction score
125
Let's hold that window up. How does it look?
You must be registered for see images attach

Ok, here we see something that starts to bother me. This is supposed to look like a truck bed. Check out how thick those rails would be under our arms.
I gotta fix that.
You must be registered for see images attach

Ok, thats better. One more change needs to happen. The quarter panel doesn't look like it was cut right. My tape line should fix it.
You must be registered for see images attach
 

simplesam88

Active Member
Joined
Aug 18, 2025
Messages
41
Reaction score
125
Guess i better fix those lines out of metal.
You must be registered for see images attach


Well, time to start final fitment of these pieces. Normally when doing metal work I prefer butt joints. It avoids potential envelopes and moisture collecting rust zones. This won't be that. That heavy cladding on the body is not something I can get around. So some weldthrough primer, and a little more quality primer. Now I have something to weld to.
You must be registered for see images attach


You must be registered for see images attach
 

Latest posts

Members online

Top