Shanecrabtree
New Member
I want to first give Downtown full and complete credit for the original thread found here HOW TO: Change Transfer Case Position Switch, it will get the job done and I encourage you to take a look at it since it has a ton of great information including the proper electrical resistance numbers if you want to bench test the old part. If you have a on dash light that indicates you're in Part-Time (4-Hi) or 4-LO when the transfer case is in 2WD position, this is the most common fix.
I wanted to do a little bit more detailed step through for people who may have never taken out the console before since there are folks that think this can't be done quickly by going through the top and insist that changing it from the bottom is the way to go. I did this through the top in 38 minutes while taking detailed pictures. If I didn't have to take the pictures, I say it would have taken 25-30 minutes tops. This job requires you to only take out three trim pieces, the console shell, four screws, four nuts, lift the lever out of the way and the remove the switch. If you still want to lay on the ground and do it mostly blind in order to do it 10 minutes or less, knock yourself out but I personally like to be able to see my work clearly and avoid laying on the dirt/concrete. I will acknowledge that if you have a CRD, the switch is in a different position and it doesn't look possible to get a socket on it from the top, but if it was me I would still go through the top to disconnect the plug, inspect, clean and thread it in at least hand-tight when re-installing.
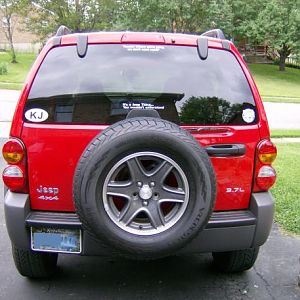
This is on a 2007 3.7 Liberty and should work for 02-07 in most cases.
What you're going to need:
Parts
Genuine Chrysler (5083138AA) Transfer Case Switch - $68.25 (On Amazon with free Prime shipping. I called the dealer here in Phoenix and it was $124.02, Doorman also makes an aftermarket one that's as cheap as $40 but it seems that Doorman isn't very consistent so I decided to go OEM from Amazon since it was 1/2 the dealership price )
O-Ring - I didn't get the size but I just picked up an assortment at Autozone for $3.25. You can take the part directly over to O'Reilly Auto Parts which sell individual ones for .38 cents each.
Tools
Phillips Screw Driver
3/8 Socket Driver
10mm Deep socket and extention
Trim tool and/or plastic knife
1&1/2 inch socket (preferably deep socket, I did see these in the tool section at Autozone, but I already had one with a obscenely large 3/4 drive)
Socket Driver and extension adapter for the 1&1/2 socket if necessary
Something for the screws and nuts, I always use a magnet dish so I won't lose anything.
How to Do It:
1. You'll be removing the center console, that sounds time consuming but I promise you it's not. First, empty out the storage box and remove these two screws in the bottom. It is not necessary to remove the lid, just shut and latch it after you take the two screws out.
2. Next, jump into the back seat and remove the panel that has the window switches on the back on the console box, disconnect the plug by pinching the tab and put aside.
3. Hop back into the front seat and remove the bezel trim around the shifter. Use your trim tool carefully so you don't scratch the plastic. When you remove this bezel, you'll need to disconnect the window control, another pinch and remove the plug. You may want to shift into N to make it easier to pull this off, make sure the E-Brake is engaged!
4. Since we're having so much fun removing trim pieces, go ahead and pop off the boot on the transfer case lever using the plastic knife or trim tool. If you look carefully you can see a snap at the neck. Go ahead and unsnap it and remove the whole boot and put aside. You're going to have to pull the transfer case lever up to make it easy to remove.
5. Just two more screws to remove, here
and here
6. You can now pull the center console out. You will need to manipulate it a bit with the shifters and e-brake, pull it out and put it aside, you should look like this.
7. Now look at the transfer case lever, it has four 10mm nuts holding it in place ( one on each side of the lever). There is some wiring clipped to one of these studs, pull it off. Remove the nuts then carefully pull the lever up and move it to the side. You may have too pull up this black cover a bit ( shown below ), it's in the way when it's fully seated but just pulling up the corner gave me enough clearance to get the lever out. It's not necessary to disconnect the transfer case lever, just be careful not to yank or pull on it too hard.
8. Here it is!
9. Remove the plug, then inspect the area for dirt and debris. You don't want any of this crud entering the transfer case ( thus one of the biggest reasons for changing this through the top ). Brush out or use compressed air to get everything out of there. Put your 1&1/2 in socket on there and remove the switch. With my huge socket wrench it was barely a push to get it out.
10. Here's the switch out.
Prep your new switch, if you notice, it doesn't come with a o-ring. If you forgot to pick one up, you can reuse the old one, but I don't recommend it. Stop being cheap and put a new o-ring on it.
11. Re-install the switch and snug it up. Reconnect the wiring making sure the plug clicks and is fully seated.
12. Replace the transfer case shift level and re-install the console which is simply the reverse. You're done, see it wasn't that hard.
I wanted to do a little bit more detailed step through for people who may have never taken out the console before since there are folks that think this can't be done quickly by going through the top and insist that changing it from the bottom is the way to go. I did this through the top in 38 minutes while taking detailed pictures. If I didn't have to take the pictures, I say it would have taken 25-30 minutes tops. This job requires you to only take out three trim pieces, the console shell, four screws, four nuts, lift the lever out of the way and the remove the switch. If you still want to lay on the ground and do it mostly blind in order to do it 10 minutes or less, knock yourself out but I personally like to be able to see my work clearly and avoid laying on the dirt/concrete. I will acknowledge that if you have a CRD, the switch is in a different position and it doesn't look possible to get a socket on it from the top, but if it was me I would still go through the top to disconnect the plug, inspect, clean and thread it in at least hand-tight when re-installing.
This is on a 2007 3.7 Liberty and should work for 02-07 in most cases.
What you're going to need:
Parts
Genuine Chrysler (5083138AA) Transfer Case Switch - $68.25 (On Amazon with free Prime shipping. I called the dealer here in Phoenix and it was $124.02, Doorman also makes an aftermarket one that's as cheap as $40 but it seems that Doorman isn't very consistent so I decided to go OEM from Amazon since it was 1/2 the dealership price )
You must be registered for see images attach
You must be registered for see images attach
O-Ring - I didn't get the size but I just picked up an assortment at Autozone for $3.25. You can take the part directly over to O'Reilly Auto Parts which sell individual ones for .38 cents each.
You must be registered for see images attach
Tools
Phillips Screw Driver
3/8 Socket Driver
10mm Deep socket and extention
Trim tool and/or plastic knife
1&1/2 inch socket (preferably deep socket, I did see these in the tool section at Autozone, but I already had one with a obscenely large 3/4 drive)
Socket Driver and extension adapter for the 1&1/2 socket if necessary
Something for the screws and nuts, I always use a magnet dish so I won't lose anything.
You must be registered for see images attach
How to Do It:
1. You'll be removing the center console, that sounds time consuming but I promise you it's not. First, empty out the storage box and remove these two screws in the bottom. It is not necessary to remove the lid, just shut and latch it after you take the two screws out.
You must be registered for see images attach
2. Next, jump into the back seat and remove the panel that has the window switches on the back on the console box, disconnect the plug by pinching the tab and put aside.
You must be registered for see images attach
You must be registered for see images attach
3. Hop back into the front seat and remove the bezel trim around the shifter. Use your trim tool carefully so you don't scratch the plastic. When you remove this bezel, you'll need to disconnect the window control, another pinch and remove the plug. You may want to shift into N to make it easier to pull this off, make sure the E-Brake is engaged!
You must be registered for see images attach
You must be registered for see images attach
4. Since we're having so much fun removing trim pieces, go ahead and pop off the boot on the transfer case lever using the plastic knife or trim tool. If you look carefully you can see a snap at the neck. Go ahead and unsnap it and remove the whole boot and put aside. You're going to have to pull the transfer case lever up to make it easy to remove.
You must be registered for see images attach
You must be registered for see images attach
5. Just two more screws to remove, here
You must be registered for see images attach
and here
You must be registered for see images attach
6. You can now pull the center console out. You will need to manipulate it a bit with the shifters and e-brake, pull it out and put it aside, you should look like this.
You must be registered for see images attach
7. Now look at the transfer case lever, it has four 10mm nuts holding it in place ( one on each side of the lever). There is some wiring clipped to one of these studs, pull it off. Remove the nuts then carefully pull the lever up and move it to the side. You may have too pull up this black cover a bit ( shown below ), it's in the way when it's fully seated but just pulling up the corner gave me enough clearance to get the lever out. It's not necessary to disconnect the transfer case lever, just be careful not to yank or pull on it too hard.
You must be registered for see images attach
You must be registered for see images attach
You must be registered for see images attach
You must be registered for see images attach
8. Here it is!
You must be registered for see images attach
9. Remove the plug, then inspect the area for dirt and debris. You don't want any of this crud entering the transfer case ( thus one of the biggest reasons for changing this through the top ). Brush out or use compressed air to get everything out of there. Put your 1&1/2 in socket on there and remove the switch. With my huge socket wrench it was barely a push to get it out.
You must be registered for see images attach
10. Here's the switch out.
You must be registered for see images attach
Prep your new switch, if you notice, it doesn't come with a o-ring. If you forgot to pick one up, you can reuse the old one, but I don't recommend it. Stop being cheap and put a new o-ring on it.
You must be registered for see images attach
You must be registered for see images attach
11. Re-install the switch and snug it up. Reconnect the wiring making sure the plug clicks and is fully seated.
You must be registered for see images attach
You must be registered for see images attach
12. Replace the transfer case shift level and re-install the console which is simply the reverse. You're done, see it wasn't that hard.
You must be registered for see images attach
Last edited:


