
photograjeep
Full Access Member
This is all the material you will need:
You will need ¾ RIDGID Conduit (1 10’ Stick)
Scrap 2” angle Iron (at least 6”)
Some scrap 1” RIDGID Conduit (at least 6”)
Some scrap 1” flat Stock (at least 6”)
8 ¼-20 2” long Allen head bolts
4 set screws (the ones I used were about 1/8”)
Duplicolor Black Truck Bed Coating (AutoZone)
Armacell Armaflex Insulation Tape (foam tape) (Home Depot)
The Tools:
Conduit bender
Conduit cutter and hacksaw or bandsaw(preferred)
Welder
Drill
¼” Tap
1/8” Tap
The Steps…
First thing I did was build the brackets (4 of them). Weld a 1-1/8” piece of 2” angle iron to a 1” long piece of 1” Conduit. (if you don’t use RIDGID, It will not fit correctly)
Cut a 1-1/8” wide square of the 1” flat stock steel
Place them together to drill pilot holes (about 7/32” drill bit) so they line up correctly, about 1/8” from the bottom (pictures below), then tap the ¼-20 on the angle and drill the hole bigger for the flat (1/4” bit)
Cut the ¾” conduit into 2 different sizes (unfortunately). Cut one to be 43.5” long (the back bar). Cut the other to be 45” long (front bar). Using a conduit bender (NOT FROM HOME DEPOT OR LOWES, those are too weak for RIDGID) bend a 10 degree bend on each end. Be careful when bending not to distort the end of the conduit so it will fit into the 1” conduit on the bracket.
Use duplicolor bedliner ( I used 2 cans) to finish everything. Use several even coatings (at least 4-5) waiting at least 15 minutes between coats. If there is anything (such as the bolts) that you will be moving, move those parts together between each coat, being careful not to ruin your coat. This will keep them fitting well after all coats are done.
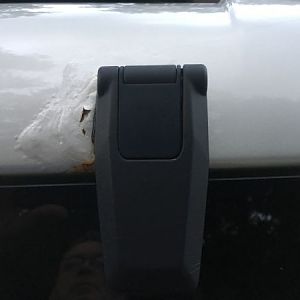
Place the foam tape on all of the inside edges of the brackets, then place bars on vehicle. Then bolt on the 1” plates.
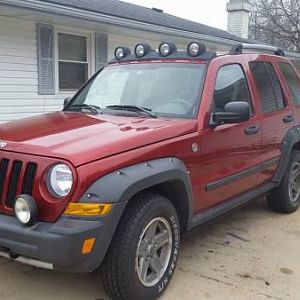
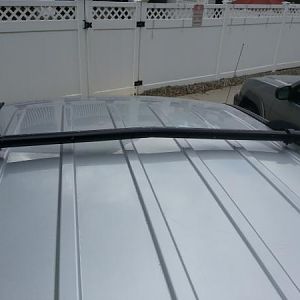
Finished Product with VERY LOW Clearance. That is definitely best for off-road. It will handle any load that the jeep is rated for IMO.
Things to Change or Improve:
The bars (being so low) make a hollow noise that you can hear in the cab. My fix is to use non expanding foam insulation to fill the hollow bars.
The bracket fits very well, but the flat square looks a tad off (just the angle it is at). Recommend bending this about 10 degrees, just above the holes (so you don’t ruin your holes) and it will follow the contour of the bars better.
Jeep needs to go back to the round bars on the KJ Liberty, so we don’t have to make inventive brackets for this to work.
I HOPE THIS THREAD HELPS.
PhotograJeep
You will need ¾ RIDGID Conduit (1 10’ Stick)
Scrap 2” angle Iron (at least 6”)
Some scrap 1” RIDGID Conduit (at least 6”)
Some scrap 1” flat Stock (at least 6”)
8 ¼-20 2” long Allen head bolts
4 set screws (the ones I used were about 1/8”)
Duplicolor Black Truck Bed Coating (AutoZone)
Armacell Armaflex Insulation Tape (foam tape) (Home Depot)
The Tools:
Conduit bender
Conduit cutter and hacksaw or bandsaw(preferred)
Welder
Drill
¼” Tap
1/8” Tap
You must be registered for see images attach
You must be registered for see images attach
You must be registered for see images attach
You must be registered for see images attach
The Steps…
First thing I did was build the brackets (4 of them). Weld a 1-1/8” piece of 2” angle iron to a 1” long piece of 1” Conduit. (if you don’t use RIDGID, It will not fit correctly)
Cut a 1-1/8” wide square of the 1” flat stock steel
Place them together to drill pilot holes (about 7/32” drill bit) so they line up correctly, about 1/8” from the bottom (pictures below), then tap the ¼-20 on the angle and drill the hole bigger for the flat (1/4” bit)
You must be registered for see images attach
You must be registered for see images attach
You must be registered for see images attach
You must be registered for see images attach
Cut the ¾” conduit into 2 different sizes (unfortunately). Cut one to be 43.5” long (the back bar). Cut the other to be 45” long (front bar). Using a conduit bender (NOT FROM HOME DEPOT OR LOWES, those are too weak for RIDGID) bend a 10 degree bend on each end. Be careful when bending not to distort the end of the conduit so it will fit into the 1” conduit on the bracket.
You must be registered for see images attach
Use duplicolor bedliner ( I used 2 cans) to finish everything. Use several even coatings (at least 4-5) waiting at least 15 minutes between coats. If there is anything (such as the bolts) that you will be moving, move those parts together between each coat, being careful not to ruin your coat. This will keep them fitting well after all coats are done.
Place the foam tape on all of the inside edges of the brackets, then place bars on vehicle. Then bolt on the 1” plates.
You must be registered for see images attach
You must be registered for see images attach
Finished Product with VERY LOW Clearance. That is definitely best for off-road. It will handle any load that the jeep is rated for IMO.
You must be registered for see images attach
You must be registered for see images attach
You must be registered for see images attach
You must be registered for see images attach
You must be registered for see images attach
You must be registered for see images attach
Things to Change or Improve:
The bars (being so low) make a hollow noise that you can hear in the cab. My fix is to use non expanding foam insulation to fill the hollow bars.
The bracket fits very well, but the flat square looks a tad off (just the angle it is at). Recommend bending this about 10 degrees, just above the holes (so you don’t ruin your holes) and it will follow the contour of the bars better.
Jeep needs to go back to the round bars on the KJ Liberty, so we don’t have to make inventive brackets for this to work.
I HOPE THIS THREAD HELPS.
PhotograJeep