Ryan.....where is the interior A pillar trim cover on the driver's side???
I have three extra gauges that I am mounting and am making a custom gauge pod for them.
I tend to make almost 90% of my custom items myself as I can make them look better and they cost less money. I am trying to make an A pillar pod which still uses the Factory grab handle. I need it to get in and out of the drivers seat. All the A pillar gauge pods that I see available to buy eliminate the grab handle from the design, so those won't do for me!
The first few attempts I tried, everybody here on the home front really liked...
Except for me. I am my worst critic!
I also ran my Coax CB cable to the rear of the vehicle.
Princess auto has them out here
Our Princess Auto don't sell them!
Wow $40 Canadian? Thats like $37-$38 US right now, that's pretty cheap.
Ryan...
Dude, you got to go into more detail on how you made those. My best guess, piece of aluminium tubing with a cap on one end and you drilled some small holes along its length?
Alright then!
Here is a list of materials I used:
2 length of aluminium tubing
(The company who make it is called K-S Engineering out of Chicago, Illinois.
Stock number 1112 7/32 X 0.014 is the size.)
I went to a good Hobby shop and bought
8 feet silicone tubbing which fits very tightly over the aluminium tube.
From a pet store/Aquarium supply!
Small tubbing cutter.
small wire wraps
2 brass (or plastic "T" pieces) to splice into factory washer tubbing
Also from the pet store/Aquarium supply
2 rubber grommets (Optional)
With a small tubbing cutter, cut the tubbing to the desired Length (48 cm/ 18 7/8 inches in my case.)
Simply pinch the uncut end 3/16 of an inch shut.
Mark out with a fine tip Sharpie where you want to drill/file the holes where you want the washer fluid to come out.
I used a very small jewellers file to make 5 small slots in the aluminium tubing.
Then on the end that I cut the alum. tube with the tubbing cutter, I slid the silicon hose 3/8" over the aluminium tube.
(When the tubbing cutter cuts the tube, it make a nice rounded shoulder on the alloy tubbing, making it easier to get the silicon hose on! A little spit also helps to "lube it up" at bit.
Next, you use the small tie wraps to attach the aluminium "washers" to the windshield wiper blade and angle the slots/holes in the alum. tube to where you want it to spray on the windshield.
From there, I drilled a hole next to the wiper pivot in the plastic cowl trim panel. Slide a rubber grommet over the silicon hose and then install the grommet into the cowel trim panel.
Once you have both sides done and the silicon hose is under the cowel trim panel, you can then splice into the Factory washer hose.
Make sure you cut the Factory hose after the one way check valve that is installed on the Factory washer hose so that the washer fluid does not drain back down the length of the washer hose. That way the sprayers will spray quicker and the washer pump will remain primed with washer fluid.
You can also just by pass the stock washer jets and just have the ones on the wiper blades. This provides for spraying power and works better over all!
I am adding an additional washer fluid reservoir and pump to my system for three reasons.
1. More washer fluid
2. More spraying pressure for both my washers and the sock washer jets.
3. I can run straight methyl hydrate in the second tank in the winter as it de- ices the best!
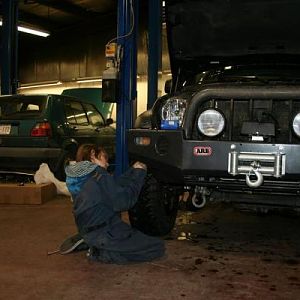
Jen didn't get any pictures of me Effing around under the cowel trim panel.
Othewise I'd have a shot of the one way check valve!