thx1138
Full Access Member
In case no one has noticed, every '05 Liberty Limited, at least the ones I've seen, have chrome side moldings and chrome grilles. I'm not into the bling thing, at least on a jeep anyway so I opted to remove my moldings and paint them the body color and re-install them.
Ok, I don't have pics of me actually removing them so I'll try to describe the process. Using a heatgun on LOW I worked back and forth over a 6-8" area until it got hot. Hot enuff to make it uncomfortable to grab anyway (don't wanna melt them now would we?) A trim stick would most likely work, but as I didn't have one, I went with a polyethylene ruler I had handy. Something made of a stiff plastic that won't scratch the body easily ya know? Once I had a short section pried off, I carefully wedged an ice scraper underneath the molding..yeah I know, but I work with what I have on hand. I continued to work the heatgun back and forth every few inches prying as I went until it finally popped off. Now this 3M "Redline" automotive tape the factory uses is different than what you normally find in a parts store. The stuff at Advance Auto or Walmart is 1 layer of grey acrylic foam tape. The stuff the moldings are taped with have 3 layers of foam, black-grey-black and this stuff is sticky! So, after removing all 4 moldings, I had tape and residue left behind on the body and the molding itself. What to do? Well, There's a product called "Goo-Gone" that is an adhesive remover. You can find it most anywhere, Walmart being one place. A lot of elbow grease and some cursing and the residue, tape, etc. is gone. Next I cleaned all affected areas with alcohol.
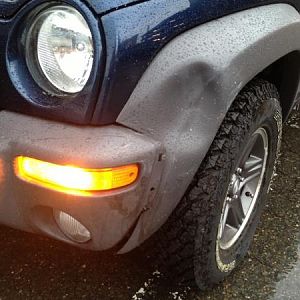
This pic shows the alignment holes for the moldings. Note the red arrows. These holes are a "normal" round hole and what I'd say is the "key" hole to start your molding when re-installing. The holes under the black arrows are oblong.
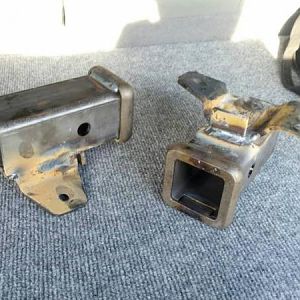
Here's a pic of the molding guides...
...and a closeup...
I sanded the moldings with 180 grit wet/dry sandpaper and then 400 grit. Wiped with a tack cloth, spayed with 3 or 4 coats of automotive trim primer (not all at once, but 1 coat...let dry...another coat...dry, etc.) then sanded with 600 grit paper.
As the Mopar paint is kinda expensive, I ordered some Stone White Duplicolor paint thru Autobarn.com for $4.50 a 5oz can...4 cans BTW. I used between 4 to 6 coats on the moldings, lightly spraying each time. When I figured they were ready for Clearcoat, I first took a black fine tip paintpen and colored in the "Liberty" logo. Then, 4 to 6 coats of Clear, lightly spraying. I let 'em cure for at least 24 hours. I had ordered that special 3M tape from a vendor online. I know I went overboard as I bought a 20 yard roll of it! You could easily get by with a 10 yard roll as this stuff ain't cheep. I cut and applied the tape to the moldings pressing it on tightly. Then , whip off the red liner and line it up..press it on and compress all along the length of the molding.
Now I have an air compressor and a paint gun, but auto paint in liquid form is outrageously expensive so that's why I used spray cans. You get more "orange peel" effect when doing this, but, when it's done in a careful manner it turns out better than one would expect. I hope this was slightly helpful to anyone attempting this procedure and if not, I apologize as I'm an awful teacher. 8-[ :-k
Ok, I don't have pics of me actually removing them so I'll try to describe the process. Using a heatgun on LOW I worked back and forth over a 6-8" area until it got hot. Hot enuff to make it uncomfortable to grab anyway (don't wanna melt them now would we?) A trim stick would most likely work, but as I didn't have one, I went with a polyethylene ruler I had handy. Something made of a stiff plastic that won't scratch the body easily ya know? Once I had a short section pried off, I carefully wedged an ice scraper underneath the molding..yeah I know, but I work with what I have on hand. I continued to work the heatgun back and forth every few inches prying as I went until it finally popped off. Now this 3M "Redline" automotive tape the factory uses is different than what you normally find in a parts store. The stuff at Advance Auto or Walmart is 1 layer of grey acrylic foam tape. The stuff the moldings are taped with have 3 layers of foam, black-grey-black and this stuff is sticky! So, after removing all 4 moldings, I had tape and residue left behind on the body and the molding itself. What to do? Well, There's a product called "Goo-Gone" that is an adhesive remover. You can find it most anywhere, Walmart being one place. A lot of elbow grease and some cursing and the residue, tape, etc. is gone. Next I cleaned all affected areas with alcohol.
This pic shows the alignment holes for the moldings. Note the red arrows. These holes are a "normal" round hole and what I'd say is the "key" hole to start your molding when re-installing. The holes under the black arrows are oblong.
You must be registered for see images attach
Here's a pic of the molding guides...
You must be registered for see images attach
...and a closeup...
You must be registered for see images attach
I sanded the moldings with 180 grit wet/dry sandpaper and then 400 grit. Wiped with a tack cloth, spayed with 3 or 4 coats of automotive trim primer (not all at once, but 1 coat...let dry...another coat...dry, etc.) then sanded with 600 grit paper.
You must be registered for see images attach
As the Mopar paint is kinda expensive, I ordered some Stone White Duplicolor paint thru Autobarn.com for $4.50 a 5oz can...4 cans BTW. I used between 4 to 6 coats on the moldings, lightly spraying each time. When I figured they were ready for Clearcoat, I first took a black fine tip paintpen and colored in the "Liberty" logo. Then, 4 to 6 coats of Clear, lightly spraying. I let 'em cure for at least 24 hours. I had ordered that special 3M tape from a vendor online. I know I went overboard as I bought a 20 yard roll of it! You could easily get by with a 10 yard roll as this stuff ain't cheep. I cut and applied the tape to the moldings pressing it on tightly. Then , whip off the red liner and line it up..press it on and compress all along the length of the molding.
You must be registered for see images attach
Now I have an air compressor and a paint gun, but auto paint in liquid form is outrageously expensive so that's why I used spray cans. You get more "orange peel" effect when doing this, but, when it's done in a careful manner it turns out better than one would expect. I hope this was slightly helpful to anyone attempting this procedure and if not, I apologize as I'm an awful teacher. 8-[ :-k