Rear Seat Lighting
Even though I used the blue water LED's in Amber, wired from the puddle light wires attached to the steering column, which is turned on when you open the doors or at the multifunction switch all on....
It would be real easy to run your own wiring and a separate switch for some rear seat lighting. The wires hide easy along the trim panels, which is what I did to install the amber LED's. Also running separate wires with switch and proper ground, eliminates the possibility of the led may remain slightly lit as the BCM controlled wiring (puddle lite set up) still provides a low voltage, until it is locked and really off.
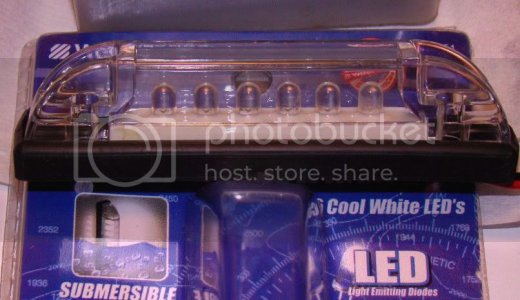
I was originally going to use these 6 white Led's from West marine and mount them for the rear. Very attractive housing and bright.
http://www.westmarine.com/webapp/wcs/stores/servlet/ProductDisplay?productId=101400&catalogId=10001&langId=-1&storeId=11151&storeNum=10109&subdeptNum=10571&classNum=10576
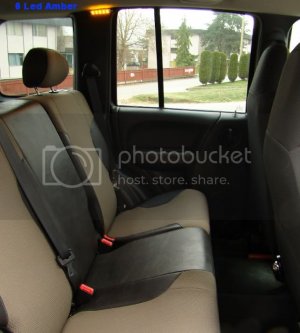
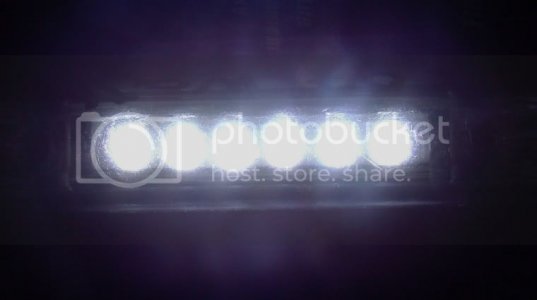
Here you can see where I mounted the 6 Led Amber.
36778[/ATTACH]"]
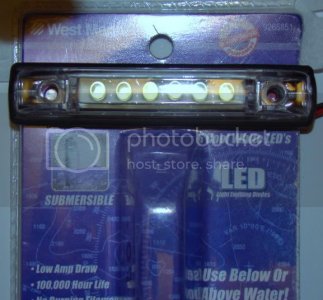
If you want bright for rear, something like these form West Marine would be perfect.
36780[/ATTACH]"]
I like the Clear plastic housing and .07 watt draw.
36782[/ATTACH]"]
They are soft white and could be left on while driving. Even one may do the job.
36784[/ATTACH]"]
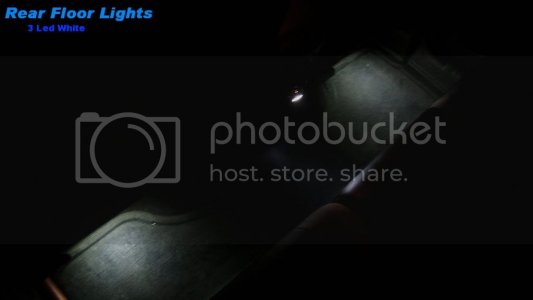
I also added Rear floor lighting. 3 Led each side was used from under each front seat.
36786[/ATTACH]"]
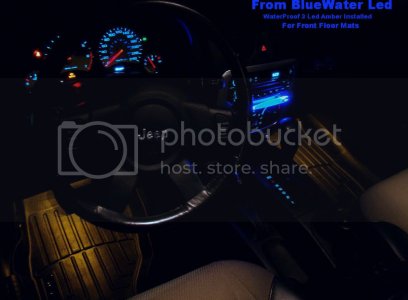
AND the front Weather Tech's with 3 amber LED's.
36788[/ATTACH]"]
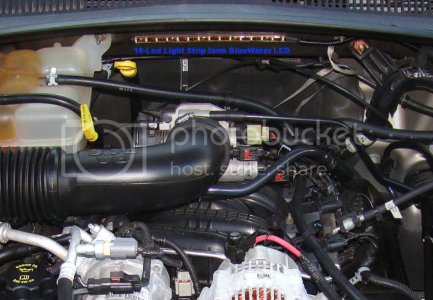
On the topic of lighting: Must have: Under the hood light! Has waterproof and fused switch.
36790[/ATTACH]"]
36792[/ATTACH]"]
Even though I used the blue water LED's in Amber, wired from the puddle light wires attached to the steering column, which is turned on when you open the doors or at the multifunction switch all on....
It would be real easy to run your own wiring and a separate switch for some rear seat lighting. The wires hide easy along the trim panels, which is what I did to install the amber LED's. Also running separate wires with switch and proper ground, eliminates the possibility of the led may remain slightly lit as the BCM controlled wiring (puddle lite set up) still provides a low voltage, until it is locked and really off.
I was originally going to use these 6 white Led's from West marine and mount them for the rear. Very attractive housing and bright.
http://www.westmarine.com/webapp/wcs/stores/servlet/ProductDisplay?productId=101400&catalogId=10001&langId=-1&storeId=11151&storeNum=10109&subdeptNum=10571&classNum=10576
Here you can see where I mounted the 6 Led Amber.
36778[/ATTACH]"]
You must be registered for see images attach
If you want bright for rear, something like these form West Marine would be perfect.
36780[/ATTACH]"]
You must be registered for see images attach
I like the Clear plastic housing and .07 watt draw.
36782[/ATTACH]"]
You must be registered for see images attach
They are soft white and could be left on while driving. Even one may do the job.
36784[/ATTACH]"]
You must be registered for see images attach
I also added Rear floor lighting. 3 Led each side was used from under each front seat.
36786[/ATTACH]"]
You must be registered for see images attach
AND the front Weather Tech's with 3 amber LED's.
36788[/ATTACH]"]
You must be registered for see images attach
On the topic of lighting: Must have: Under the hood light! Has waterproof and fused switch.
36790[/ATTACH]"]
You must be registered for see images attach
36792[/ATTACH]"]
You must be registered for see images attach
Attachments
-
 RearSeat6Led.jpg57.9 KB · Views: 0
 -
 WestMarineLED3.jpg68.3 KB · Views: 0
 -
 WestMarineLED2.jpg52.9 KB · Views: 0
 -
 WestMarineLED4.jpg17.9 KB · Views: 0
 -
 JeepLEDRearLights.jpg29 KB · Views: 0
 -
 FloorMatsLEDs.jpg64.6 KB · Views: 0
 -
 UnderHoodLight1.jpg95.2 KB · Views: 0
 -
 UnderHoodLight2.jpg44.4 KB · Views: 0
Last edited: