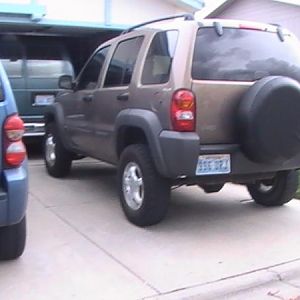
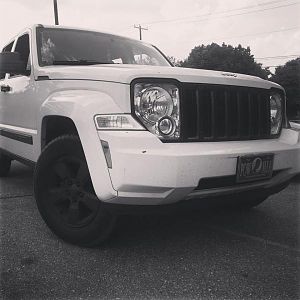
hey everybody!! so I made my own install for windshield mounted lights on my 06 KJ! it is fairly simple!
Tools:
Socket set
Wire strippers
Knife
Flat Head screw driver
Lights + Harness
for my install I went onto amazon and purchased a set of 2 Niight LED Driving lights for $33 and a Eurolight Wiring Harness for another $15. the lights are bright for such a cheap price too!
Steps: (for if you have a wiring harness)
1) pop the hood and disconnect the negative and positive battery cable
2) connect the negative line from the relay to the negative batter
3) same thing as step 2 but for the positive
4) mount the relay near the fuse box...now on my harness the wires were short from the battery so I have the relay hidden on the side of the batter and tucked the wires out of the way
5) take the trim piece off the plastic cover where the wipes and washer spout is ( the rubber piece)
6) pop each of the plastic clips out ( should be 4 or 5 total)
7) you can either take the wiper arms off at this point or cut the foam pads at the end of the plastic cover off for now. I cut the foam, its easy.
8) now here comes the tricky part...find a mounting spot for your lights on the plastic cover. I chose the flat part near the edge. BUT make sure your wipers wont hit the lights!! start on the driver side, as the harness should have a short side of connecting wires
9) mark and drill out the hole for your mounting screws
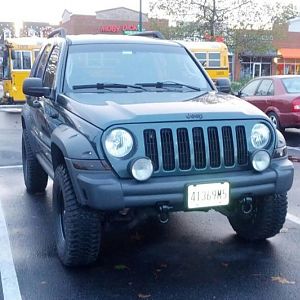
10) mount your lights and then drill another hole for the wire to come through the plastic cover so they are hidden out of sight as you can see in this picture
11) lift up the plastic cover and reach in and grab the negative and positive wires off the lights and connect them to one side of the wiring harness
12) Repeat steps 8-11 for the passenger side
13) while the plastic cover is still lifted, run the harness wires under it in the open area where the wiper links and washer fluid lines are. make sure the harness is away from the fluid lines so it wont leak and short out your lights!
the wires should look hidden like this
14) by now you should have the lights mounted and the wires ran under the plastic cover and tucked out of view. take the flexible trim piece that you removed and notch out where it meets the wires
15) reconnect your battery
16) attach your switch and make sure the lights work! if not, retrace the steps and find the problem
17) run the wires for the switch down the opening near the hood strut on the right side. unless you have a hole in the firewall ( which KJ's don't) then go through there. if not go near the hood strut.
18) fish the wires through the hole when the door is open...I have blue lights for my car because I am in the fire department, that's why I have so many wires
last step ! find a mounting spot for your switch and you're all set! sorry for the lack of pictures, I wrote this after I was done installing. didn't think people would need a write up but hey, I gave it a shot. any questions just comment!
Tools:
Socket set
Wire strippers
Knife
Flat Head screw driver
Lights + Harness
for my install I went onto amazon and purchased a set of 2 Niight LED Driving lights for $33 and a Eurolight Wiring Harness for another $15. the lights are bright for such a cheap price too!
Steps: (for if you have a wiring harness)
1) pop the hood and disconnect the negative and positive battery cable
2) connect the negative line from the relay to the negative batter
3) same thing as step 2 but for the positive
4) mount the relay near the fuse box...now on my harness the wires were short from the battery so I have the relay hidden on the side of the batter and tucked the wires out of the way
5) take the trim piece off the plastic cover where the wipes and washer spout is ( the rubber piece)
6) pop each of the plastic clips out ( should be 4 or 5 total)
7) you can either take the wiper arms off at this point or cut the foam pads at the end of the plastic cover off for now. I cut the foam, its easy.
8) now here comes the tricky part...find a mounting spot for your lights on the plastic cover. I chose the flat part near the edge. BUT make sure your wipers wont hit the lights!! start on the driver side, as the harness should have a short side of connecting wires
9) mark and drill out the hole for your mounting screws
10) mount your lights and then drill another hole for the wire to come through the plastic cover so they are hidden out of sight as you can see in this picture
You must be registered for see images attach
11) lift up the plastic cover and reach in and grab the negative and positive wires off the lights and connect them to one side of the wiring harness
12) Repeat steps 8-11 for the passenger side
13) while the plastic cover is still lifted, run the harness wires under it in the open area where the wiper links and washer fluid lines are. make sure the harness is away from the fluid lines so it wont leak and short out your lights!
the wires should look hidden like this
You must be registered for see images attach
14) by now you should have the lights mounted and the wires ran under the plastic cover and tucked out of view. take the flexible trim piece that you removed and notch out where it meets the wires
15) reconnect your battery
16) attach your switch and make sure the lights work! if not, retrace the steps and find the problem
17) run the wires for the switch down the opening near the hood strut on the right side. unless you have a hole in the firewall ( which KJ's don't) then go through there. if not go near the hood strut.
You must be registered for see images attach
18) fish the wires through the hole when the door is open...I have blue lights for my car because I am in the fire department, that's why I have so many wires
You must be registered for see images attach
last step ! find a mounting spot for your switch and you're all set! sorry for the lack of pictures, I wrote this after I was done installing. didn't think people would need a write up but hey, I gave it a shot. any questions just comment!
You must be registered for see images attach
Last edited: