Question!

Disclaimer: Links on this page pointing to Amazon, eBay and other sites may include affiliate code. If you click them and make a purchase, we may earn a small commission.

Senistr

Full Access Member
Joined
Jun 12, 2015
Messages
153
Reaction score
0
Location
Colorado
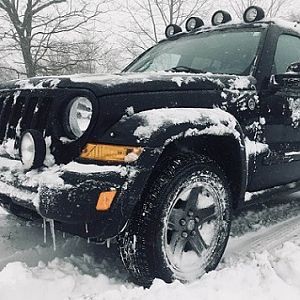
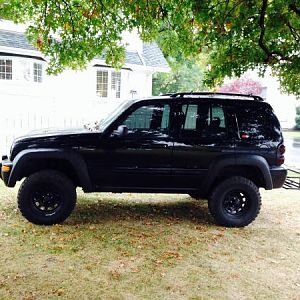
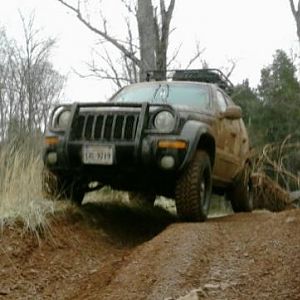
So I finally got some 1.25" spacers to put my offest back to 0 for my tires and I am wondering if I have to modify the front fender in any way to not rub when turning. I just had my pinch weld hammered back and am about to use a heat gun to flatten the plastic and melt it back to the other side and I know I have to push in by the fog light housing to keep it from rubbing but with the spacers, what about the fender? I know some people are against spacers but this keeps me from rubbing on the inside of the fender and on the front sway bar as I have noticed. If someone can please help me real quick before I actually start. o_o

(I posted in the KK forum by accident but I have a KJ)
 

CactusJacked

Full Access Member
Joined
Dec 12, 2013
Messages
2,407
Reaction score
11
Location
Chicago Suburbs
With 3.25" of lift and 1.5" spacers, my tires rub on the front inner edge of the flare (where it meets the plastic liner) as well as the liner itself. It doesn't contact during normal driving, only during tighter parking lot maneuvers. Best thing to do is bolt up a spacer and wheel and give it a test turn. Nothing will answer you better than show & tell in your own driveway. When you install them for real, use a dab of red loctite on the adapter to hub lug nuts, and be sure to use a torque wrench.
 

Senistr

Full Access Member
Joined
Jun 12, 2015
Messages
153
Reaction score
0
Location
Colorado
Yeah my buddy has a torque wrench from when he installed his side railed on his truck, that was sadly totaled and now buying an H3 (eww). Should I just do it to one wheel and test it before applying everything? And thank you for your response...I knew you were lurking SOMEWHERE =P
 

CactusJacked

Full Access Member
Joined
Dec 12, 2013
Messages
2,407
Reaction score
11
Location
Chicago Suburbs
3 lug nuts on the adapter and 3 on the wheel is plenty to do a weight loaded test fit in the driveway, just don't drive it that way. And yeah, I would check both sides. If all is clear, you can install for real.
 

Senistr

Full Access Member
Joined
Jun 12, 2015
Messages
153
Reaction score
0
Location
Colorado
Ok..not when my buddy gets home to unlock the garage (his house) I can pull it in and go to work. Thank you for clarifying some things for me. I think it should only take a few hours...hopefully less.
 

Senistr

Full Access Member
Joined
Jun 12, 2015
Messages
153
Reaction score
0
Location
Colorado
Well I just finished and I found a couple things interesting...One the guy hammered the passenger further back then the driver side, so the driver side still rubs which i'll have to take the tire back off and try to get that hammered back some more. Second thing, I need to push the front part of the fender well by the fog light some more so it doesn't rub upfront or possibly just allow it to wear down. Third, and MOST annoying is someone told me I wouldn't have to worry about side steps because it should clear with the spacer on. Well were they DEAD wrong. Now I have to find some time to see if someone can chop off part of the step rail, the part that curves inside the front fender well before something really gets messed up.
 

tommudd

Moderator
Staff member
Moderator
Joined
Jul 14, 2005
Messages
22,456
Reaction score
3,643
Location
Southeastern Ohio
I know you already know this but your main issue is not with the body or the side steps even its not enough lift and tires too big
With that size tires and only 2 inches of lift or so you're going to have issues. Even 245-75-16s would rub ..................
 
Last edited:

CactusJacked

Full Access Member
Joined
Dec 12, 2013
Messages
2,407
Reaction score
11
Location
Chicago Suburbs
Third, and MOST annoying is someone told me I wouldn't have to worry about side steps because it should clear with the spacer on. Well were they DEAD wrong. Now I have to find some time to see if someone can chop off part of the step rail, the part that curves inside the front fender well before something really gets messed up.

You need to get yourself a "precision reciprocating clearance adjustment tool". :happy175:

You must be registered for see images attach
 

Senistr

Full Access Member
Joined
Jun 12, 2015
Messages
153
Reaction score
0
Location
Colorado
So another question i've been looking around for and havn't figured out but...what is the purpose of removing the rear sway bar, and that's the purpose of a clevis lift?
 

CactusJacked

Full Access Member
Joined
Dec 12, 2013
Messages
2,407
Reaction score
11
Location
Chicago Suburbs
When you look at how the rear sway bar is mounted, it doesn't really do anything. Effective sway bars are also attached to the frame, this isn't. Now, when I took mine off, I immediately noticed that my back end (of the Jeep) was squishy, meaning it felt loose if I would saw the steering wheel back and forth. Turns out it was by upper control arm/boomerang was shot, and best I can figure is the sway bar, being attached to the lower control arms, was helping prevent them from tweaking side to side. Those at least, were my results. Now that I replaced the upper control arm, all is tight again and I don't miss the sway bar. A clevis lift spacer is another way of gaining a little more lift. The amount is twice that of the space; 1/4" gives 1/2" lift, etc.
 

Senistr

Full Access Member
Joined
Jun 12, 2015
Messages
153
Reaction score
0
Location
Colorado
So for my 2 1/2 inch lift from Skyjacker, If I had a Clevis Left, I'll get a little more height out of it?
 

Senistr

Full Access Member
Joined
Jun 12, 2015
Messages
153
Reaction score
0
Location
Colorado
That might be something I would be interested later down the road then. Fortunately enough I pushed back the plastic well enough to get very minimal rub when turning. Also I took off the front air dam which was harder than planned lol.
 

Jbergun

Full Access Member
Joined
Jun 4, 2015
Messages
1,009
Reaction score
2
Location
Chicago
That might be something I would be interested later down the road then. Fortunately enough I pushed back the plastic well enough to get very minimal rub when turning. Also I took off the front air dam which was harder than planned lol.

I just whipped out my SOG pocket knife and cut the dam air dam easy to do with a sharp knife dremel or a razor cause i seen it was kinda attached to the wheel well liner i seen more work than i wanted to do so i started cutting
 

Senistr

Full Access Member
Joined
Jun 12, 2015
Messages
153
Reaction score
0
Location
Colorado
Yeah i could have done that but i took a drill to the metal rivet and just drilled lol. It's off and everything seems intact though.
 

Jbergun

Full Access Member
Joined
Jun 4, 2015
Messages
1,009
Reaction score
2
Location
Chicago
Yeah i could have done that but i took a drill to the metal rivet and just drilled lol. It's off and everything seems intact though.

Whatever works that was probably easier i hacked at it pretty good with my knife i keep it so sharp but still it was alot of plastic to go through
 

tommudd

Moderator
Staff member
Moderator
Joined
Jul 14, 2005
Messages
22,456
Reaction score
3,643
Location
Southeastern Ohio
So for my 2 1/2 inch lift from Skyjacker, If I had a Clevis Left, I'll get a little more height out of it?

3/8 inch clevis gives 3/4 inches of lift
you can also add a 1/4 inch top plate for 1/2 inches of lift
Problem is with the Skyjacker springs is they will keep sagging so no matter what you do after a while you'll be back where you are currently
 

Senistr

Full Access Member
Joined
Jun 12, 2015
Messages
153
Reaction score
0
Location
Colorado
I am aware of that can I can always replace the spring whenever that actually happens. But for now everything is looking mighty fine and at the rate I drive, 30,000 miles is less than 3 years so I think i'll be fine for a few years before switching them anyways.
 
Top