
bmrrwolfe
Full Access Member
So i've had my liberty since august and have done some minor modifications, so i figured i might as well start a build thread.
Lets go back the beginning! It started with my 2000 Cherokee Classic i built up myself, 3.5" RE lift with 32" BFGoodrich surco rack, hella 500s and hella 550s front mounted Hi-lift tow hooks 7" touchscreen DVD player all custom audio Bored throttle body, programmer and real CAI etc etc:
Loved it but was looking for something newer and better for daily commuting to school..
So i got offered this Liberty for a straight trade!
At first i didn't really like it, it was abused dirty and needed work.
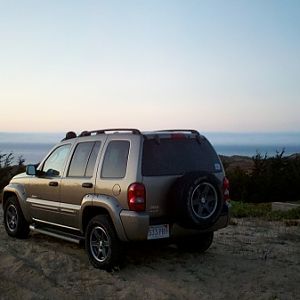
Its 2006 Liberty with 3.7 Automatic 62k 4X4, power everything, ABS, trailer hitch, spray painted rims mismatched tires extremely dirty and "custom tow hooks and sh!tty foglights drilled into the bumper and really loud cherry bomb glasspack:
First thing was to clean and clean and clean some more!
The random foglights that were wired horribly came off and the towhooks came out since there is no way they could of been used without ripping them out of the subframe. Also it got serviced the biggest part being new wheel bearings and speed sensors grand total of the service $544
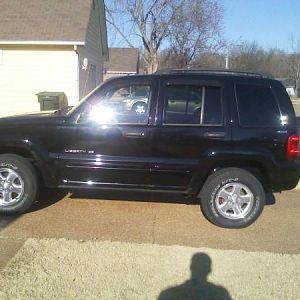
Then it needs some wheels and tires. Found these on craigslist for $160 with some goodyear tires with about half tread left:
Then tint the marker lights, with some extra niteshades i had:
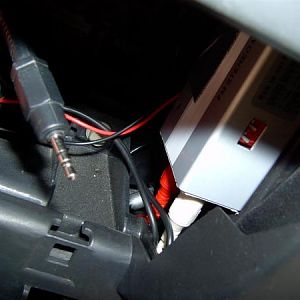
I added a 5" Pyle touchscreen DVD player with bluetooth got it new for $120 shipped, also added a 12" Infinity sub and kicker 300zx1 amp:
Then it needed a roof rack, well first some crossrails so i made these:
Then the windows got tinted 50% front (limit for Ohio) and 20% rear:
Then a set of Hella 500s just to the bumper since its already ruined with the holes:
Then a Rola roof rack that i got new for $60 shipped")
also i added a set of cheapy 55w lights to the back:
I found these on craigslist for $90 including all the mounting hardware
Mounted it, and the taillight covers and moved the hellas onto it:
Also added a set of Pilot foglights to the roof rack and wired them in:
Lets go back the beginning! It started with my 2000 Cherokee Classic i built up myself, 3.5" RE lift with 32" BFGoodrich surco rack, hella 500s and hella 550s front mounted Hi-lift tow hooks 7" touchscreen DVD player all custom audio Bored throttle body, programmer and real CAI etc etc:
You must be registered for see images attach
You must be registered for see images attach
You must be registered for see images attach
Loved it but was looking for something newer and better for daily commuting to school..
So i got offered this Liberty for a straight trade!
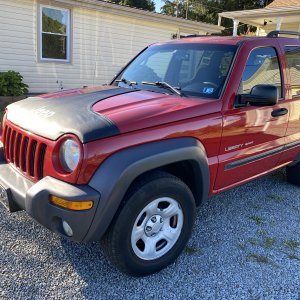
At first i didn't really like it, it was abused dirty and needed work.
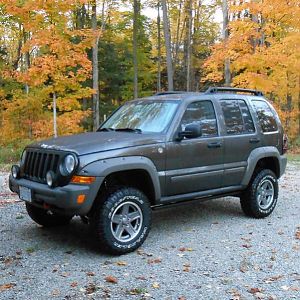
Its 2006 Liberty with 3.7 Automatic 62k 4X4, power everything, ABS, trailer hitch, spray painted rims mismatched tires extremely dirty and "custom tow hooks and sh!tty foglights drilled into the bumper and really loud cherry bomb glasspack:
You must be registered for see images attach
You must be registered for see images attach
First thing was to clean and clean and clean some more!
The random foglights that were wired horribly came off and the towhooks came out since there is no way they could of been used without ripping them out of the subframe. Also it got serviced the biggest part being new wheel bearings and speed sensors grand total of the service $544
Then it needs some wheels and tires. Found these on craigslist for $160 with some goodyear tires with about half tread left:
You must be registered for see images attach
Then tint the marker lights, with some extra niteshades i had:
You must be registered for see images attach
I added a 5" Pyle touchscreen DVD player with bluetooth got it new for $120 shipped, also added a 12" Infinity sub and kicker 300zx1 amp:
You must be registered for see images attach
Then it needed a roof rack, well first some crossrails so i made these:
You must be registered for see images attach
You must be registered for see images attach
Then the windows got tinted 50% front (limit for Ohio) and 20% rear:
You must be registered for see images attach
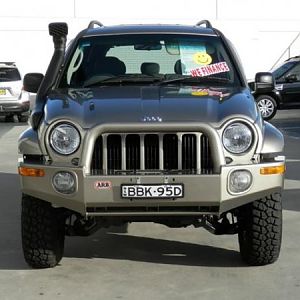
Then a set of Hella 500s just to the bumper since its already ruined with the holes:
You must be registered for see images attach
Then a Rola roof rack that i got new for $60 shipped
also i added a set of cheapy 55w lights to the back:
You must be registered for see images attach
You must be registered for see images attach
I found these on craigslist for $90 including all the mounting hardware
You must be registered for see images attach
Mounted it, and the taillight covers and moved the hellas onto it:
Also added a set of Pilot foglights to the roof rack and wired them in:
You must be registered for see images attach
You must be registered for see images attach
Last edited: