m_volyrakis
Full Access Member
HOW TO: Install a Warn 9500 XP in an OEM bumper (custom mount) UPDATED
WINCH PLATE:
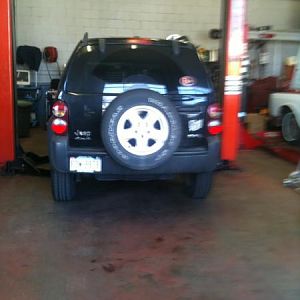
Started off with removing the bumper, strapping the winch on
and making a rough mock up of what I had in mind.
I then made an AutoCad template
and a prototype out of tin.
Fitted it on my rig a couple of times and re measured again and again and again...:freak3: and then measured some more.
Calculated everything 5-6 times and made numerous changes to the AutoCad Template...
and finally made one out of 1/4 inch steel.
After some refitting and recalculating and trimming.... I ended up with this:
One more try..
Reinforced sanded galvanized and electrostaticly painted... I can't wait!!!
last test round..
Some minor bumper trimming
Drilled trough for some extra support
Almost done..
SOLENOID PACK
Got this empty spot in my engine bay and decided to mount the solenoid pack using that hole in the middle
Made a 1/4 thick bracket which I measured multiple timew but managed to get the size and orientation wrong... so i had to shave a bit off.
Mounted the pack
and the remote
THE FINAL PRODUCT:
Thanks to Speedracerbubba who has been a GREAT HELP
I'm having an Amsteel Blue synthetic winch line 5/16 X 100 ft delivered to me!
Will post a couple of shots when the job is done!
So, what do you think?
Cable came in a couple of days ago thanks to SPEEDRACERDUBBA!! :head3::favorites37::roflbow::happy107:
Amsteel Blue Winch Rope Line 5/16" x 100' w/ crush proof thimble
Installed the same day
BUT..... there is always a catch...
The crush proof thimble which I so much desired is too thick to fit in the Warn hook
kopkrab.gif(banghead)(censored)(censored) (censored)(Argh):mad3::mad3::mad3::mad3: :wtf2::wtf2::disgust: :Frustrated::Frustrated::Frustrated::icon_sad: cryinghard.gifcryinghard.gifcryinghard.gif cryinghard.gif
So this is the only solution I could come up with to have the thing installed..
Any Ideas? :Stupid Me: Please:help:
WINCH PLATE:
Started off with removing the bumper, strapping the winch on
You must be registered for see images
and making a rough mock up of what I had in mind.
You must be registered for see images
I then made an AutoCad template
You must be registered for see images
You must be registered for see images
and a prototype out of tin.
You must be registered for see images
Fitted it on my rig a couple of times and re measured again and again and again...:freak3: and then measured some more.
Calculated everything 5-6 times and made numerous changes to the AutoCad Template...
and finally made one out of 1/4 inch steel.
You must be registered for see images
You must be registered for see images
After some refitting and recalculating and trimming.... I ended up with this:
You must be registered for see images
You must be registered for see images
You must be registered for see images
One more try..
You must be registered for see images
Reinforced sanded galvanized and electrostaticly painted... I can't wait!!!
You must be registered for see images
last test round..
You must be registered for see images
Some minor bumper trimming
You must be registered for see images
You must be registered for see images
Drilled trough for some extra support
You must be registered for see images
You must be registered for see images
Almost done..
You must be registered for see images
SOLENOID PACK
Got this empty spot in my engine bay and decided to mount the solenoid pack using that hole in the middle
You must be registered for see images
Made a 1/4 thick bracket which I measured multiple timew but managed to get the size and orientation wrong... so i had to shave a bit off.
You must be registered for see images
Mounted the pack
You must be registered for see images
and the remote
You must be registered for see images
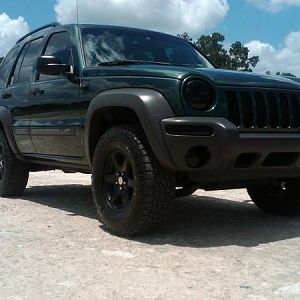
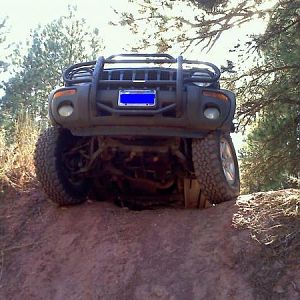
THE FINAL PRODUCT:
You must be registered for see images
You must be registered for see images
You must be registered for see images
You must be registered for see images
Thanks to Speedracerbubba who has been a GREAT HELP
I'm having an Amsteel Blue synthetic winch line 5/16 X 100 ft delivered to me!
You must be registered for see images
Will post a couple of shots when the job is done!
So, what do you think?
Cable came in a couple of days ago thanks to SPEEDRACERDUBBA!! :head3::favorites37::roflbow::happy107:
Amsteel Blue Winch Rope Line 5/16" x 100' w/ crush proof thimble
You must be registered for see images
Installed the same day
You must be registered for see images
You must be registered for see images
BUT..... there is always a catch...
The crush proof thimble which I so much desired is too thick to fit in the Warn hook
kopkrab.gif(banghead)(censored)(censored) (censored)(Argh):mad3::mad3::mad3::mad3: :wtf2::wtf2::disgust: :Frustrated::Frustrated::Frustrated::icon_sad: cryinghard.gifcryinghard.gifcryinghard.gif cryinghard.gif
So this is the only solution I could come up with to have the thing installed..
You must be registered for see images
Any Ideas? :Stupid Me: Please:help:
Last edited:
")