Quick and dirty Jeep Liberty CB Radio install:
Hardware: Smallest Cobra CB, CB Antenna, CB antenna mounting hardware (the mounting screw and also a spring mount), 18’ antenna cable, Trailer hitch wiring kit (mounting bracket included), add a mini fuse wire, 10amp mini fuse, screws, bolts, nuts.
Tools: hand tools, socket set, wrenches, drill, strong drill bits.
Intro: CB radios are recommended for a lot of off road groups as well as traditional uses. There are many ways to install this, I feel this is a cheap and effective way to do this if you are pressed for time and money, and will use your cb infrequently. Sorry for the pic quality only had my cell phone cam.
CB Radio: Picking a CB wasn't hard I chose the smallest Cobra I could find. It sells for about $35 at walmart online and local shops have it from $50-$60. There are other radios from midland, radio shack with similar dimensions.
Location: A good location would be under the AC controls along side of the cigarette lighter. When taking the plastic off you’ll see that you’d have to cut into the wall behind the plastic, it’s not deep enough to fit the radio. It’s possible but not quick, and the mic cord would be in the way of the transfer case shifter.
On youtube there’s a video where someone mounted it behind the plastic below the steering wheel. There’s a lot of room but no way to adjust volume and change the channels without pulling down the cover which can’t be done while driving.
The location I chose is on the side of the driver’s seat. This is a good compromise to have a quick install and will only fit the mallest cobra or other cb. I’ve seen mag light mounts here.
Install mounting:
On the frame below the seat there’s a sotock hole. This is probably because I don’t have power seats but perfect for the lower bolt.
Install your own bolt and nut combo to fit the hole and stock cb radio mount. Line the mount up vertical then drill a hole into the frame to install a top bolt and nut on the frame. The radio can only be screwed into the mount from the top. It's a tight fit. With two bolts through the mount and seat frame it’ll hold strong. Do this step first so you can place the radio in position and get locations for the wiring.
Install Wiring: There’s a hole in the carpet by the front driver’s side seat, insert you power wire for the radio below this running it under the carpet toward the hood release. You’ll have to pull out the plastic trim to get it there.
Power wires: Like I said this is quick and dirty version. I took a little shortcut to wire this. I purchased a mini add a fuse wire. This is a wire mounted to a mini fuse adapter that goes into the fuse box slot and accepts a mini fuse on top of it (10 amp). The inside fuse box, located on the drivers side of the dash has a few spare slots but none of them are wired to the box. Looking at the manual, I noticed that the fuse for the rear 12v outlet was missing so I used it and it works fine, just plug it into the fuse box, plug the fuse in then the power cable. For the ground I noticed two bolts with ground wires, So I just put my ground wire on one. There is static from the fuse box and ground if settings are all the way up but when you have a good signal the cb is still clear.
Install the Mic Mount: Mount the mic. This is a hard one but I mounted the mic on the left side of the steering wheel. This keeps the mic control on the same side as the cb radio. It's another tight fit so check that the door will close properly before you drill the holes. With the mic installed here you can’t get in and out of the jeep, without seeing and almost tripping over the wire. To eliminate this so stick the wire under the plastic trim above the hood release, down the side under the plastic at the door and come out right at the cb radio. IT'll look clean, always mounted and never in the doorway by your feet and if you strech it tight you'll have enough cord to reach your head easily.
You’ll have to drill through the lower dash to mount but if the cb is ever removed the mic m holes will be the only visible trace of this whole cb intall.
Install Antenna cable: Now that the CB is wired up and working you can get to the antenna cable. I chose to drill a small hole an the bottom of the plastic trim where the cable will exit into the trim. This is so when the plastic trim is installed over the cable it doesn’t pinch the cable.
Run the cable through the plastic trim to the rear seat belt bolts they’ll be a break in the carpet. Then lower the set and run it under the carpet along side the rest of the rear wiring. Once it hits the rear remove the plastic trim and run it up the driver’s side rear corner plastic until it’s just above the rear glass level. Bring it out of the plastic.
It’ll hang from under the glass and weather stripping but if you ever sell the liberty it’s an easy uninstall with no drilled hole to patch or seal later.
Install Antenna Mount:
So by now everything is installed an in place up except, mounting the cb antenna. Although there are better ways, after thinking long and hard about crazy ways to fabricate a mount, I tried this:
I bought a Trailer hitch wiring kit with mounting bracket included. This is $10 at walmart. The mounting bracket is a small "L" shape. Inspect it, make sure the mounting bracket looks strong, atleast 1/8” metal, remember this piece is why you are buying the kit.
There are 4 mounting holes on the coreners and one big one in the middle. If you drill the two opposite holes (top left and bottom right) wide enough, they’ll fit the screw for the antenna mount and the bolt from rear tire mount. With an antenna spring inbetween the antenna, it’s strong enough to hold the antenna and easily replaceable. I've got a 4' fiberglass antenna (not pictured) it sways but stays.
Compromises: A lot of this install is a compromise. Like the liberty itself, it's not *********, but will be there when you need it. You won’t be able to see your channels but aleast you can reach the controls while driving.
You won't be able to lift the glass or open the tail gate when the antenna is installed but you can screw off the antenna in seconds and store it on the work days that you aren't on the trails anyway.
The antenna cord if hidden properly is barely noticable, if you hate it then unscrew it too on weekdays and store it in the plastic trim. It's alot better than drilling you tailgate, rear storage floor (gas tank) or bumper. Remember if you drilled a hole to fit the antenna out of teh jeep it you have to be as lage as teh cb fitting the size of a quarter.
If you uninstall the cb radio this way, you won't have a lot patch up work to get it to look stock.
Taking some of these the shortcuts can save time, money, and cutting up or fabricating alot of mounts and setups with hard to find parts. If you run the wires hidden under trim and carpet, it'll still look clean.
Hardware: Smallest Cobra CB, CB Antenna, CB antenna mounting hardware (the mounting screw and also a spring mount), 18’ antenna cable, Trailer hitch wiring kit (mounting bracket included), add a mini fuse wire, 10amp mini fuse, screws, bolts, nuts.
Tools: hand tools, socket set, wrenches, drill, strong drill bits.
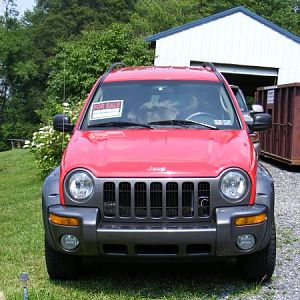
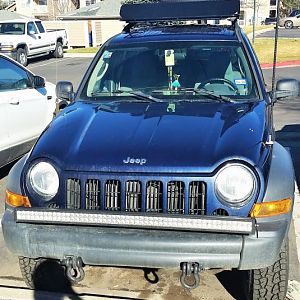
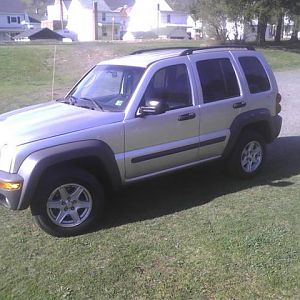
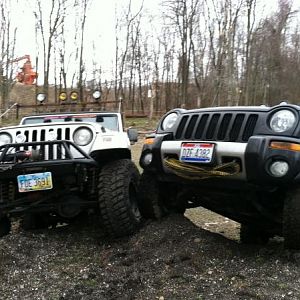
Intro: CB radios are recommended for a lot of off road groups as well as traditional uses. There are many ways to install this, I feel this is a cheap and effective way to do this if you are pressed for time and money, and will use your cb infrequently. Sorry for the pic quality only had my cell phone cam.
You must be registered for see images attach
You must be registered for see images attach
CB Radio: Picking a CB wasn't hard I chose the smallest Cobra I could find. It sells for about $35 at walmart online and local shops have it from $50-$60. There are other radios from midland, radio shack with similar dimensions.
You must be registered for see images attach
Location: A good location would be under the AC controls along side of the cigarette lighter. When taking the plastic off you’ll see that you’d have to cut into the wall behind the plastic, it’s not deep enough to fit the radio. It’s possible but not quick, and the mic cord would be in the way of the transfer case shifter.
On youtube there’s a video where someone mounted it behind the plastic below the steering wheel. There’s a lot of room but no way to adjust volume and change the channels without pulling down the cover which can’t be done while driving.
The location I chose is on the side of the driver’s seat. This is a good compromise to have a quick install and will only fit the mallest cobra or other cb. I’ve seen mag light mounts here.
You must be registered for see images attach
Install mounting:
On the frame below the seat there’s a sotock hole. This is probably because I don’t have power seats but perfect for the lower bolt.
Install your own bolt and nut combo to fit the hole and stock cb radio mount. Line the mount up vertical then drill a hole into the frame to install a top bolt and nut on the frame. The radio can only be screwed into the mount from the top. It's a tight fit. With two bolts through the mount and seat frame it’ll hold strong. Do this step first so you can place the radio in position and get locations for the wiring.
You must be registered for see images attach
You must be registered for see images attach
Install Wiring: There’s a hole in the carpet by the front driver’s side seat, insert you power wire for the radio below this running it under the carpet toward the hood release. You’ll have to pull out the plastic trim to get it there.
You must be registered for see images attach
Power wires: Like I said this is quick and dirty version. I took a little shortcut to wire this. I purchased a mini add a fuse wire. This is a wire mounted to a mini fuse adapter that goes into the fuse box slot and accepts a mini fuse on top of it (10 amp). The inside fuse box, located on the drivers side of the dash has a few spare slots but none of them are wired to the box. Looking at the manual, I noticed that the fuse for the rear 12v outlet was missing so I used it and it works fine, just plug it into the fuse box, plug the fuse in then the power cable. For the ground I noticed two bolts with ground wires, So I just put my ground wire on one. There is static from the fuse box and ground if settings are all the way up but when you have a good signal the cb is still clear.
You must be registered for see images attach
You must be registered for see images attach
Install the Mic Mount: Mount the mic. This is a hard one but I mounted the mic on the left side of the steering wheel. This keeps the mic control on the same side as the cb radio. It's another tight fit so check that the door will close properly before you drill the holes. With the mic installed here you can’t get in and out of the jeep, without seeing and almost tripping over the wire. To eliminate this so stick the wire under the plastic trim above the hood release, down the side under the plastic at the door and come out right at the cb radio. IT'll look clean, always mounted and never in the doorway by your feet and if you strech it tight you'll have enough cord to reach your head easily.
You’ll have to drill through the lower dash to mount but if the cb is ever removed the mic m holes will be the only visible trace of this whole cb intall.
You must be registered for see images attach
You must be registered for see images attach
Install Antenna cable: Now that the CB is wired up and working you can get to the antenna cable. I chose to drill a small hole an the bottom of the plastic trim where the cable will exit into the trim. This is so when the plastic trim is installed over the cable it doesn’t pinch the cable.
You must be registered for see images attach
You must be registered for see images attach
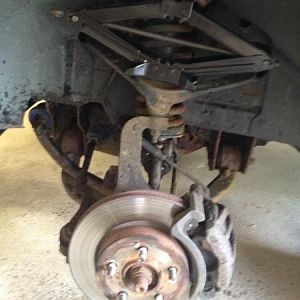
Run the cable through the plastic trim to the rear seat belt bolts they’ll be a break in the carpet. Then lower the set and run it under the carpet along side the rest of the rear wiring. Once it hits the rear remove the plastic trim and run it up the driver’s side rear corner plastic until it’s just above the rear glass level. Bring it out of the plastic.
It’ll hang from under the glass and weather stripping but if you ever sell the liberty it’s an easy uninstall with no drilled hole to patch or seal later.
You must be registered for see images attach
You must be registered for see images attach
You must be registered for see images attach
Install Antenna Mount:
So by now everything is installed an in place up except, mounting the cb antenna. Although there are better ways, after thinking long and hard about crazy ways to fabricate a mount, I tried this:
I bought a Trailer hitch wiring kit with mounting bracket included. This is $10 at walmart. The mounting bracket is a small "L" shape. Inspect it, make sure the mounting bracket looks strong, atleast 1/8” metal, remember this piece is why you are buying the kit.
There are 4 mounting holes on the coreners and one big one in the middle. If you drill the two opposite holes (top left and bottom right) wide enough, they’ll fit the screw for the antenna mount and the bolt from rear tire mount. With an antenna spring inbetween the antenna, it’s strong enough to hold the antenna and easily replaceable. I've got a 4' fiberglass antenna (not pictured) it sways but stays.
You must be registered for see images attach
You must be registered for see images attach
Compromises: A lot of this install is a compromise. Like the liberty itself, it's not *********, but will be there when you need it. You won’t be able to see your channels but aleast you can reach the controls while driving.
You won't be able to lift the glass or open the tail gate when the antenna is installed but you can screw off the antenna in seconds and store it on the work days that you aren't on the trails anyway.
The antenna cord if hidden properly is barely noticable, if you hate it then unscrew it too on weekdays and store it in the plastic trim. It's alot better than drilling you tailgate, rear storage floor (gas tank) or bumper. Remember if you drilled a hole to fit the antenna out of teh jeep it you have to be as lage as teh cb fitting the size of a quarter.
If you uninstall the cb radio this way, you won't have a lot patch up work to get it to look stock.
Taking some of these the shortcuts can save time, money, and cutting up or fabricating alot of mounts and setups with hard to find parts. If you run the wires hidden under trim and carpet, it'll still look clean.
Last edited: