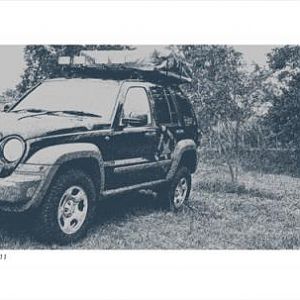
I recently saw a posting on this site on how to do a roof rack for a Jeep Liberty, so I decided to take some “poetic” freedom and create a similar kayak rack but one that would be made of more sturdy materials and would also look like a professionally made rack. This is the process that I followed to create this rack, all of the parts that I am using I got at The Home Depot and I am including the part number since there are a few parts that look similar but are not the correct one.
The parts I used for this were:
(2) Aluminum square tubes, 48” long part # 030699406203 $ 11.27 ea
(1) pipe insulation strip of foam, part #718793150115 $1.38
(4) 2” u-bolts, part #030699095360 $1.98
(1) 35” rubber tie down, part # 734884853512 $1.98
that is it…the total cost was only $33.82 plus tax!
You must be registered for see images attach
The first thing I did was measure the perimeter of the roof rack that comes standard in my KJ. For you can use a strip of cable, string, anything…. Then I cut the 35” rubber tie down into four equal strips that are the same length as the perimeter of the roof rack.
You must be registered for see images attach
These strips will be used to cushion the kayak rack on the roof rack. Next I sprayed painted the aluminum tubes with white primer (I know aluminum doesn’t rust), this makes the black paint stick better to the tubes and it also helps when marking the tubes.
You must be registered for see images attach
Once they dried, I rested them on top of the roof rack and centered them so they have an equal amount of length sticking out on both sides. Then, I passed the u-bolt through the factory installed rack and make sure to center the bolt so I could mark where I need to drill the holes on the aluminum tube.
You must be registered for see images attach
I then, did the same for the other three spots that will need to be drilled.
You must be registered for see images attach
Once the holes were drilled I painted the aluminum in black so that it doesn’t stand out too much and to make it look like a professional rack. Once the paint dried I cut the pipe insulation in half and pass it through the aluminum tube.
You must be registered for see images attach
The insulation pad had a cut down the middle and even though it wasn’t completely open I decided to add some tape to reinforce this foam…I could just see that padding coming off once I hit the freeway.
You must be registered for see images attach
Once this is done, I placed the new bars back on top of the factory rack and used the u bolts to secure them and that was it. I tied them pretty hard but not TOO hard that they would damage the factory rack.
You must be registered for see images attach
Let me know what you guys think…I cut the remaining parts of the u-bolts in the back, BUT on the front I am leaving them as I am planning on creating a detachable light rack that I can tie into those bolts when I need to use it and then take it off when I am done off roading…that would help with gas efficiency.
You must be registered for see images attach
You must be registered for see images attach
You must be registered for see images attach
[/QUOTE}