FLyingwen's '02 KJ Renegade

Disclaimer: Links on this page pointing to Amazon, eBay and other sites may include affiliate code. If you click them and make a purchase, we may earn a small commission.

Flyingwen

Full Access Member
Joined
Sep 18, 2009
Messages
72
Reaction score
1
Location
Arizona
Well I might as well start a Journal on here too... Since I am new to this form its mostly cut and paste's from other forums.

I will use this post as a place holder for current a current picture and a links to other posts and mods as we go.

Here is how the KJ sit's now:
You must be registered for see images


Current stats:

Planned mods:
  • Rear Deck w/ Goodies
  • Custom Rear Bumper
 
Last edited:

Flyingwen

Full Access Member
Joined
Sep 18, 2009
Messages
72
Reaction score
1
Location
Arizona
Here is a front shot of the KJ shortly after we bought it:
You must be registered for see images attach


As you can see FlyingBaby approves!!
You must be registered for see images attach
 

Flyingwen

Full Access Member
Joined
Sep 18, 2009
Messages
72
Reaction score
1
Location
Arizona
Tires

The KJ has 245/75 R16 Goodyear MT/R tires mounted on wheels off of a Jeep Rubicon Wrangler.
You must be registered for see images attach


We also have a full size matching spare:
You must be registered for see images attach


Also some required stickers can be seen on the rear window.
 

Flyingwen

Full Access Member
Joined
Sep 18, 2009
Messages
72
Reaction score
1
Location
Arizona
Roof Rack

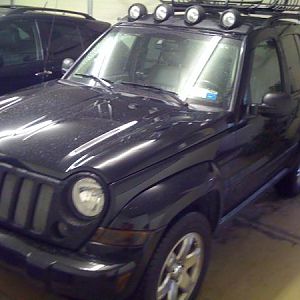
When we bought the KJ the factory roof rack/ rails were removed and replaced with a Con-Ferr roof rack. FlyingWil (my husband) wanted to add some LightForce Stubby lights on the rear for reverse lights at that time.

You must be registered for see images attach


We all can use more light when backing up, but especially in the off highway environment.

Time:
Aprox 2 hours

Tools:
Basic tools required.

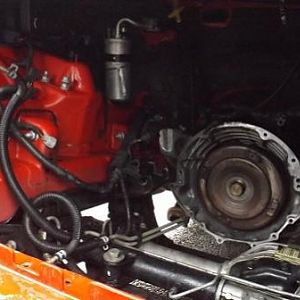
Since we were installing a 
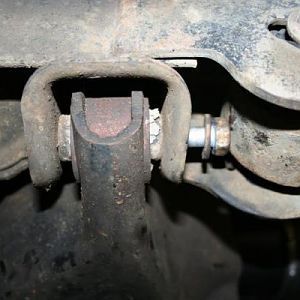
BajaRack Mule in place of the Con-Ferr roofrack, a new rack subframe was fabricated by Built II Beat Fabrication. The goal was to keep the rack as low as possible and as you can see it was accomplished nicely.

Here is the rack subframe:

You must be registered for see images attach


You must be registered for see images attach


You must be registered for see images attach


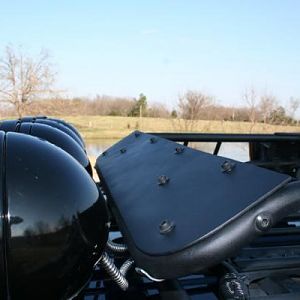
We decided on using two LightForce Stubby's as back-up lights. These light offer great light output and flexibility to redirect with ease. While the KJ was at the fabrication shop, we had them weld in two mounting plates for the Stubby's bases.

Here is the lights mounted to the rack:

You must be registered for see images attach


After the lights were installed, on to my favorite...wiring. We wanted to be able to use the lights in multiple situations, and toyed with many options from an on-off-on switch to just an on-off. For ease of installation we decided to base everything off the LightForce Wiring Harness, since they are very well built and the switch will match the front LightForce 170 switch on the KJ now. Below is my modified diagram of the LightForce harness:

You must be registered for see images attach


Note:
I put a 1N4004 diode(*) in series with the OEM reverse light feed to the relay. This will isolate the OEM reverse light circuit from the aux switch, which is going to feed the same terminal on the relay. Then, when I activate the switch to turn the relay on, it will not backfeed the OEM reverse light circuit. Not that the latter is a bad thing, I just don't know how the OEM circuit works and it may not appreciate 12V being fed back into it. The effect of this isolation is that the OEM reverse lights (in the rear tail lamps) will not come on when I activate the switch.

(*) if you don't have a 1N4004 diode handy, try radio shack, a 1N4001 or 1N4002 will work as well. It's just that the 1N4004 type is near indestructible in an automotive application.


So now the big question, where to tap into the reverse lights? Looking at the FSM, I was able to dig up the following in regards to the reverse lights on 8Wa - 80 - 76:
You must be registered for see images attach


This led me to testing the Brown wire with the green stripe on the Drivers rear tail lamp connector. This wire goes into socket 4 (highlighted yellow). It tested good when the KJ was shifted into reverse. So I traced the Brown wire with a Green stripe to the cargo compartment just under the hinge for the rear door. I figured this would be as good of a place as any to mount the relay as the wires would need to be fed up to the roof.... ah, the next decision, how to run the wires?

So after a while of pondering and looking down on the roof of the KJ, I decided it was best to just drill a hole to feed the wires through. Since I would like to keep the rack removable, we decided that trailer wire extensions would make the perfect quick disconnects. I tested the wires through a bunch of groments from the toolbox and finally landed on the smallest one I could get, a 7/16".

You must be registered for see images attach


So now where to drill the hole? Looking down on the roof, you can see that we have a nice ding with a tad bit of rust... So I was thinking that would be a good spot, however I want the disconnects to be as hidden as possible, so it was moved a bit rear ward of where the rust spot is.

You must be registered for see images attach


Here you can see the hole drilled:

You must be registered for see images attach


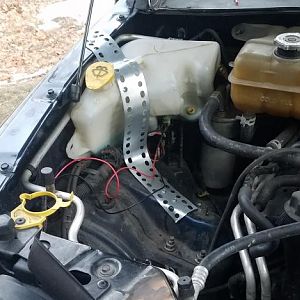
The hole was filed smooth, and treated with some touch up paint to prevent rust. While the paint was drying it was time to start running the wiring. I had to extend both the Positive and the Negative wires. I wanted to keep the Fuse for the positive as close to the battery as possible, so I kept that the stock length and spliced between the fuse and the relay, matching the gauge wire (12g). Fuses were mounted just below the drivers side battery strut as shown below:

You must be registered for see images attach


I like to ground off the battery when possible, so since I was already runing one cable two wouldn't kill me. So I also did the same with a 12g ground wire. Since I was going to have the relay in the rear this was also the prime opportunity to run the wires for the switch. I drilled a new hole for the switch, and in it went. I feed the positive off the already fused positve input for the Lightforce 170's.

You must be registered for see images attach


You must be registered for see images attach


You must be registered for see images attach


The Ground, and Positve (FUSED) wires were ran through the driver's side firewall grommet, I joined the switch wire into the harness under the diver kick panel and routed the harness though both door sills and to the rear under the plastics.

It was now time address the new hole in the roof now that the touch up paint was dry(er)and get the harness prepared for the lights. Since the trailer adapters were larger than the grommet and the hole, this took some planning. I removed the wires from the relay block so I had a free end to deal with when feeding the wires through the hole. I soldered every splice and connection for rigidity, plus I never have luck with crimp joints. I didn't have any shrink tubing, so I used a heavy dose of electrical tape.

Here you can see the light harness ready to be fed through the hole in the roof:

You must be registered for see images attach


Once the wire was feed through the hole in the roof the wires were routed down the C Pillar to the relay.

You must be registered for see images attach


In the above picture you can see a factory harness. I zip tied my harness along this strip to tie it to the Jeep and keep it from rattling when on/off the highway. The top exposed wires were treated with some RTV silicone to prevent water ingress through the grommet, and allowed to dry while I began wiring the the Stubby lights.

The Stubby's do not come with wire leads out of the lamp, so I soldered and crimped connectors on to the lights as shown below:

You must be registered for see images attach


I routed the cable through some wire loom, and used UV Zip ties to connect it to the rack as shown below:

You must be registered for see images attach


You must be registered for see images attach


You must be registered for see images attach


Now it was time to test it out. Every thing worked as planned, so every interior panel was re-snapped back on. By this time it was dark so I did not get a good shot of where I mounted the relay. I mounted the relay to the rear pillar just in front of the "vent".

Here's some night pics of the lights in action:

headlights on, switch on:
You must be registered for see images attach


Headlights on, in reverse:
You must be registered for see images attach


Final Thoughts:
The light output is great, and far better than stock. The lights wired in this manner, the lights automatically turn on when shifted into reverse (doesn't matter where the switch is, ie: on or off), and this feature is very nice, however once the rack is off this will mean that the trailer harness (my quick connects) are live any time shifted to reverse. A simple plastic cover remedy's this issue. The ability to switch on is going to be fun. Not just for tailgaters, but for setting up camp, loading and unloading at night, or just general light where and when needed. I am very pleased with the overall outcome of the installation.
 
Last edited:

Flyingwen

Full Access Member
Joined
Sep 18, 2009
Messages
72
Reaction score
1
Location
Arizona
Engine Bay

The engine bay was very clean at one point, the KJ has an K&N filter and a Magnaflow exhaust. The exhaust is very quiet compared the the Calmini Exhaust on the Xterra.

You must be registered for see images attach


At this point it has an Optima Red Top, but it will be replaced with an Odyssey or two down the road.
You must be registered for see images attach


UPDATE:
New Battery Tie Down:
You must be registered for see images


You must be registered for see images
 
Last edited:

Flyingwen

Full Access Member
Joined
Sep 18, 2009
Messages
72
Reaction score
1
Location
Arizona
Rear Axle

The Rear of the KJ has been regeared to 410's (front too!), and added protection on the Axle. Hiden on the inside of this is a Detroit Locker. It makes backing up fun!
You must be registered for see images attach
 

Flyingwen

Full Access Member
Joined
Sep 18, 2009
Messages
72
Reaction score
1
Location
Arizona
ARB Front

The front bumper was replaced with an ARB bumper. I love the looks of it and knowing that it is airbag compliant and crash tested. Plus I haven't seen too many other KJ's with an ARB around here. The factory fog lights were repositioned into the bumper, and I plan on installing a set of LightForce 170's on the front above the Warn winch.

You must be registered for see images attach


You must be registered for see images attach


Edit:
Guess who installed a set of LightFoce 170's?

Yup, me! They look right at home on the KJ...
You must be registered for see images attach


Mounting was pretty basic... I removed the odd eyelet that was used as a winch hook hold (that took the longest!) and a LightForce Wiring Harness.

Once the eyelet was off... the ARB Bumper got a touch up paint job to prevent rust as seen below:
You must be registered for see images attach


Once the paint had dried for 30 min... the tape was removed....
You must be registered for see images attach


And the mounts were installed:
You must be registered for see images attach


Switch was mounted next to the factory roof light switch. The hole had to be drilled through both the metal facet and the two layers of plastic.
You must be registered for see images attach


Then the switch was installed and the molding placed back onto the dash. Looks pretty good to me!
You must be registered for see images attach


All done!!!

You must be registered for see images attach


Then off to the trails today!!!

You must be registered for see images attach
 
Last edited:

Flyingwen

Full Access Member
Joined
Sep 18, 2009
Messages
72
Reaction score
1
Location
Arizona
Interior

The interior of the Jeep has rubberized floor mats, Jeep Clinometer, Neoprene seat covers, and a Gauge Pod with ****** and Oil gauges as FlyingBaby is pointing out below:

You must be registered for see images attach


You must be registered for see images attach


You must be registered for see images attach


The CB is mounted on the side of the center console near the shifter and allows for the passenger seat to be moved...

You must be registered for see images attach
 
Last edited:

Flyingwen

Full Access Member
Joined
Sep 18, 2009
Messages
72
Reaction score
1
Location
Arizona
Suspension

The Jeep had a hybrid lift on it, which is basically the Franken-lift with out the Daystar parts. We might add that later. So for now it is OME and Rancho components:

Here is pic from the seller....
You must be registered for see images attach
 

Flyingwen

Full Access Member
Joined
Sep 18, 2009
Messages
72
Reaction score
1
Location
Arizona
MagLight Mounts

We all have a handful of the trusty MagLight flashlights laying around. In our case my husband has quite a few laying around in the closets, vehicles, and storage containers. Many of us have one in our Jeep's, and for what ever reason the MagLight mount never seems to last. Well, the stock MagLight mount finally broke on my KJ (installed by the prior owner), and so it was time for the proper mount to be installed.

To mount the MagLight, in my case a three D cell flashlight, I used a set of QuickFist Clamps on the side of the driver's seat mounts. Here's a quick write up:

Install Time: Aprox 5 min.
Tools Needed: Drill, Drill Bit, Wrench, Marker
Hardware needed: 1 pack of QuickFist Clamps, 2 #10 screws, washers, and nuts.

Step 1: Mark the location where you place the #10 screw to mount the QuickFist Clamps as seen here:
You must be registered for see images attach


Step 2: Drill holes to accommodate the #10 Screws as seen below:
You must be registered for see images attach


Step 3: Install #10 screws into QuickFist Clamps using the washers provided in the package.
You must be registered for see images attach


Step 4: Install to seat mount using the washers and nuts. Be careful not to over tighten, and tighten just enough to prevent the mounts from rotating.

Step 5: Install flashlight and enjoy!!!
You must be registered for see images attach


You must be registered for see images attach


Note: I am sure many of you have figured this out, but to help reduce the noise of the batteries when going over bumps or washboard, we wrap each our batteries with duct tape. Start at the seam on the side, and wrap 3 times using the factory seam as reference point. Make sure that you can remove the batteries and not to over wrap them. It works like a charm!

You must be registered for see images attach


You must be registered for see images attach
 

Flyingwen

Full Access Member
Joined
Sep 18, 2009
Messages
72
Reaction score
1
Location
Arizona
Magazine 2 page spread!

Nice shot by Mark F'n featured in this issue of JPFreek. Nice to have your KJ featured in a magazine!

You must be registered for see images attach
 

Flyingwen

Full Access Member
Joined
Sep 18, 2009
Messages
72
Reaction score
1
Location
Arizona
Well the pile - o - parts is building and the last part is due to arrive today from the brown truck.

  • Jeepin by Al Gen 4.5 Upper A arms
  • Custom Valved OME NS131L
  • Custom DayStar front coil spacers for the OME927's
  • Custom Valved OME N132L
  • New Rear Bump Stop
  • New OME948 rear coils
  • 5 brand new Xtreme A/T 265/75R16 to replace the GY 245/75/R16.
  • Lots of paint and primer to paint the Rubicon Wheels Black

Planning on getting the tires off today to sand, prime, and paint the rims. I had a little hesitation going to the ProComp tires, but I have heard through the grapevine that they are made by the same company that makes Dick Cepek, and some other well know brands... so we'll give them a shot, and a 40,000 mile warranty isn't bad to boot.

Next comes the interior compartment for the rear hatch.
 

Flyingwen

Full Access Member
Joined
Sep 18, 2009
Messages
72
Reaction score
1
Location
Arizona
Some progress today... got the old tires off yesterday, so here's pic of old (back) and new:
You must be registered for see images attach


You must be registered for see images attach


The new JBA 4.5s that the brown truck dropped off!
You must be registered for see images attach


Started on the wheels since the tires were off. I started cleaning the wheels by hand and got fed up, and decided to sandblast the rubi wheels.
You must be registered for see images attach


After some cleaning I primed everything with self etching primer:
You must be registered for see images attach


Then came the black paint:
You must be registered for see images attach


I'm headed off to Boston for the weekend so the rest will be finished up on Sunday.
 

Flyingwen

Full Access Member
Joined
Sep 18, 2009
Messages
72
Reaction score
1
Location
Arizona
Got the new shoes on the KJ finally! What a chore. Special thanks to Travis from Safari Pacific for letting us use his tire machines.

Here's how it sits as of this exact moment, the center caps are missing, as we are going to emphasize the JEEP portion of the center caps in a girly color to match the purple hi-lift, so I can stop getting haggled at the fuel pumps... "so, your husband let you drive his Jeep" We need to go pick out a color at hobby loby. We tried nail polish, but it made some funky bond with the plastics and the paint.

You must be registered for see images attach


You must be registered for see images attach


Tonight I plan on installing the upper arms and enlarging the frame holes by about 3/4" from the pocket of the KJ, this will allow the JBA 4.5s to hit the bump stop and drop as low as possible. Then the rest will follow. I am awaiting on the black lug nuts to arrive (We just switch all the wheel studs) and hoping they will be in before the lifting process is complete.

I was a bit worried about the ProComp tires as mentioned before, but it was nice to be able to only hear the catback exhaust and no more tire noise! Took them on a mild off the pavement run, and the had great bite, and so far I am pleased...
 

Flyingwen

Full Access Member
Joined
Sep 18, 2009
Messages
72
Reaction score
1
Location
Arizona
Refining the suspension:

Well I though I would get started on lifting, or re-lifting the KJ today. What a pain. I was hoping to get the front done before it got dark, so I started around 3:30 PM. I started on the passenger side since it has the CAI and I figured it was easier than pulling the battery and electrical goodies.

So off I went and pulled out the old struts, springs and upper A arms. To my surprise, I went to pull the tire off and notice it was missing 2 lug nuts. The studs had been completely broken off. (note to self, next time torque wheels to specs). So good thing I had a few in the spare parts bucket for the Jeep and I allready had everything off, so just one more thing added to the list no big deal.

So I got everything off which was rather easy. Here you can see the old lift compared to the new lift for the front:
You must be registered for see images attach


To allow for maximum travel on the front with the JBA 4.5 A arms, we needed to cut the pockets a bit more. Here is before and after:

Before:
You must be registered for see images attach


After:
You must be registered for see images attach


Testing with out the springs in allowed the A arms to go clear to the top and clear to the bottom (where it would interfere with the springs). So I hit it all with a coat a paint, and pounded a bit more of the pinch weld, and areas the 245/75R16 rubbed since we are now running 265/75R16's. Then hit it all with under coating after the paint had dried to touch. Will have to report if future rubbing issues occur.

Now came the fun part. I was alone and doing this in my driveway, installing the clevis is a PAI. MAJOR PAIN! It took me about 2 hours to line them to the lower arm to get the bolt through. what fun... Luckily FlyingWen came out at that point to help and we were able to get it to line up.

Got everything on and back together, and at this point it was getting late to be using air tools in the driveway, so only the front passenger side is done, but I am excited to get the other side complete and get the rear done.

Here is the best pic I could get at 10:00pm and as she sits now. I like!
You must be registered for see images attach


Here you can see the driver's side installed and ready to go.
You must be registered for see images


Of course the chrome lug nuts had to go with the black wheels!
You must be registered for see images


Rear's installed and all ready to go:
You must be registered for see images


All done:
You must be registered for see images


All and all it went well... Mid front I looked down and saw the drippings from the PB Blaster, and some red fluids. I kept trying to figure out how the jeep could be leaking hydraulic fluid. Well I guess the saying "blood sweat and tears" came into play.

Warning Graphic Pics Click links if you want to see.
Ground View

Jeep View

All it was, was a small nick on my elbow the size of a common plantar wart. LOL
 

Flyingwen

Full Access Member
Joined
Sep 18, 2009
Messages
72
Reaction score
1
Location
Arizona
hood blackout

Just got back from putting a new hood blackout on the KJ. Looks sweet.

Here's the pics:
You must be registered for see images attach


From uptop:

Near Windshield:
You must be registered for see images attach


Front:
You must be registered for see images attach
 

Dave

Administrator
KJ Supporting Member
KK Supporting Member
Joined
Feb 22, 2006
Messages
15,567
Reaction score
15
Location
on here
Really nice jeep and write up, Wendy.

Dave
 

Flyingwen

Full Access Member
Joined
Sep 18, 2009
Messages
72
Reaction score
1
Location
Arizona
Thanks for all the compliments...

I forgot to add pics of the fridge! Who needs to deal with ice and soggy sandwiches... and I can go grocery shopping and see a movie on the way home with no worries. Its an on and off pavement mod!

You must be registered for see images attach
 

Latest posts

Members online

Top