ScamSurvivor
New Member
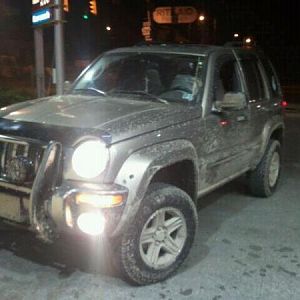
We had a radiator and waterpump leak and while there are several awesome videos to help for other models, I could not find one for the 2006, and there were enough differences and hiccups for the first timer to warrant a detailed thread for the 2006.
I'm writing while I still remember clearly, and for benefit of the next first timer, and will add photos when I get a chance. Im also unsure as to whether I should have used any cleaner/lubricants/adhesive anywhere and would love anyone to point anywhere I should've. I'm seriously thinking of taking apart the thermostat and water pump to rectify if I should've cleaned better/put in a grease...?
All directions written as if standing at front of the car looking towards the engine, and refers to left/right of person looking.
(Step -1: disconnect the negative battery terminal)
Step 1. Drain/Flush your cooling system
Step 2. Remove the front grill
Step 3. Remove the front body bar
Step 4. Remove the Serpentine Belt OR
Step 5. Remove the Electric Fan
Step 6. Remove the Water Pump
Step 7. Remove the radiator hoses
Step 8. Remove the thermostat housing
Step 9. Replace thermostat and reinstall housing
Step 10. Replace waterpump
Step 11. Remove the radiator
Step 12. Replace the radiator
Step 13. Reattach hoses
Step 14. Replace Serpentine Belt
Step 15. Replace Electric Fan
Step 16. Replace front body bar
Step 17. Replace grill
Step 18. Fill with coolant mix and burp air from system.
Step 1 Drain/Flush cooling system
(Drain is inevitable for replacing thermostat, hoses, waterpump, flush is essential for replacing radiator, neither required for serpentine belts") )
)
If replacing the radiator you MUST do this now so you don't flush old fluid/debris through your new radiator. Simple and pretty easy with right tools/know how, 5-6mins to set up
1a- Car must be cold, fluid will be hot for at least an hour after driving.
1b-Locate radiator cap on coolant reservoir, remove and pump out fluid into a large bucket for disposal at an autocentre.
1c-Locate drain/petcock on radiator. Stand at front of car and look down radiator, there will be nut nub on the bottom right of the radiator that faces toward the engine.
Also on this nub is a valve underneath that points to the ground. Push a thin hose onto the valve OR place a bucket underneath, then use a set of pliers to open the nut with a half turn anticlockwise, then gently continue turning as you pull the nut outward (do not remove). This opens the valve and coolant will drain from the valve below. It will not gush wildly or messily, but streams out in an orderly fashion.
I let ours drip while I was completing other steps.
Flush system but do not refill (Detailed instructions tba- I messed up, did not flush prior to new radiator so have not yet completed)
Step 2. Remove front grill
This is both simple and easy and should take 1-2 mins. Do not skip, impossible to access nuts without removing.
2a-The grill top is hooked to the car body, simply push the grill toward the engine to sequentially lift and release the hooks. Then lift the grill and remove (bottom tabs are placement tabs, not holding tabs so do not need to be released).
Step 3. Remove front body bar
This is simple, requires a little maneuvering and patience but should take 3-5mins.
3a- Locate 4 nuts across top of bar: 2 on left, 2 on right. Remove. Store nuts.
3b-Locate 3 nuts on hood latch release brace: 1 on top, 2 at bottom. Remove. Store. These 7 nuts are the same, but different from other radiator nuts so keep separate.
3c- Locate yellow washer fluid reservoir lid. This is attached to the body bar so must be taken off the reservoir by simply slipping off (there is a U shape on the ring that you compress to widen the ring and then slips off the reservoir. Simple. Don't make it hard).
3d- Maneuver the whole body bar gently off the car, keeping the hood latch cord attached, and rest it on top of the engine out of the way (the cord is long enough).
Step 4. Remove the serpentine belt
This is simple and easy, will take 1 min
Get a long ratchet and locate the 15mm tension release pulley that will be the left most nut when looking at the belt. Press down on the ratchet and the pulley will move, take off the belt.
Step 5. Remove the Electric fan
This is simple and mostly easy- requires a bit of fiddling. 2-5 mins to take off the nuts and wiring, 2-3 mins to remove the fan itself.
5a- Locate the 2 nuts on the upper left and right of the fan housing attached to the radiator. Remove and store.
5b- Locate the wiring coupling on the upper left top corner. It has a red tag that you will remove with pliers. Its sticky, so keep pulling.
5c- With red tab removed, use your left hand to press down the release tab on the top left part of the harness, and pull apart.
5d- Remove fan by lifting up slightly before pushing towards the engine- it is sitting in brackets at the bottom of the radiator so must be lifted up first. Remove gently around any hoses/pipes.
Step 6- Remove the waterpump
This is simple but slightly fiddly, should take 10-15mins. Use a ratchet and socket extender to make it easier.
6a- Locate the waterpump- its part of the serpentine belt pulleys, to the right of the belt tensioner pulley and is the largest black wheel surrounded by 8 nuts/bolts.
6b- You'll need better access to the lower left bolts: unscrew the 15mm small pulley to the left of the waterpump, remove the pulley and nut and keep safe.
6c- Before you remove bolts: Have your new waterpump handy. Identify how the waterpump is orientated and sit your new pump on the battery in the same position (ie top is up). Loosen all bolts, then systematically remove and place in the new water pump in the correct hole. They are all different lengths so this is important.
6d- The bottom left bolt will be hard to remove due proximity to metal housing but persevere, use a small socket.
6e- Once all bolts removed waterpump will simply come off. Lift out and clean the area. * I did not know how to remove the roughened rusty edge parts, love some feedback here.
Step 7. Remove the radiator hoses
This is simple. It is NOT easy. Ended up taking over an hour due to tools and fiddliness. We had the crimp clamps, not the screw clamps. From what I understand the crimp clamps allow expansion/contraction without damaging hoses or plastic attachments, but they are a PITA. You'll need a water pipe wrench or the special crimp clamp release tool (?). Ordinary pliers are not wide enough.
7a- Locate 3 hoses: large one and a thin one on top right of radiator, then a large one bottom left.
Note- if you are replacing the hoses but not the radiator you will remove both ends. If you are replacing both radiator AND hoses JUST REMOVE FROM THE NON RADIATOR END and keep hoses on the radiator. If you are replacing the radiator but your hoses are good, then just remove from the radiator end.
7b-Thin one should be easy, use pliers to release the clamp and move down the hose, then detach from radiator. Large one next to may take more effort. Patience and perseverance: squeeze the crimp clamp ends together with pipe wrench and wiggle until they move freely on the hose, then move down the hose. It will take some effort to wiggle the hose loose from the crusty rusty glue holding it on, and then wiggle the hose off. Again, patience and perseverance. It WILL happen, when you least expect it. If you have screw clamps: yay, you only have to deal with removing the hoses. Beware residual coolant.
7c- Bottom left hose is a bugger. You may need to go from underneath the engine depending on the orientation of your clamps, but possible and preferable to go from the top.
Step 8. Remove Thermostat housing.
This is simple, and easy but be prepared for the nuts to be tight. Takes 1-3 mins depending on nuts.
8a- Locate housing at the non radiator end of the bottom left hose you just removed. Locate the 2 nuts top and bottom, remove and keep safe.
8b- Detach housing, thermostat will be either in the housing or stay in the pipe, in which case grab some pliers and wiggle to remove, it will just plop out. Note the orientation for replacement: spring side is to the engine, nib is to the housing.
Step 9 Replace thermostat
Simple, easy, pay attention to gasket, 1-3 mins.
9a- Clean the housing/seating area of the thermostat to enable a good seal.
9b- Place your new thermostat in the housing, ensure the gasket is seated nicely and smoothly, seat housing with thermostat back into the pipe and ensure flush and lined up with bolt holes. Return bolts and tighten * How tight? I don't know, I did it as tight as I could without breaking my ratchet. Torque wrench would be useful here and for all nuts on the engine.
Step 10 Replace Water Pump
Simple, pretty easy but requires attention and a little fiddling as you make sure the bolts don't fall out as you place the water pump (remember we put the bolts in the new pump holes to keep them in order).
10a- Make sure your gasket is sitting nicely in the groove. *I didn't have any gasket sticky or grease... love some input about whether this is necessary. My gasket sat comfortably without moving, but who would know after install....
10b- Carefully lift your new pump tilted down slightly to keep bolts in holes. Hold your gasket in place. Move pump into position, line up with bolt holes (you already orientated your pump so you know where the top is) and use one of the longer bolts to screw in slightly and hold position.
10c- Gradually screw each bolt just enough so they aren't going to fall out.
10d- Press water pump firmly against engine and slowly finger tighten all bolts.
10e- Use your ratchet to fully tighten bolts. The lower left bolt will be hard to get in, use your ratchet and keep turning until it is past the the neighboring pulley. DO NOT CROSS THREAD!
I'm writing while I still remember clearly, and for benefit of the next first timer, and will add photos when I get a chance. Im also unsure as to whether I should have used any cleaner/lubricants/adhesive anywhere and would love anyone to point anywhere I should've. I'm seriously thinking of taking apart the thermostat and water pump to rectify if I should've cleaned better/put in a grease...?
All directions written as if standing at front of the car looking towards the engine, and refers to left/right of person looking.
(Step -1: disconnect the negative battery terminal)
Step 1. Drain/Flush your cooling system
Step 2. Remove the front grill
Step 3. Remove the front body bar
Step 4. Remove the Serpentine Belt OR
Step 5. Remove the Electric Fan
Step 6. Remove the Water Pump
Step 7. Remove the radiator hoses
Step 8. Remove the thermostat housing
Step 9. Replace thermostat and reinstall housing
Step 10. Replace waterpump
Step 11. Remove the radiator
Step 12. Replace the radiator
Step 13. Reattach hoses
Step 14. Replace Serpentine Belt
Step 15. Replace Electric Fan
Step 16. Replace front body bar
Step 17. Replace grill
Step 18. Fill with coolant mix and burp air from system.
Step 1 Drain/Flush cooling system
(Drain is inevitable for replacing thermostat, hoses, waterpump, flush is essential for replacing radiator, neither required for serpentine belts
)If replacing the radiator you MUST do this now so you don't flush old fluid/debris through your new radiator. Simple and pretty easy with right tools/know how, 5-6mins to set up
1a- Car must be cold, fluid will be hot for at least an hour after driving.
1b-Locate radiator cap on coolant reservoir, remove and pump out fluid into a large bucket for disposal at an autocentre.
1c-Locate drain/petcock on radiator. Stand at front of car and look down radiator, there will be nut nub on the bottom right of the radiator that faces toward the engine.
Also on this nub is a valve underneath that points to the ground. Push a thin hose onto the valve OR place a bucket underneath, then use a set of pliers to open the nut with a half turn anticlockwise, then gently continue turning as you pull the nut outward (do not remove). This opens the valve and coolant will drain from the valve below. It will not gush wildly or messily, but streams out in an orderly fashion.
I let ours drip while I was completing other steps.
Flush system but do not refill (Detailed instructions tba- I messed up, did not flush prior to new radiator so have not yet completed)
Step 2. Remove front grill
This is both simple and easy and should take 1-2 mins. Do not skip, impossible to access nuts without removing.
2a-The grill top is hooked to the car body, simply push the grill toward the engine to sequentially lift and release the hooks. Then lift the grill and remove (bottom tabs are placement tabs, not holding tabs so do not need to be released).
Step 3. Remove front body bar
This is simple, requires a little maneuvering and patience but should take 3-5mins.
3a- Locate 4 nuts across top of bar: 2 on left, 2 on right. Remove. Store nuts.
3b-Locate 3 nuts on hood latch release brace: 1 on top, 2 at bottom. Remove. Store. These 7 nuts are the same, but different from other radiator nuts so keep separate.
3c- Locate yellow washer fluid reservoir lid. This is attached to the body bar so must be taken off the reservoir by simply slipping off (there is a U shape on the ring that you compress to widen the ring and then slips off the reservoir. Simple. Don't make it hard
).3d- Maneuver the whole body bar gently off the car, keeping the hood latch cord attached, and rest it on top of the engine out of the way (the cord is long enough).
Step 4. Remove the serpentine belt
This is simple and easy, will take 1 min
Get a long ratchet and locate the 15mm tension release pulley that will be the left most nut when looking at the belt. Press down on the ratchet and the pulley will move, take off the belt.
Step 5. Remove the Electric fan
This is simple and mostly easy- requires a bit of fiddling. 2-5 mins to take off the nuts and wiring, 2-3 mins to remove the fan itself.
5a- Locate the 2 nuts on the upper left and right of the fan housing attached to the radiator. Remove and store.
5b- Locate the wiring coupling on the upper left top corner. It has a red tag that you will remove with pliers. Its sticky, so keep pulling.
5c- With red tab removed, use your left hand to press down the release tab on the top left part of the harness, and pull apart.
5d- Remove fan by lifting up slightly before pushing towards the engine- it is sitting in brackets at the bottom of the radiator so must be lifted up first. Remove gently around any hoses/pipes.
Step 6- Remove the waterpump
This is simple but slightly fiddly, should take 10-15mins. Use a ratchet and socket extender to make it easier.
6a- Locate the waterpump- its part of the serpentine belt pulleys, to the right of the belt tensioner pulley and is the largest black wheel surrounded by 8 nuts/bolts.
6b- You'll need better access to the lower left bolts: unscrew the 15mm small pulley to the left of the waterpump, remove the pulley and nut and keep safe.
6c- Before you remove bolts: Have your new waterpump handy. Identify how the waterpump is orientated and sit your new pump on the battery in the same position (ie top is up). Loosen all bolts, then systematically remove and place in the new water pump in the correct hole. They are all different lengths so this is important.
6d- The bottom left bolt will be hard to remove due proximity to metal housing but persevere, use a small socket.
6e- Once all bolts removed waterpump will simply come off. Lift out and clean the area. * I did not know how to remove the roughened rusty edge parts, love some feedback here.
Step 7. Remove the radiator hoses
This is simple. It is NOT easy. Ended up taking over an hour due to tools and fiddliness. We had the crimp clamps, not the screw clamps. From what I understand the crimp clamps allow expansion/contraction without damaging hoses or plastic attachments, but they are a PITA. You'll need a water pipe wrench or the special crimp clamp release tool (?). Ordinary pliers are not wide enough.
7a- Locate 3 hoses: large one and a thin one on top right of radiator, then a large one bottom left.
Note- if you are replacing the hoses but not the radiator you will remove both ends. If you are replacing both radiator AND hoses JUST REMOVE FROM THE NON RADIATOR END and keep hoses on the radiator. If you are replacing the radiator but your hoses are good, then just remove from the radiator end.
7b-Thin one should be easy, use pliers to release the clamp and move down the hose, then detach from radiator. Large one next to may take more effort. Patience and perseverance: squeeze the crimp clamp ends together with pipe wrench and wiggle until they move freely on the hose, then move down the hose. It will take some effort to wiggle the hose loose from the crusty rusty glue holding it on, and then wiggle the hose off. Again, patience and perseverance. It WILL happen, when you least expect it. If you have screw clamps: yay, you only have to deal with removing the hoses. Beware residual coolant.
7c- Bottom left hose is a bugger. You may need to go from underneath the engine depending on the orientation of your clamps, but possible and preferable to go from the top.
Step 8. Remove Thermostat housing.
This is simple, and easy but be prepared for the nuts to be tight. Takes 1-3 mins depending on nuts.
8a- Locate housing at the non radiator end of the bottom left hose you just removed. Locate the 2 nuts top and bottom, remove and keep safe.
8b- Detach housing, thermostat will be either in the housing or stay in the pipe, in which case grab some pliers and wiggle to remove, it will just plop out. Note the orientation for replacement: spring side is to the engine, nib is to the housing.
Step 9 Replace thermostat
Simple, easy, pay attention to gasket, 1-3 mins.
9a- Clean the housing/seating area of the thermostat to enable a good seal.
9b- Place your new thermostat in the housing, ensure the gasket is seated nicely and smoothly, seat housing with thermostat back into the pipe and ensure flush and lined up with bolt holes. Return bolts and tighten * How tight? I don't know, I did it as tight as I could without breaking my ratchet. Torque wrench would be useful here and for all nuts on the engine.
Step 10 Replace Water Pump
Simple, pretty easy but requires attention and a little fiddling as you make sure the bolts don't fall out as you place the water pump (remember we put the bolts in the new pump holes to keep them in order).
10a- Make sure your gasket is sitting nicely in the groove. *I didn't have any gasket sticky or grease... love some input about whether this is necessary. My gasket sat comfortably without moving, but who would know after install....
10b- Carefully lift your new pump tilted down slightly to keep bolts in holes. Hold your gasket in place. Move pump into position, line up with bolt holes (you already orientated your pump so you know where the top is) and use one of the longer bolts to screw in slightly and hold position.
10c- Gradually screw each bolt just enough so they aren't going to fall out.
10d- Press water pump firmly against engine and slowly finger tighten all bolts.
10e- Use your ratchet to fully tighten bolts. The lower left bolt will be hard to get in, use your ratchet and keep turning until it is past the the neighboring pulley. DO NOT CROSS THREAD!
Last edited: