hyson
New Member
So, with having a Jeep, installing a CB radio only made sense to me. However, since most of the parts I found online were for Wranglers, I was more or less at a loss for how and where to install the cb and antenna in the KJ.
With some determination, I bargained for a used but very sturdy cb rig (Uniden PC 122XL) from my local pawn shop. I traded a few camera lenses and $15 for the radio. I also wanted to "get out there" as fast as I could so I immediately ran to Radio Shack and picked up a (worthless) magnetic roof mount antenna with RG58 coax attached (~$25)
I threw this piece of junk on my roof and off I went. Needless to say, when I learned about SWR (Standing Wave Ratio) and how to measure it, I was off again to Radio Shack to pick up the meter ($45) they sell to tune the antenna. I was pretty shocked to learn that with the R.S. antenna paired with my radio, my SWR was off the scale (3+ on most channels - ideally, < 1.5 is good).
Trying to get the SWR down to an acceptable level, I tried all sorts of configurations with the antenna, coax and where it was placed while mounted. A pesky side affect from this cheap setup was feedback through my aftermarket radio and stock speaker system. If I muted the head unit, I wouldn't get the feedback squelch.
After a few days, I knew this setup was crap and I needed something better to get the results I was after. If only I knew the "trouble" I'd be getting myself into...
Trying to find a solution for a permanent mount with low a SWR and after looking around this forum a while, I saw someone used a Firestik Door Jamb mount ($29 from Amazon, including shipping) that looked like the perfect ideal solution for what I was after. This is the mount I used.
Now that I found the mount, it was time to pair it with the appropriate antenna. I originally wanted to use a 102 inch stainless steel antenna after hearing all the great things about it but was disappointed to learn that Firestik recommends this mount only up to a 4' antenna. This may have worked out for the best because I'm sure I would have destroyed it when off-roading, even if a bent it down securely.
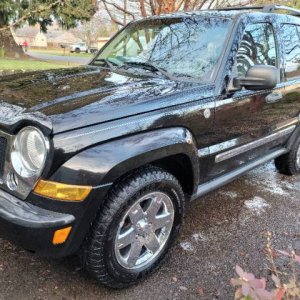
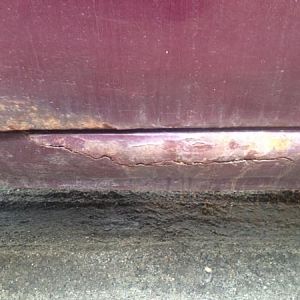
None-the-less, I attached the mount to the rear where the door and glass meet. This is what it looks like when everything is closed and buttoned up. Disregard the spring, antenna, and coax for the time being, as I'll explain what I used.
This is what it looks like mounted on the inside. Basically, I drilled four holes after marking where they needed to be. In order, I used a 3/32 bit then a 7/64 bit. I didn't want to make the pilot holes too big.
The sheet metal screws aren't too long so that's why I think that Firestik only recommends antennas up to 4'. Anyway, despite the picture, the screws are flush and don't interfere with the tailgate in any way.
Confident that the mount would hold my antenna of choice (a tunable 5' Wilson top-loaded [$30 from truck stop]), I decided to add the stock spring ($8) as a safety precaution should I nail a low hanging tree branch; and it doesn't hurt to get a few inches out of the antenna - bigger is better.
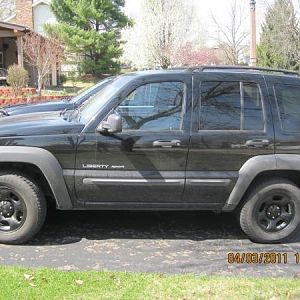
The entire exterior setup looks like this.
Now let's talk about that annoying coax install and how to run it into the KJ's interior.
If anyone here is mildly into CB radio and electrical theory, they'd know any sort of kinks or 90 degree angles in the coax cable causes trouble with SWR and power loss. Basically, everything should be straight with no sharp angles. I was experiencing all kinds of issues running the coax into my cabin without drilling holes because the coax ran too closely to the KJ's sheet metal and had to be pinched in a few places to get it inside.
I knew I had to bite the bullet and drill a hole somewhere. But I was trying to figure out what would be the most minimally invasive hole to get the coax inside. After removing my taillight, I saw a hole with a piece of heavy adhesive tape over it (sorry, no pictures - didn't want to take off my light again). I realized, after sticking a wooden dowel through that it was in the inside of the cabin - granted, most of that interior is plastic and pops off easy if it's tugged on hard enough. I only realized I was inside after popping off the rear plastic panel.
Ok, so let's get back to the coax and how I got it inside without kinks.
I used K40 Coax Cable with Removable FME Connector ($24) I found at my local truck stop.
The removable FME connector allows a smaller hole to be drilled into the vehicle. I used a 3/32 bit sequentially up to a 3/8 bit where you see the cable and black goop above. I thought I could get away with using a 5/16 bit and probably could have with some finagling. I didn't mind going a size up though so the coax didn't get ripped or torn while snaking it through.
Even with a 3/8 bit hole, the coax was pretty snug. Once I pulled it through into the cabin, I waterproofed the hole with some Permatex Black Silicone Adhesive Sealant I picked up from AutoZone. It was only 4 or 5 bucks.
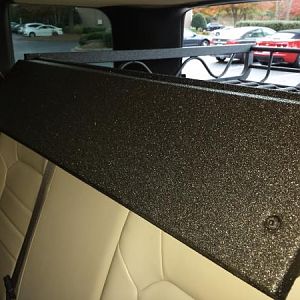
Once the coax was inside the cabin, I just pulled it over the plastic covering haphazardly. I'm sure you could clean up this more if you wanted to but it doesn't bother me.
I ran the coax to where I had the radio mounted. As you can see from this picture, it's mounted to the right of gear shifter. There's a flimsy plastic covering that can be bent out in order to get the holes drilled. I mounted the radio a while ago but I used a universal mount and I think a 1/4 bit was plenty big enough to get the bolts through.
The excess coax is underneath the rear passenger seats with a minimal amount of kinks and overlapping sections, as this messes with the SWR.
Unfortunately, I didn't take pictures of when I hardwired the power wires into my fuse panel. But a basic understanding of DC power and soldering skill will make short work of this.
I'm pretty sure I've included most of the aspects of this install. If anyone has any specific questions or anything, shoot me a PM. I'd be more than happy to try to elaborate.
- Mike
With some determination, I bargained for a used but very sturdy cb rig (Uniden PC 122XL) from my local pawn shop. I traded a few camera lenses and $15 for the radio. I also wanted to "get out there" as fast as I could so I immediately ran to Radio Shack and picked up a (worthless) magnetic roof mount antenna with RG58 coax attached (~$25)
I threw this piece of junk on my roof and off I went. Needless to say, when I learned about SWR (Standing Wave Ratio) and how to measure it, I was off again to Radio Shack to pick up the meter ($45) they sell to tune the antenna. I was pretty shocked to learn that with the R.S. antenna paired with my radio, my SWR was off the scale (3+ on most channels - ideally, < 1.5 is good).
Trying to get the SWR down to an acceptable level, I tried all sorts of configurations with the antenna, coax and where it was placed while mounted. A pesky side affect from this cheap setup was feedback through my aftermarket radio and stock speaker system. If I muted the head unit, I wouldn't get the feedback squelch.
After a few days, I knew this setup was crap and I needed something better to get the results I was after. If only I knew the "trouble"
I'd be getting myself into...Trying to find a solution for a permanent mount with low a SWR and after looking around this forum a while, I saw someone used a Firestik Door Jamb mount ($29 from Amazon, including shipping) that looked like the perfect ideal solution for what I was after. This is the mount I used.
You must be registered for see images attach
Now that I found the mount, it was time to pair it with the appropriate antenna. I originally wanted to use a 102 inch stainless steel antenna after hearing all the great things about it but was disappointed to learn that Firestik recommends this mount only up to a 4' antenna. This may have worked out for the best because I'm sure I would have destroyed it when off-roading, even if a bent it down securely.
None-the-less, I attached the mount to the rear where the door and glass meet. This is what it looks like when everything is closed and buttoned up. Disregard the spring, antenna, and coax for the time being, as I'll explain what I used.
You must be registered for see images attach
This is what it looks like mounted on the inside. Basically, I drilled four holes after marking where they needed to be. In order, I used a 3/32 bit then a 7/64 bit. I didn't want to make the pilot holes too big.
You must be registered for see images attach
The sheet metal screws aren't too long so that's why I think that Firestik only recommends antennas up to 4'. Anyway, despite the picture, the screws are flush and don't interfere with the tailgate in any way.
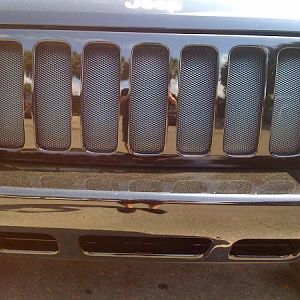
Confident that the mount would hold my antenna of choice (a tunable 5' Wilson top-loaded [$30 from truck stop]), I decided to add the stock spring ($8) as a safety precaution should I nail a low hanging tree branch; and it doesn't hurt to get a few inches out of the antenna - bigger is better.
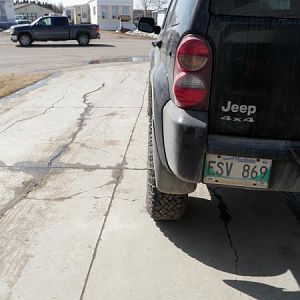
The entire exterior setup looks like this.
You must be registered for see images attach
Now let's talk about that annoying coax install and how to run it into the KJ's interior.
If anyone here is mildly into CB radio and electrical theory, they'd know any sort of kinks or 90 degree angles in the coax cable causes trouble with SWR and power loss. Basically, everything should be straight with no sharp angles. I was experiencing all kinds of issues running the coax into my cabin without drilling holes because the coax ran too closely to the KJ's sheet metal and had to be pinched in a few places to get it inside.
I knew I had to bite the bullet and drill a hole somewhere. But I was trying to figure out what would be the most minimally invasive hole to get the coax inside. After removing my taillight, I saw a hole with a piece of heavy adhesive tape over it (sorry, no pictures - didn't want to take off my light again). I realized, after sticking a wooden dowel through that it was in the inside of the cabin - granted, most of that interior is plastic and pops off easy if it's tugged on hard enough. I only realized I was inside after popping off the rear plastic panel.
Ok, so let's get back to the coax and how I got it inside without kinks.
You must be registered for see images attach
I used K40 Coax Cable with Removable FME Connector ($24) I found at my local truck stop.
You must be registered for see images
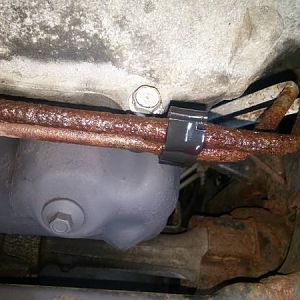
The removable FME connector allows a smaller hole to be drilled into the vehicle. I used a 3/32 bit sequentially up to a 3/8 bit where you see the cable and black goop above. I thought I could get away with using a 5/16 bit and probably could have with some finagling. I didn't mind going a size up though so the coax didn't get ripped or torn while snaking it through.
Even with a 3/8 bit hole, the coax was pretty snug. Once I pulled it through into the cabin, I waterproofed the hole with some Permatex Black Silicone Adhesive Sealant I picked up from AutoZone. It was only 4 or 5 bucks.
You must be registered for see images
Once the coax was inside the cabin, I just pulled it over the plastic covering haphazardly. I'm sure you could clean up this more if you wanted to but it doesn't bother me.
You must be registered for see images attach
I ran the coax to where I had the radio mounted. As you can see from this picture, it's mounted to the right of gear shifter. There's a flimsy plastic covering that can be bent out in order to get the holes drilled. I mounted the radio a while ago but I used a universal mount and I think a 1/4 bit was plenty big enough to get the bolts through.
You must be registered for see images attach
The excess coax is underneath the rear passenger seats with a minimal amount of kinks and overlapping sections, as this messes with the SWR.
Unfortunately, I didn't take pictures of when I hardwired the power wires into my fuse panel. But a basic understanding of DC power and soldering skill will make short work of this.
I'm pretty sure I've included most of the aspects of this install. If anyone has any specific questions or anything, shoot me a PM. I'd be more than happy to try to elaborate.
- Mike
Last edited: