Project 2004 Liberty pickup

Disclaimer: Links on this page pointing to Amazon, eBay and other sites may include affiliate code. If you click them and make a purchase, we may earn a small commission.

tommudd

Moderator
Staff member
Moderator
Joined
Jul 14, 2005
Messages
22,456
Reaction score
3,643
Location
Southeastern Ohio
QUOTE:
You do not have to unbolt the diff support bolt unless you do this for a living and like to charge your customers more in labor.


Just for future reference for anyone who is reading this, NO ONE unbolts the rear diff support to install a rear lift ( or none that I have ever heard of or seen)
NOR does anyone or most anyone use a spring compressor and that includes installing 4 inch lift springs with two extra upper isolators
so now you know that no one does that to charge extra ! LMAO ;)
 
Last edited:

CrazyDrei

Space Monkey
Joined
Dec 10, 2020
Messages
176
Reaction score
161
Location
Maine
QUOTE:
You do not have to unbolt the diff support bolt unless you do this for a living and like to charge your customers more in labor.


Just for future reference for anyone who is reading this, NO ONE unbolts the rear diff support to install a rear lift ( or none that I have ever heard of or seen)
NOR does anyone or most anyone use a spring compressor and that includes installing 4 inch lift springs with two extra upper isolators
so now you know that no one does that to charge extra ! LMAO ;)

tommudd,

Try googling: Jeep Liberty spacer lift install
or any variation of that

First one that pops up:
2002 Jeep liberty KJ 2.5" Daystar lift install installation video from start to finish.
xc_hide_links_from_guests_guests_error_hide_media

Second one
how to lift a 2006 jeep liberty
xc_hide_links_from_guests_guests_error_hide_media

I am sure that if you read the instructions on the Daystar lift you will find that step in their directions too.

BAM, you are wrong, I am right again.

Still waiting on your response on the differences between the D30A and the regular D30, other than your cop out answer of "The D30a is completely different than the Durty 30." So until I get some numbers and maybe a picture or two of some of the dimensions of say the pinion length, diameter, bearing surfaces, changing shocks on 60 KJs is not the same thing as "building" 60 KJs.

And still calling your bluff on how others have built a Liberty pickup, I posted the only two pictures of how others have done it, and nothing but chit chat from you. You are very proud of your camera skills when you were watching the BDS build surely you still know how to use one when you saw all the other Liberty pickup builds, lets see them. Still calling you out.

You sound very disturbed that I am very comfortable outside your comfort zone and it does not disturb me.

Cheers!
 
Last edited:

tommudd

Moderator
Staff member
Moderator
Joined
Jul 14, 2005
Messages
22,456
Reaction score
3,643
Location
Southeastern Ohio
You are right ? We are talking about two different ends of the KJ, SO I WIN

Plus I would never, ever install any spacer lift, I have removed about 10-11 of them to install a real lift, but never installed one in my life
Plus you are referencing a Daystar lift, when you clearly have an OTT ( over the top ) lift, two completely different ways of installing a spacer lift
As far as the difference between the D30a and a 30 , I figured you already knew
BUT,....it's an aluminum version of the Dana 30 with a longer pinion shaft. Unfortunately, the light weight aluminum construction makes it weaker than the D30 and the longer pinion shaft means pinion related D30 parts won't fit it.
Mopar is the only manufacturer of the longer pinion gears required by the Dana 30a. As a result, there are only three sources of 4.10 gears for the Liberty's front differential: wrecked I4 Libertys, online stores that sell discounted Mopar parts, and Jeep dealerships.

as far as pictures go, there are 100s on here , but got out of the mood of posting
Plenty of folks on here have seen my 03 and 04 , See I do not need to prove anything

Not disturbed at all , just posting so others do not think they have to use compressors on rear springs
 
Last edited:

CrazyDrei

Space Monkey
Joined
Dec 10, 2020
Messages
176
Reaction score
161
Location
Maine
Just figured out how to get YouTube videos to start at a specific time

Just listen for it.

xc_hide_links_from_guests_guests_error_hide_media
 

tommudd

Moderator
Staff member
Moderator
Joined
Jul 14, 2005
Messages
22,456
Reaction score
3,643
Location
Southeastern Ohio
LOL
well tell ya what ask Prof , he watched and helped when we lifted his
he'll straighten ya out NO compressors needed on the rear

OH did you read the differences of the D30a and D30 I posted just for you ?
DONE
 

CrazyDrei

Space Monkey
Joined
Dec 10, 2020
Messages
176
Reaction score
161
Location
Maine
You are right ? We are talking about two different ends of the KJ, SO I WIN

Plus I would never, ever install any spacer lift, I have removed about 10-11 of them to install a real lift, but never installed one in my life
Plus you are referencing a Daystar lift, when you clearly have an OTT ( over the top ) lift, two completely different ways of installing a spacer lift
As far as the difference between the D30a and a 30 , I figured you already knew

as far as pictures go, there are 100s on here , but got out of the mood of posting
Plenty of folks on here have seen my 03 and 04 , See I do not need to prove anything

Not disturbed at all , just posting so others do not think they have to use compressors on rear springs

tommudd,

Lets try this one again. I am not asking for permission to do something, I am telling everyone that I am doing something.

I am not asking you if there is a difference between a D30 and D30A, there is a difference, I am very well aware of it. I am saying that I will figure it out and make it work, it would be nice to get some positive and useful feedback from someone with as much experience as you. However you missed the whole point, it's OK, just sit back and watch me do somehting that you never dreamed is possible. If you have a D30 or D30A in your hands I would like to know some measurements that I can not find online, if you do not it's OK. I will pick up another KJ or XJ, tear them apart and figure out what I need to make what I want.

Why change the subject to the front when we are talking about the back? That's a clever way to say that I am right and you are wrong. Below is the link to the Daystar rear coil spacers that I am talking about and the Daystar directions on how to install the rear coil spacers.

https://www.daystarweb.com/product/2-rear-leveling-kit-jeep-liberty-2002-2007

You must be registered for see images attach


Back to the pictures of 100s Liberty pickups, I have searched for a couple years and have only seen the two I posted, please do share. I do know it is very difficult to post a picture of something that does not exist.

You must be registered for see images attach


OMG, 2.5" OTT in the front and 2" UDC (Under da coil) in the rear spacer lift on a Liberty pickup.

Stay tuned for more shenanigans!
 

CrazyDrei

Space Monkey
Joined
Dec 10, 2020
Messages
176
Reaction score
161
Location
Maine
LOL
well tell ya what ask Prof , he watched and helped when we lifted his
he'll straighten ya out NO compressors needed on the rear

OH did you read the differences of the D30a and D30 I posted just for you ?
DONE

tommudd,

Your posted difference between the two diffs: "The D30a is completely different than the Durty 30" So what it is the difference?

You must be registered for see images attach
 

tommudd

Moderator
Staff member
Moderator
Joined
Jul 14, 2005
Messages
22,456
Reaction score
3,643
Location
Southeastern Ohio
like posted above
...it's an aluminum version of the Dana 30 with a longer pinion shaft. Unfortunately, the light weight aluminum construction makes it weaker than the D30 and the longer pinion shaft means pinion related D30 parts won't fit it.
Mopar is the only manufacturer of the longer pinion gears required by the Dana 30a. As a result, there are only three sources of 4.10 gears for the Liberty's front differential: wrecked I4 Libertys, online stores that sell discounted Mopar parts, and Jeep dealerships.
what else do you need ?
 

CrazyDrei

Space Monkey
Joined
Dec 10, 2020
Messages
176
Reaction score
161
Location
Maine
eBay coil and strut spacers: part 2
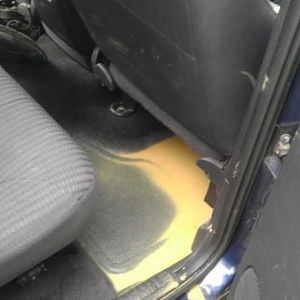
BEFORE spacers

You must be registered for see images attach


AFTER spacers

You must be registered for see images attach


OK, unlike the 10 minute rears, there is no quick or easy way to do the front spacers. I slaved away for about 3 hours on and off as my kids were helping (distracting) me. After three hours front drivers side strut spacer is in and the entire drivers side is complete.

Get that popcorn out and enjoy my misery.

You must be registered for see images attach


Battery came out with 10mm bolts on terminals and 10mm battery holder bolt
Fuse box came out with 2 clips and slid up and out of the way
Battery tray was held in with two 13mm nuts and one 12mm nut

You must be registered for see images attach


4 18mm nuts hold the top of strut tower

You must be registered for see images attach


Poof, they are off.

You must be registered for see images attach


My first ray of happiness: seeing a gap between the top strut mount and body

You must be registered for see images attach


I was hoping that the strut would slide out without being removed from the clevis. I could have wiggled the spacer on top of the strut as is in this picture but ended up separating shock from clevis, 21mm bolt from what I remember.

You must be registered for see images attach


To an untrained eye, this may look like a tear in the outer CV boot, but to me it's continuous suspension component lubrication port, it also prevents the brakes from locking up, keeping this safety feature just the way it is.

You must be registered for see images attach


I have not done 60 KJ lifts not have I done 60 lifts or 6 but I expected the strut bolts to be too long for the spacer. Most important reason for completely removing the strut.

You must be registered for see images attach


Saw a video of a poor old man with a hack saw cutting the bolts down, bless his sole, diamond cut off wheel made short work of this and it took longer to tighten the nylon lock nuts than it was to cut the bolts.

You must be registered for see images attach


Now for the fun part, as I mentioned earlier I dislike struts and do not have the proper tools to work on them. So I do what any work out of your garage mechanic would do: medium duty canoe straps (cause I know the light duty ones will not hold, been there done that) and keep on tightening them until the spring compresses enough to line it up with the lower clevis bolt hole. I used another canoe strap to pull the clevis horizontally towards the bolt hole.

You must be registered for see images attach


Another view of the red canoe strap that pulled the clevis towards the passenger side.

So all ya'll hypothetical internet experts say anything about my use of ratchet straps do some research first. Lets start off with the compression rate of the strut coils: it's around 290# I am sure Tom will chime in with the exact per inch spring rate of every strut coil for every KJ ever made. Lets call it 300# per inch rate.

Now the orange ratchet straps. I am using 700# ratchet straps which means they are rated to carry a 700# load and a breaking strength around 2,000#. I am using two of them and lets call them 500# a strap. Multiply that by 2 and I am at 1,000# of ratchet strap pulling strength. I need to compress the shock about 2". So lets look at the actual numbers: 300# spring rate per inch over 2 inches is 600# of required spring compression. 1,000# of safe ratchet strap working limit, and this gives me a 400# safety margin, I will take that any day.

Oh yeah, I also disconnected the upper and lower ball joints to give me the lower control arm articulation I needed to get the clevis bolt in.

You must be registered for see images attach


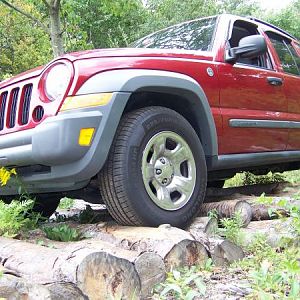
It is in, it was painstaking and unpleasant, but it's in, just one more side to go (tomorrow).

You must be registered for see images attach


Another angle of the finished install.

You must be registered for see images attach


Another shot of the finished drivers side. It will settle after a couple lats around the yard. I will take the hub to fender and ground to fender measurements then.

Key take aways from the install.

I did not mention that I completely removed the front sway bar. I planned on removing it for both the weight savings and suspension articulation gain. Removing or disconnecting the sway bar gives the extra clearance to pull the clevis out.

Both upper and lower ball joints were removed to increase lower control arm articulation, it made re-installing the clevis possible. Couple strikes with a 3# ball peen hammer on the spindle and the ball joints pop right out of the spindle, do not need a fork or ball joint separator unless you do this for a living and need an excuse to charge your customers more for you labor and unnecessary tools.

All strut spacers are a PITA no matter if you have a Nissan, Toyota, BMW or Jeep.

Now that I have a feel for what and how this can be done I will try and setup a camera and shoot a video of the passenger side install.

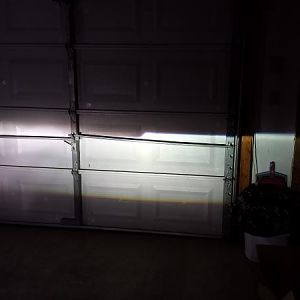
Here's a teaser for the rest of this weeks misadventures.

You must be registered for see images attach


Stay tuned for more shenanigans!
 

CrazyDrei

Space Monkey
Joined
Dec 10, 2020
Messages
176
Reaction score
161
Location
Maine
like posted above
...it's an aluminum version of the Dana 30 with a longer pinion shaft. Unfortunately, the light weight aluminum construction makes it weaker than the D30 and the longer pinion shaft means pinion related D30 parts won't fit it.
Mopar is the only manufacturer of the longer pinion gears required by the Dana 30a. As a result, there are only three sources of 4.10 gears for the Liberty's front differential: wrecked I4 Libertys, online stores that sell discounted Mopar parts, and Jeep dealerships.
what else do you need ?

tommudd,

Thank you Tom, now we are getting somewhere. D30 comes in short and long pinion shaft. Do you know exactly how long is the short pinion shaft and exactly how long is the long pinion shaft? Both overall length as well as from teeth to tail length?

How long is the D30A pinion shaft? Both overall and from teeth to tail?

Here are the three pinions that I am referring to. If either one of the pictures is generic and is not the actual picture of the part, please correct me.

You must be registered for see images attach


D30 short fits Jeep TJ/XJ

You must be registered for see images attach


D30 long fits 72-86 Jeep CJ

You must be registered for see images attach


D30A fits Liberty

First question: are the pictures above correct and do they correspond to the actual D30 diffs that from my best knowledge they should fit?

If not do you have pictures or actual links to the correct pinions?

Second question: what are the exact timken or mopar bearing part numbers for all 3 of the pinons pictured?

Third question: are D30A gears standard cut or reverse cut? I am referring to the actual cut not the rotation, if you do not know no big deal. Is the regular D30 front pinion regular cut or reverse cut?

Fourth question: what is the difference between a front D30 and rear D30 axles other than the reverse rotation in the front?

Fifth question: are there mid/high/low pinion variations for the D30?

In the initial build I said that I possibly want 5.13 gears, possibly, not set in stone. It's way more realistic for me to run an inline doubler giving me 10.14 gears. However at this point I will be maxed out at 25mph in 4x4 high and lucky if I can hit 10mph bouncing off the rev limiter in 4th gear in 4x4 low at 29.6:1 final drive ration. Just thinking out loud.

What Libertys came with 3.55 gears? Picking one up or just the front end and running a doubler will give me what I want at a budget that I want.

Look forward to your insight.
 

sleazy rider

Retired moto tech and gearhead
Joined
Dec 8, 2020
Messages
540
Reaction score
499
Location
SE Michigan
Congrats on the persistence and ingenuity to get that front spacer combo in. I saw how much room was left as the shop pulled my front shocks and it wasn't going to just slide in with a tall spacer on top.

I'm still trying to figure out why I have the same fender clearance on mine with new OEM length shocks and fresh springs up front. The replacements were noticeably longer than the old that were in it.
 

CrazyDrei

Space Monkey
Joined
Dec 10, 2020
Messages
176
Reaction score
161
Location
Maine
Congrats on the persistence and ingenuity to get that front spacer combo in. I saw how much room was left as the shop pulled my front shocks and it wasn't going to just slide in with a tall spacer on top.

I'm still trying to figure out why I have the same fender clearance on mine with new OEM length shocks and fresh springs up front. The replacements were noticeably longer than the old that were in it.

****** rider,

Yeah, there is very little room there. It's a challenge to squeeze the struts and spacer combo or longer coils in there.

How much longer are the new longer coils than the old saggy ones were? Did you replace the sway bar links? Also, when you put the new springs in, did you get a longer shock/strut too or a Daystar type strut top drop bracket?

If your shock is the same length and the new spring is longer, you are just increasing the preload so your fender height will be very close to OEM coils.

Another factor is the longer coil itself. Non race shorter coils are not as consistent as a 36" long race coil and there will be a discrepancy between the actual coil rate from the target rate, your coils might be on the softer side.

Nevertheless, I bet the ride is much better with new coils than with the old ones.
 

sleazy rider

Retired moto tech and gearhead
Joined
Dec 8, 2020
Messages
540
Reaction score
499
Location
SE Michigan
The front was pre-assembled kit. Grab and install, but laying next to the old, they were just 1/2” longer which should translate to an inch taller by inference. I don’t have a spacer kit in my Liberty, but have been eyeballing them as a visual incentive to lift with a full suspension kit. $100 shipped doesn’t put a hurt on my retiree budget too bad.

Entire suspension is stock stuff. Sway bar ends were still ok, so they just got disconnected to install the new.
 

CrazyDrei

Space Monkey
Joined
Dec 10, 2020
Messages
176
Reaction score
161
Location
Maine
eBay spacer lift is in!


You must be registered for see images attach


Before spacer lift.

You must be registered for see images attach


2" rear coil spacers only

You must be registered for see images attach


Front 2.5" strut spacer and rear 2" coil spacer.

You must be registered for see images attach


Teaser of whats to come.

Stay tuned for more shenanigans!
 

CrazyDrei

Space Monkey
Joined
Dec 10, 2020
Messages
176
Reaction score
161
Location
Maine
eBay coils spacer install video

Rear coil install was relatively simple and straight forward. There are also hundreds of YouTube how to videos on installing rear coil spacers and they are all a great resource. There are also a couple great videos on YouTube on how to install and swap out OEM struts, which great and all but they do not account for the extra length of the strut spacer.

According to many sources drivers side is more challenging than the passenger side strut. I undertook the drivers side first, it took around three hours. It was more of an exploratory and learning endeavor. I figured out exactly what i needed to do, best order and which tools I needed. Passenger side strut spacer took under one hour start to finish which included playing with camera.

Below is the video of the actual strut top spacer install.

xc_hide_links_from_guests_guests_error_hide_media

To summarize:

Jack up front of truck, remove front wheel
Remove airbox, undo four 18mm strut top nuts
21mm lower clevis bolt
21mm upper clevis bolt
21mm upper ball joint nut
Strut and clevis should slide out, separate strut from clevis with pry bar
Remove strut and clevis

Cut at least 3mm from strut bolts
install strut top spacer onto strut with nylon lock nuts provided
Slide strut into proper position, slide strut into clevis, tighten clevis bolt
I used two 700# ratchet straps to compress the strut 2" to get lower clevis bolt in
Tighten lower clevis bolt
Tighten four upper strut bolts inside engine bay
Jack up front of vehicle by lower control arm, tighten upper ball joint
Install front wheel

This is not the best way to do it but a way to do it. It made sense to me and was done in less than an hour. If you want to undertake this yourself plan on 2 hours for rear coils and 6 hours for the struts. If you take it to a mechanic expect 3hours in labor for general mechanic or 2 hours of labor for a Jeep mechanic that has worked on Liberties before.

Hopefully this helps anyone who was ever thinking about the $100 eBay spacer lift but was not sure if they were upto the challenge of being able to install it themselves with the tools they have at home.

Stay tuned for more shenanigans!
 

CrazyDrei

Space Monkey
Joined
Dec 10, 2020
Messages
176
Reaction score
161
Location
Maine
Another fun day playing with the Jeep.

You must be registered for see images attach


Tires went on perfectly however there was just a little bit of rubbing up front, so I cut and folded the front inner fender pinch weld. 33" tires fit perfectly up front with no rubbing even under full suspension articulation (read: upto full coil bind)

xc_hide_links_from_guests_guests_error_hide_media

Stay tuned for more shenanigans!
 

CrazyDrei

Space Monkey
Joined
Dec 10, 2020
Messages
176
Reaction score
161
Location
Maine
Took the Liberty for a spin around the yard with the kiddos. Found the log I got stuck on the first time I drove my Liberty last month, with over 6" more ground clearance the log didn't have a chance, went up and over it no problems at all.

It feels so good to finally be able to drive a "Trail Rated" Liberty on a trail and not get stuck every 100 feet.

You must be registered for see images attach


All i can say is that 33" tractor tires fit perfectly with a 2" spacer lift and are an absolute hoot to drive!

Stay tuned for more shenanigans!
 

CrazyDrei

Space Monkey
Joined
Dec 10, 2020
Messages
176
Reaction score
161
Location
Maine
Pick up bed liner is in.

You must be registered for see images attach


Just a teaser as usual. Working on editing the video of making this bed liner and fitting it into the Liberty.

Stay tuned for more shenanigans!
 

CrazyDrei

Space Monkey
Joined
Dec 10, 2020
Messages
176
Reaction score
161
Location
Maine
Found a couple of videos I made of my friend's 07 Liberty that was the inspiration for my Liberty pickup.

xc_hide_links_from_guests_guests_error_hide_media

And a longer version of both trucks over same obstacles but not overlayed.

xc_hide_links_from_guests_guests_error_hide_media

Stay tuned for more shenanigans!
 
Top