Thanks for the feedback everyone. I was excited about doing this and was hoping for some interaction.
Ok back to the good stuff.
So, now that I have all of my cables run to the back it's time to see if I can stuff 10lbs. of Audio into this tailgate. lol. I started by crating a surface to work from.
Now that I know what I have to work with I can figure everything else out. So the box begins.
I figured out that I would have to mount the 2 subs on one side due to cabling length. I also want to make sure that I have space for extra cabling and the amp. so here is the box starting to take shape.
Yea, I know I missed some nails with the nail gun. Its been awhile since I did this stuff as a kid so I chalk it up to my eye aren't what they used to be lol. That's why the make dikes right?
So I have some additional pieces to glue and nail into the box, and some holes to cut.
My buddy figured he better label stuff for me so I wouldn't forget what goes there. I thought that was rather nice of him. Yeah!
Now to test fit it back and figure out how to secure it to the tailgate so that it doesn't wind up in the front seat with me if I have to panic stop for some reason. With this all figured out I took some time to router out a trim panel for the front and test fit all my equipment.
Like I'm not going to know that's the bottom of what I made. Lol So all the test fits went well. So since he was nice enough to label everything I figured I would fill his truck bed full of sawdust and router all the edges on the box using his Tailgate work surface. Fair!
So now to stretch some fleece over the box here and there and apply some fiberglass & resin to make it rock hard.
With all the glass work done and smoothed up its time to prime the visible areas for paint.
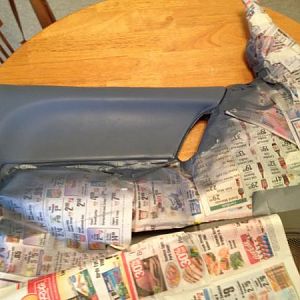
Add apply paint.
I also took a few minutes away from smelling all the fumes to install a rearview camera for backing up.
Ok back to the good stuff.
So, now that I have all of my cables run to the back it's time to see if I can stuff 10lbs. of Audio into this tailgate. lol. I started by crating a surface to work from.
You must be registered for see images attach
Now that I know what I have to work with I can figure everything else out. So the box begins.
I figured out that I would have to mount the 2 subs on one side due to cabling length. I also want to make sure that I have space for extra cabling and the amp. so here is the box starting to take shape.
You must be registered for see images attach
Yea, I know I missed some nails with the nail gun. Its been awhile since I did this stuff as a kid so I chalk it up to my eye aren't what they used to be lol. That's why the make dikes right?
So I have some additional pieces to glue and nail into the box, and some holes to cut.
You must be registered for see images attach
My buddy figured he better label stuff for me so I wouldn't forget what goes there. I thought that was rather nice of him. Yeah!
You must be registered for see images attach
Now to test fit it back and figure out how to secure it to the tailgate so that it doesn't wind up in the front seat with me if I have to panic stop for some reason. With this all figured out I took some time to router out a trim panel for the front and test fit all my equipment.
You must be registered for see images attach
Like I'm not going to know that's the bottom of what I made. Lol So all the test fits went well. So since he was nice enough to label everything I figured I would fill his truck bed full of sawdust and router all the edges on the box using his Tailgate work surface. Fair!
So now to stretch some fleece over the box here and there and apply some fiberglass & resin to make it rock hard.
You must be registered for see images attach
With all the glass work done and smoothed up its time to prime the visible areas for paint.
You must be registered for see images attach
Add apply paint.
You must be registered for see images attach
I also took a few minutes away from smelling all the fumes to install a rearview camera for backing up.
You must be registered for see images attach


